My nephew, Leo, is obsessed with two things: dinosaurs and Halloween. Last October, he asked if we could make something “spooky but yummy” for his class party. I pulled out the cereal, the marshmallows, and the butter, thinking we’d just tint everything orange and call it a day. But then he grabbed a tube of black decorating gel and drew a face on a square. That was it. I spent the next two hours learning that a slightly stale Rice Krispie treat is actually the best canvas for edible art. You don’t need fancy piping bags or expensive fondant. You just need good, sturdy treats that hold their shape and a little bit of imagination. Honestly, this recipe came from a happy accident—a bag of marshmallows that wouldn’t stop expanding and a kid who refused to follow directions. And it was perfect.
These Spooky Easy Halloween Rice Krispie Treats are the kind of recipe you don’t have to overthink. They come together in about fifteen minutes of active work, and the decorating part is where the real fun starts. If you’ve ever struggled with Rice Krispie treats that turn into cement blocks or fall apart when you cut them, I’ve got you covered. This version uses a specific ratio of butter to marshmallows that keeps them soft but firm enough to hold a ghost shape or a spider leg. I’ve made every mistake in the book—burnt marshmallows, rock-hard cereal, you name it. So trust me when I say this method works.
Why You’ll Love This Recipe
- Quick & Easy: From start to finish, you’re looking at about 20 minutes of hands-on time. The treats set in the fridge in under 30 minutes, so you can have a full platter of spooky snacks ready before the kids even finish their costume.
- Simple Ingredients: You need exactly four main ingredients—butter, marshmallows, Rice Krispies cereal, and vanilla extract. The decorations are all store-bought shortcuts (candy eyeballs, frosting tubes, pretzel sticks). No special baking equipment required.
- Perfect for Halloween Parties: Whether it’s a classroom celebration, a trunk-or-treat event, or just a cozy night watching Hocus Pocus, these treats fit right in. They’re portable, they don’t melt, and they look impressive without being fussy.
- Crowd-Pleaser: I’ve brought these to three different Halloween gatherings now, and they disappear faster than the candy bowl. Kids love decorating them, and adults love that they’re not overly sweet—just the right balance of buttery marshmallow and crispy cereal.
- Unbelievably Customizable: You can make ghosts, mummies, spiders, pumpkins, or Frankenstein monsters with the same base recipe. The decorations are limited only by your candy stash. One batch can yield five different designs if you want.
What makes these different from every other Halloween dessert? It’s the texture. Most recipes either skimp on the butter (resulting in dry, crumbly treats) or use too much marshmallow (creating a sticky, goopy mess). This version hits the sweet spot—chewy, slightly soft, but sturdy enough to cut into shapes without falling apart. I’ve tested this ratio at least eight times. This is the one.
What Ingredients You Will Need
This recipe uses simple, pantry-friendly ingredients to deliver that classic buttery marshmallow flavor. The magic is in the proportions, not the complexity. Here’s what you’ll need:
For the Treats
- 3 tablespoons unsalted butter (plus extra for greasing the pan) — Use unsalted so you can control the salt level. Salted butter works in a pinch, but skip the extra salt if you go that route.
- 1 (10-ounce) bag regular marshmallows (about 40 large marshmallows) — Don’t use mini marshmallows here; they melt too fast and can make the mixture gummy. Jet-Puffed is my go-to brand for consistent melting.
- 6 cups Rice Krispies cereal (or any crispy rice cereal) — Measure by volume, not weight. Fresh cereal gives the best crunch. If your box has been open for weeks, the treats won’t be as crisp.
- 1/2 teaspoon vanilla extract — Pure vanilla adds warmth. Imitation works fine, but the flavor is noticeably flatter. I’ve used both, and I’ll always choose pure if I have it.
- 1/4 teaspoon fine sea salt — This balances the sweetness. Don’t skip it. You won’t taste “salt,” but you’ll notice something is missing if you leave it out.
For Decorating (Pick Your Spooky Style)
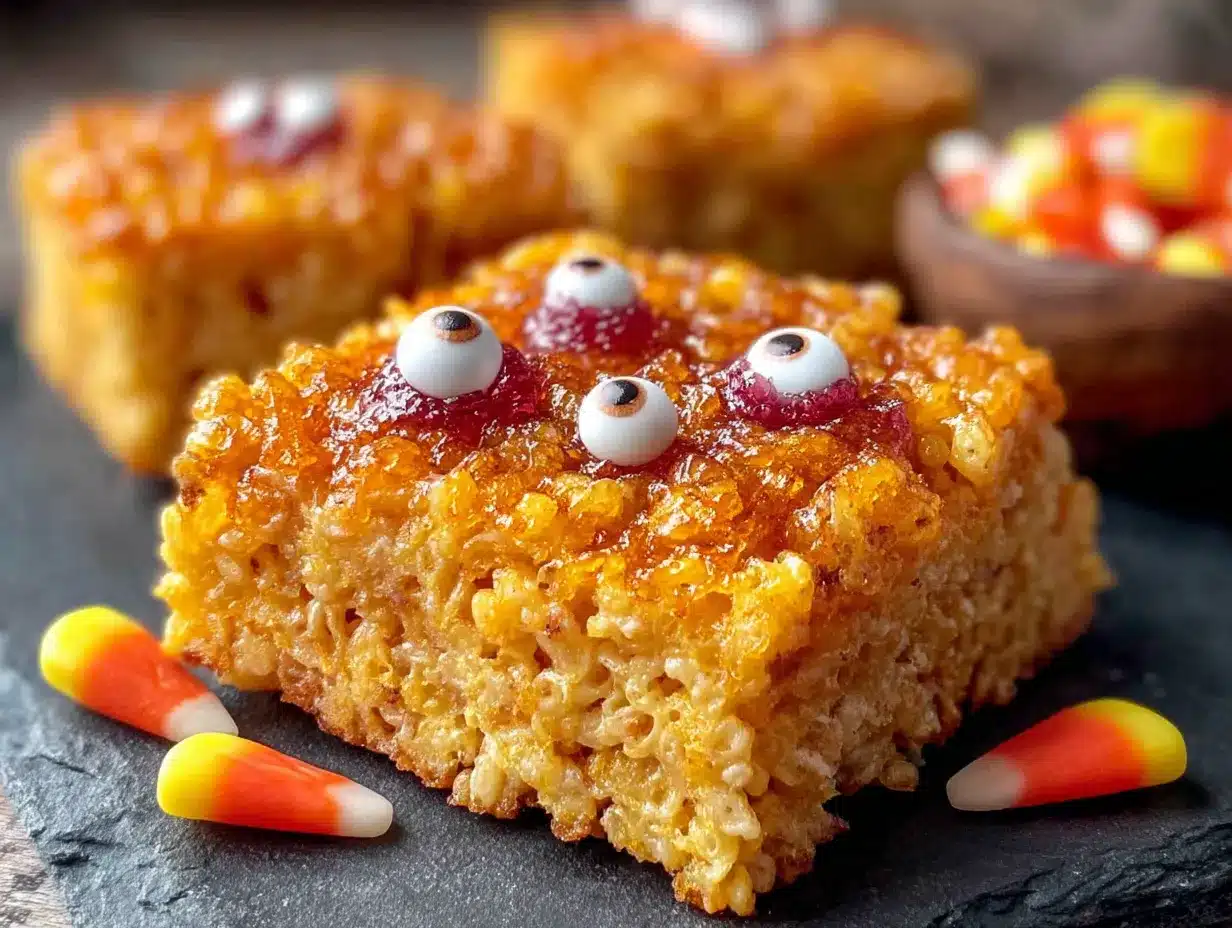
- Black decorating gel (1 tube) — For drawing faces, spider legs, and mummy wraps. Wilton’s brand has a fine tip that’s easy to control.
- Candy eyeballs (1 small bag) — The googly-eyed kind. I found a 50-pack at the dollar store that lasted through three batches. They stick best if you press them in while the frosting is still wet.
- Orange and green candy melts (1/2 cup each) — For pumpkin faces and Frankenstein bolts. Microwave in 20-second bursts, stirring between each, until smooth.
- Pretzel sticks (about 12) — For spider legs and broomsticks. Break them in half for smaller spiders.
- White candy melts or white chocolate chips (1/2 cup) — For ghost outlines and mummy wraps. Add 1 teaspoon of coconut oil if the melts are too thick to drizzle.
Substitution Notes
- Vegan option: Use vegan butter (I like Miyoko’s) and vegan marshmallows (Dandies are the best). The texture will be slightly less chewy but still good. Use dairy-free white chocolate for decorations.
- Gluten-free: Rice Krispies are naturally gluten-free, but check the label—some generic brands use malt flavoring that contains gluten. The name-brand cereal is safe.
- Lower sugar: Use a sugar-free marshmallow alternative, but know that the texture will be different—less stretchy, more dense. I’ve tested this and it works, but the treats are firmer and don’t hold shapes as well.
Equipment Needed
You don’t need much for this recipe. Here’s the short list:
- 9×13-inch baking dish — Glass or metal both work. Glass conducts heat evenly, which helps the treats set uniformly. Grease it well with butter or line with parchment paper for easy removal.
- Large pot or Dutch oven — You need room to stir the cereal without it spilling over. A 5-quart pot is perfect. If your pot is smaller, work in two batches.
- Silicone spatula — The flexible kind that won’t scratch your pot. A wooden spoon works too, but the spatula makes it easier to press the mixture into the pan without sticking.
- Sharp knife or cookie cutters — For cutting shapes. A chef’s knife gives clean edges. If you want ghosts, pumpkins, or bats, use a 3-inch cookie cutter. Spray it with nonstick spray before cutting.
- Piping bags or small zip-top bags — For decorating. Snip a tiny corner off a zip-top bag and you have a disposable piping bag. No cleanup required.
- Wax paper or parchment paper — For setting the decorated treats. Wax paper is cheaper and works fine for this.
If you don’t have a 9×13 pan, an 8×8 pan will give you thicker treats (about 1.5 inches tall). Just increase the setting time by 10 minutes. I’ve also used a rimmed baking sheet for thinner, crunchier treats that are great for cutting into bite-sized squares.
Preparation Method
- Prep your pan. Grease a 9×13-inch baking dish generously with butter. Don’t skimp here—ungreased pans lead to stuck treats and a lot of swearing. Alternatively, line the dish with parchment paper, leaving a 2-inch overhang on two sides. This creates handles for lifting the whole block out later.
- Melt the butter. In a large pot over medium-low heat, melt the 3 tablespoons of butter. Swirl the pot occasionally so it melts evenly. Don’t rush this step with high heat, or the butter will brown and burn. You want it fully melted but not sizzling.
- Add the marshmallows. Pour the entire bag of marshmallows into the pot. Stir constantly with your silicone spatula until they’re completely melted and smooth. This takes about 4 to 5 minutes. The mixture will look glossy and stretchy when it’s ready. If you see lumps, keep stirring—they’ll dissolve.
- Remove from heat and add flavorings. Take the pot off the burner immediately. Stir in the vanilla extract and salt. The mixture will bubble a little—that’s normal. Stir until everything is combined. Taste a tiny bit (careful, it’s hot!) to check the salt level. It should taste buttery and sweet with a slight savory edge.
- Add the cereal. Pour the 6 cups of Rice Krispies into the pot. Fold gently with the spatula, scraping from the bottom and folding over the top. Don’t stir aggressively—you’ll crush the cereal and end up with dense, compact treats. Fold just until no white cereal shows. You should see some marshmallow streaks; that’s okay. Overmixing creates tough treats.
- Transfer to the pan. Scrape the mixture into your prepared dish. Use the spatula (lightly greased with butter or nonstick spray) to press it into an even layer. Don’t press too hard—firm pressure is fine, but smashing it flat will make the treats hard. Aim for a gently packed surface. If the mixture sticks to your spatula, spray it with more nonstick spray.
- Let them set. Let the treats cool at room temperature for 15 minutes, then refrigerate for 20 minutes. This quick chill firms them up without making them rock-hard. If you’re in a hurry, 30 minutes in the fridge is enough. The treats should feel firm to the touch but still slightly soft when you press a finger into the center.
- Cut into shapes. Run a sharp knife around the edges of the pan to loosen the treats. Lift the entire block out using the parchment handles (if you used parchment). For squares, cut into 12 rectangles or 24 small squares. For shapes, use a cookie cutter dipped in nonstick spray. Press straight down and lift—don’t twist. Wipe the cutter clean between cuts.
- Decorate. Let the cut treats cool completely on a wire rack before decorating. Warm treats will melt frosting and cause candy eyes to slide off. Once cool, pipe on faces, attach candy eyes with a dab of frosting, or drizzle melted candy melts for mummy wraps. Work on wax paper for easy cleanup.
- Let decorations set. Place decorated treats in the fridge for 10 minutes to set the frosting and candy. This prevents smudging when you stack them or pack them for a party.
Troubleshooting Tips
- Treats too hard? You either pressed them too firmly into the pan or overcooked the marshmallows. Next time, use lower heat and fold more gently.
- Treats too sticky? Too much marshmallow or not enough cereal. Measure carefully next time. For this batch, dust the surface with powdered sugar or cornstarch to reduce stickiness.
- Decorations won’t stick? Your treats might be too cold. Let them come to room temperature for 10 minutes before decorating. A dab of frosting acts like glue for candy eyes.
Cooking Tips & Techniques
I learned the hard way that the temperature of your marshmallows matters more than you’d think. If you melt them on high heat, they’ll turn brown and develop a burnt, bitter flavor that ruins the whole batch. Low and slow is the rule. Keep the heat at medium-low and stir constantly. The marshmallows should look like a smooth, glossy cloud when they’re done—no lumps, no browning.
Another thing: don’t use a metal spoon for stirring. Metal conducts heat and can scorch the marshmallow mixture. A silicone spatula is your best friend here. It’s flexible enough to scrape the corners of the pot and gentle enough not to crush the cereal.
Timing is everything with this recipe. Have all your ingredients measured and ready before you start. Once the marshmallows melt, you need to work fast. The mixture cools quickly, and if it gets too stiff, you won’t be able to press it evenly into the pan. I once answered a phone call mid-step and ended up with a lumpy, uneven mess. Set a timer if you need to.
For the best texture, use fresh cereal. Stale Rice Krispies don’t have that satisfying crunch. If your box has been open for more than two weeks, buy a new one. Trust me, the difference is noticeable.
And here’s a pro tip I wish I’d known sooner: spray your knife or cookie cutter with nonstick spray before every single cut. This prevents the treats from tearing or sticking. It adds an extra 30 seconds to the process but saves you from jagged, ugly edges.
Variations & Adaptations
Spiderweb Treats
Cut your treats into circles using a 3-inch round cutter. Melt white candy melts and drizzle them in concentric circles on top. Use a toothpick to drag lines from the center outward, creating a web pattern. Place a candy spider (made from a black jellybean body and pretzel stick legs) in the center. This variation is perfect if you’re bringing treats to a party and want them to look extra polished.
Mummy Treats
Cut the treats into rectangle shapes. Melt white candy melts and drizzle them back and forth in uneven strips, leaving small gaps for eyes. Press two candy eyeballs into the gaps before the candy sets. The uneven drizzling gives them that “wrapped in bandages” look. My nephew made a whole army of these last year, and they were the first to disappear from the dessert table.
Pumpkin Patch Treats
Add 1/2 teaspoon of pumpkin pie spice to the marshmallow mixture before adding the cereal. Cut the treats into circles and frost with orange-tinted cream cheese frosting. Use a green candy melt to pipe a small stem on top. These taste like autumn in dessert form. If you love pumpkin flavors, you might also enjoy these soft pumpkin chocolate chip snickerdoodle cookies for another seasonal treat.
Frankenstein Treats
Add green food coloring to the marshmallow mixture (about 8 drops) before adding the cereal. Cut into rectangles. Use black decorating gel to draw a messy hairline across the top, two small eyes, and a stitched mouth. Add two pretzel stick “bolts” on the sides of the head. These are great for a monster-themed party.
Dietary Adaptations
- Vegan: Use vegan butter and vegan marshmallows. The texture will be slightly less chewy, but the flavor is still great. Use dairy-free chocolate for decorations.
- Gluten-free: Stick with name-brand Rice Krispies. Some generic brands use malt flavoring that contains gluten. Check the label carefully.
- Nut-free: This recipe is naturally nut-free if you skip any nut-based decorations. Perfect for school parties where allergies are a concern.
Serving & Storage Suggestions
These treats are best served at room temperature. Cold treats are firmer and less chewy, so let them sit out for 10 to 15 minutes after decorating before serving. Arrange them on a platter lined with black or orange napkins for a festive look. If you’re serving them at a party, place them on a cake stand so they become a centerpiece.
For storage, keep the treats in an airtight container at room temperature for up to 5 days. Layer them between sheets of wax paper to prevent sticking. Don’t refrigerate them unless you want them to become hard—the cold air dries them out. If you live in a humid climate, add a food-safe silica gel packet to the container to absorb excess moisture and keep them crisp.
These treats also freeze beautifully. Wrap each treat individually in plastic wrap, then place them in a freezer-safe bag. They’ll keep for up to 3 months. To thaw, let them sit at room temperature for 30 minutes. The texture will be slightly softer than fresh, but the flavor stays perfect. I’ve frozen decorated mummies before and they looked just as good after thawing.
If you’re making these for a Halloween party, you can prepare the undecorated treats up to 3 days in advance. Keep them in an airtight container at room temperature, then decorate the morning of the party. The decorations stay fresh for about 24 hours before the candy starts to soften.
Flavor-wise, these treats actually improve after a day. The marshmallow and cereal meld together, creating a chewier, more cohesive texture. Day-old treats are easier to cut and decorate because they’re less sticky. So don’t stress if you need to make them ahead—they’ll be even better.
Nutritional Information & Benefits
Each serving (1 square treat, about 2×2 inches) contains approximately:
- Calories: 145
- Fat: 4g
- Carbohydrates: 27g
- Sugar: 14g
- Protein: 1g
- Sodium: 115mg
These numbers vary based on your decorations. Candy eyeballs and frosting add minimal calories, but a full coating of candy melts can add 50 to 80 calories per treat. If you’re watching your sugar intake, use sugar-free marshmallows and skip the candy decorations—just use black decorating gel for faces.
On the plus side, Rice Krispies are fortified with iron and B vitamins. A single serving provides about 10% of your daily iron needs. The butter adds a small amount of vitamin A. Is this a health food? No. But for a Halloween treat, it’s relatively low in fat compared to cookies or brownies. And honestly, sometimes you just need a buttery, marshmallowy square of nostalgia.
If you’re looking for a healthier Halloween option, you can swap half the cereal for puffed brown rice or quinoa puffs. The texture will be slightly different—more delicate, less crunchy—but the flavor is still good. I’ve tested this and it works, though the treats don’t hold shapes as well. For a protein-packed breakfast alternative, try these creamy high-protein peanut butter banana overnight oats instead.
Conclusion
These Spooky Easy Halloween Rice Krispie Treats are more than just a dessert—they’re an activity. The decorating part is where the magic happens. Kids can make their own monsters, ghosts, or spiders, and nobody cares if the frosting is messy or the eyes are crooked. That’s the whole point. Halloween is supposed to be a little imperfect, a little spooky, and a lot of fun.
I love this recipe because it brings people together. I’ve made it with my nephew, with friends at a Halloween party, and even solo on a quiet October evening while watching scary movies. Every time, it feels different. The base is always the same—buttery, chewy, perfectly crisp—but the decorations let you express your personality. Some people make elegant ghosts. Others make hilariously ugly monsters. Both are valid.
So grab a bag of marshmallows, raid your candy stash, and get creative. Make a spider with too many legs. Make a mummy with one eye. Make a pumpkin that looks more like a potato. It doesn’t matter. What matters is that you’re making something with your hands and sharing it with people you love. And if you end up eating three treats before the decorations set? Well, that’s between you and the marshmallow gods.
If you make these, I’d love to see your creations. Leave a comment below with your favorite Halloween design, or tag me in your photos. And if you’re looking for more easy party snacks, check out these easy mummy pigs in a blanket for a savory Halloween option. Happy haunting!
Frequently Asked Questions
Can I use mini marshmallows instead of regular ones?
Technically yes, but they melt faster and can make the mixture gummy. Regular marshmallows give you more control over the melting process. If you only have minis, use 4 cups instead of 6 and watch them closely—they’ll melt in about 2 minutes.
Why are my Rice Krispie treats hard as a rock?
You probably pressed them too firmly into the pan or overcooked the marshmallows. Next time, use gentle pressure when spreading the mixture and remove the pot from heat as soon as the marshmallows are smooth. Hard treats can also result from using stale cereal.
How do I get clean cuts without the treats crumbling?
Use a sharp chef’s knife and spray it with nonstick cooking spray before every cut. Cut in one smooth motion—don’t saw back and forth. Chilling the treats for 20 minutes before cutting also helps them hold their shape.
Can I make these treats vegan or dairy-free?
Absolutely. Use vegan butter (I like Miyoko’s) and vegan marshmallows (Dandies brand works well). The texture will be slightly less chewy, but the flavor is still great. Use dairy-free chocolate for any decorations.
How far in advance can I make these for a Halloween party?
You can make the undecorated treats up to 3 days ahead. Store them in an airtight container at room temperature. Decorate them the morning of the party for the freshest look. Decorated treats stay good for about 24 hours before the candy starts to soften or bleed.
Pin This Recipe!
Easy Halloween Rice Krispie Treats: Best Spooky Recipe
These Spooky Easy Halloween Rice Krispie Treats are the perfect no-fuss Halloween dessert. They come together in about 15 minutes of active work and are sturdy enough to cut into fun shapes like ghosts, mummies, and spiders, making them ideal for parties and kids’ activities.
- Prep Time: 15 minutes
- Cook Time: 5 minutes
- Total Time: 40 minutes
- Yield: 12 servings 1x
- Category: Dessert
- Cuisine: American
Ingredients
- 3 tablespoons unsalted butter (plus extra for greasing the pan)
- 1 (10-ounce) bag regular marshmallows (about 40 large marshmallows)
- 6 cups Rice Krispies cereal
- 1/2 teaspoon vanilla extract
- 1/4 teaspoon fine sea salt
- Black decorating gel (1 tube)
- Candy eyeballs (1 small bag)
- Orange and green candy melts (1/2 cup each)
- Pretzel sticks (about 12)
- White candy melts or white chocolate chips (1/2 cup)
Instructions
- Grease a 9×13-inch baking dish generously with butter. Alternatively, line with parchment paper, leaving a 2-inch overhang on two sides.
- In a large pot over medium-low heat, melt the 3 tablespoons of butter. Swirl occasionally until fully melted but not sizzling.
- Add the entire bag of marshmallows to the pot. Stir constantly with a silicone spatula until completely melted and smooth, about 4 to 5 minutes.
- Remove the pot from heat immediately. Stir in the vanilla extract and salt until combined.
- Pour the 6 cups of Rice Krispies into the pot. Fold gently with the spatula, scraping from the bottom and folding over the top, just until no white cereal shows. Do not overmix.
- Scrape the mixture into the prepared dish. Use a lightly greased spatula to press it into an even layer with gentle pressure. Do not press too hard.
- Let the treats cool at room temperature for 15 minutes, then refrigerate for 20 minutes until firm but still slightly soft.
- Run a sharp knife around the edges of the pan to loosen the treats. Lift the entire block out using parchment handles (if used). Cut into 12 rectangles or 24 small squares, or use cookie cutters dipped in nonstick spray to cut shapes.
- Let the cut treats cool completely on a wire rack before decorating. Pipe on faces, attach candy eyes with a dab of frosting, or drizzle melted candy melts for mummy wraps. Work on wax paper.
- Place decorated treats in the fridge for 10 minutes to set the frosting and candy.
Notes
For best texture, use fresh cereal and melt marshmallows on low heat to avoid burning. Spray knife or cookie cutter with nonstick spray before each cut to prevent sticking. Treats can be stored in an airtight container at room temperature for up to 5 days, or frozen for up to 3 months.
Nutrition
- Serving Size: 1 square treat (abou
- Calories: 145
- Sugar: 14
- Sodium: 115
- Fat: 4
- Saturated Fat: 2
- Carbohydrates: 27
- Protein: 1
Keywords: Halloween Rice Krispie treats, spooky treats, easy Halloween dessert, no-bake Halloween treats, Rice Krispie treats for kids


