That sticky-sweet buttery smell — the one that fills your whole kitchen in about ninety seconds flat — still takes me straight to my friend Jenna’s tiny apartment on a rainy October evening. She was trying to pull off a Halloween party for a dozen kids with about twenty dollars and zero baking experience. I walked in expecting store-bought cookies and maybe some sad candy corn. Instead, she was standing at her stove, butter melting in a giant pot, a bag of marshmallows ripped open on the counter. “We’re making ghosts,” she said, like it was the most obvious thing in the world. And honestly? It was. She shaped them freehand, no cookie cutter in sight, and by the time the party started, we had a platter of lopsided little ghosts that the kids absolutely devoured before I could even grab one.
That night changed how I think about Halloween treats forever. You don’t need fancy molds, expensive decorating tools, or hours of time. These Easy Halloween Rice Krispie Treat Ghosts come together in about fifteen minutes, and they look genuinely adorable without requiring any artistic talent. I’ve made them every year since, tweaking the method just a little — letting the mixture cool a few seconds longer so the marshmallow doesn’t burn my fingers, using a tiny bit more butter so they stay softer. The kids still fight over the ones with the most uneven faces. There’s something about a ghost that doesn’t look perfect that makes it even more lovable, you know?
This is the kind of recipe that saves you on a busy weeknight when you realize the school Halloween party is tomorrow and you volunteered to bring treats. It’s also the kind that becomes a tradition, the one your kids will ask for year after year. I’ve never met a person who didn’t smile when they saw these little guys sitting on a plate. So let’s make some ghosts. They’re easier than you think, and way more fun than anything you could buy at the store.
Why You’ll Love This Recipe
I’ve tested this recipe more times than I care to admit. First batch was too sticky. Second batch was too hard. Third batch? Perfect. Here’s what makes these Easy Halloween Rice Krispie Treat Ghosts worth every minute:
- Quick & Easy: From start to finish, you’re looking at about fifteen minutes. That’s it. No oven, no complicated steps, no waiting around.
- Simple Ingredients: Butter, marshmallows, Rice Krispies cereal, and a little bit of candy for the eyes. You probably already have everything in your pantry.
- Perfect for Halloween: Whether it’s a classroom party, a trunk-or-treat event, or just a fun afternoon activity with the kids, these ghosts fit right in.
- Crowd-Pleaser: I’ve brought these to potlucks, school functions, and family gatherings. They disappear faster than anything else on the table.
- No Special Equipment: You don’t need a ghost-shaped cookie cutter or any fancy tools. Just your hands and a little bit of patience.
What makes this version different from the dozens of other recipes out there? It’s the texture. I figured out that letting the marshmallow mixture cool for exactly two minutes before shaping makes the treats soft and chewy instead of rock-hard by the next morning. Plus, I use a tiny pinch of salt in the butter — it balances the sweetness and makes the flavor taste more like homemade and less like a factory snack. This isn’t just another Halloween treat. It’s the one your kids will remember.
Honestly, there’s something special about making food that looks like something else. It makes people smile. It sparks conversation. And when you bite into one of these ghosts, you get that nostalgic Rice Krispie treat taste that takes you back to childhood. It’s comfort food with a costume on.
What Ingredients You Will Need
This recipe keeps things simple. You only need a handful of ingredients, and most of them are probably in your kitchen right now. Here’s what you’ll grab:
- 3 tablespoons unsalted butter — I use salted butter in a pinch, but unsalted gives you more control over the flavor. The butter adds richness and helps the marshmallows melt smoothly. I recommend Land O’Lakes or Kerrygold for best results.
- 1 package (10 ounces) mini marshmallows — Regular marshmallows work too, but mini marshmallows melt faster and more evenly. Jet-Puffed is my go-to brand. If you want a fun twist, try using marshmallow creme instead — just reduce the butter to 2 tablespoons.
- 6 cups Rice Krispies cereal — Generic puffed rice cereal works fine here. I’ve tested it with both, and the texture is nearly identical. Just make sure it’s fresh and crispy, not stale.
- ¼ teaspoon salt — This is optional but highly recommended. A tiny pinch of salt cuts through the sweetness and makes the treats taste more balanced. Trust me on this one.
- 1 tablespoon vanilla extract — Pure vanilla extract adds warmth and depth. Imitation vanilla works too, but pure gives you a richer flavor. I’ve made this both ways, and the pure vanilla version is noticeably better.
- Candy eyes or chocolate chips — For the ghost faces. I use mini chocolate chips for the eyes and a slightly larger chip for the mouth. You can also use candy eyeballs from the baking aisle, but chocolate chips taste better.
- Optional: powdered sugar for dusting — A light sprinkle makes the ghosts look even more ghostly. It’s purely decorative, but it adds a nice touch.
For the best texture, make sure your marshmallows are fresh. Stale marshmallows don’t melt as smoothly and can leave you with lumpy treats. Also, if you’re making these for a school event, check for any peanut or tree nut warnings on your ingredients — Rice Krispies are generally safe, but always read labels.
One more thing: if you’re dairy-free, you can substitute the butter with a plant-based butter like Earth Balance. The texture will be slightly different — a little less firm — but they still taste great. I’ve made them for friends with dairy allergies, and nobody complained.
Equipment Needed
You don’t need much for this recipe, which is one of the reasons I love it. Here’s what you’ll want to have ready:
- Large pot or Dutch oven — You need something big enough to hold all the marshmallows and cereal. A 5-quart pot works perfectly.
- Wooden spoon or silicone spatula — For stirring. A wooden spoon is sturdy and won’t scratch your pot. A silicone spatula is great for scraping every last bit of marshmallow mixture.
- Large mixing bowl — For holding the cereal before you add the marshmallow mixture. Any big bowl works.
- Parchment paper or wax paper — Essential for shaping the ghosts without everything sticking to your hands. You’ll also use it to line your work surface.
- Measuring cups and spoons — For precise measurements. I’ve eyeballed this before and ended up with way too much cereal.
- Small bowl of water — Dip your fingers in water before shaping. It prevents the marshmallow mixture from sticking to your hands. Game changer.
- Butter knife or offset spatula — For smoothing edges and cleaning up any messy spots.
If you don’t have a large pot, you can use a microwave-safe bowl and melt the butter and marshmallows in the microwave. Just heat in 30-second bursts, stirring between each. It works fine, but I prefer the stovetop method because it gives you more control. Also, if you’re making these with kids, the stovetop version keeps little hands away from hot bowls.
Preparation Method
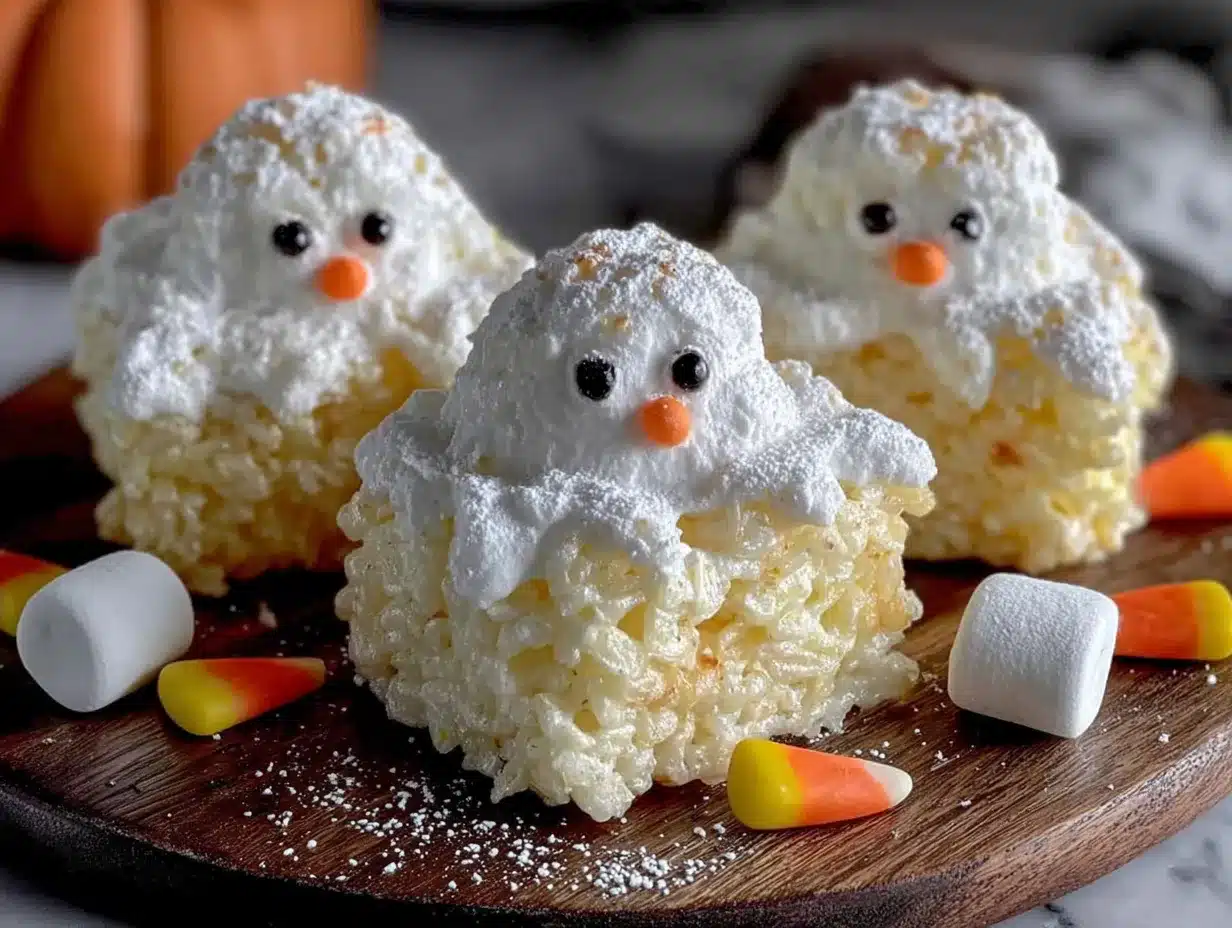
Alright, let’s make some ghosts. This whole process takes about fifteen minutes, so clear your counter and get everything ready before you start.
- Line your work surface. Lay out a large sheet of parchment paper or wax paper on your counter. You’ll shape the ghosts directly on this. Lightly grease the paper with a tiny bit of butter or nonstick spray.
- Melt the butter. Place your large pot over medium-low heat. Add the 3 tablespoons of unsalted butter and let it melt slowly. Don’t rush this — if the butter burns, the whole batch will taste off. Swirl the pot occasionally so the butter melts evenly.
- Add the marshmallows. Once the butter is fully melted, pour in the entire 10-ounce bag of mini marshmallows. Stir constantly with your wooden spoon or silicone spatula. The marshmallows will start to puff up and then collapse into a gooey, glossy mass. This takes about 3 to 4 minutes.
- Season the mixture. When the marshmallows are completely melted and smooth, remove the pot from the heat. Stir in the ¼ teaspoon of salt and 1 tablespoon of vanilla extract. The vanilla will sizzle a little — that’s normal. Stir until everything is combined.
- Add the cereal. Pour the 6 cups of Rice Krispies cereal into the pot. Fold the cereal into the marshmallow mixture gently but thoroughly. You want every piece of cereal coated, but you don’t want to crush the cereal. Overmixing will make the treats dense and hard.
- Let it cool slightly. Here’s the trick: let the mixture sit in the pot for exactly 2 minutes. This is the sweet spot where the mixture is cool enough to handle but still warm enough to shape. If you try to shape it immediately, you’ll burn your fingers. If you wait too long, the mixture sets and becomes impossible to work with.
- Shape the ghosts. Dip your fingers in the small bowl of water. Scoop up about ¼ cup of the mixture. Roll it into a ball, then gently flatten it into an oval shape. Pinch one end to create a little tail — that’s the bottom of the ghost. Place it on the parchment paper. Repeat with the remaining mixture. You should get about 12 to 14 ghosts, depending on size.
- Add the faces. While the ghosts are still warm and slightly tacky, press in the candy eyes or chocolate chips. Use two mini chips for eyes and one slightly larger chip for the mouth. You can make them look scared, happy, or silly — it’s up to you. Press gently so the chips stay in place.
- Let them set. Allow the ghosts to cool completely at room temperature. This takes about 15 to 20 minutes. Don’t rush this step — if you try to move them too soon, they’ll fall apart.
- Optional dusting. If you want extra ghostly vibes, dust the finished ghosts lightly with powdered sugar. Use a fine-mesh sieve for even coverage.
A few things to watch for: if the mixture starts to harden before you’re done shaping, pop the pot back on low heat for about 30 seconds to soften it. Also, if your hands get too sticky, just re-dip them in the water. Keep that bowl of water handy — it’s your best friend here.
Cooking Tips & Techniques
I’ve made this recipe at least twenty times, and I’ve learned a few things the hard way. Here are my best tips:
- Don’t overheat the marshmallows. Low and slow is the way to go. If you crank up the heat, the marshmallows can scorch and turn grainy. You’ll end up with a weird texture and a slightly burnt flavor. I learned this the hard way when I was rushing one year.
- Use fresh marshmallows. Stale marshmallows don’t melt properly. They get rubbery and never fully smooth out. Check the expiration date before you start.
- Wet hands are your secret weapon. I cannot stress this enough. Dip your fingers in water before every single ghost. It prevents the marshmallow mixture from sticking to your skin and makes shaping so much easier.
- Work quickly but don’t panic. You have about 5 to 7 minutes of workable time before the mixture sets. That’s plenty of time to shape all the ghosts. Just move steadily and don’t overthink it.
- Make them different sizes. Kids love variety. Make a few big ghosts and a few tiny ones. The tiny ones are especially cute and perfect for little hands.
- Press the candy in at the right moment. If you add the chocolate chips when the mixture is too hot, they’ll melt and slide off. If you wait too long, the surface hardens and the chips won’t stick. The sweet spot is about 30 seconds after shaping.
One time, I forgot to add the vanilla extract until after I’d already mixed in the cereal. I tried to stir it in, but it was too late — the vanilla just pooled at the bottom of the pot. The treats still tasted fine, but they weren’t as flavorful. So don’t skip the vanilla, and add it at the right time.
Variations & Adaptations
This recipe is endlessly customizable. Here are some of my favorite variations:
- Chocolate Ghosts: Melt ½ cup of chocolate chips with the butter and marshmallows. You’ll get dark, chocolatey ghosts that look even spookier. Use white chocolate chips for the eyes so they stand out.
- Gluten-Free Version: Rice Krispies are naturally gluten-free, but some brands add malt flavoring that contains gluten. Look for certified gluten-free puffed rice cereal. Everything else in this recipe is already gluten-free.
- Vegan Ghosts: Use plant-based butter and vegan marshmallows. Dandies brand makes excellent vegan marshmallows that melt beautifully. The texture will be slightly softer, but they still hold their shape.
- Peanut Butter Ghosts: Add ¼ cup of creamy peanut butter to the marshmallow mixture right after you remove it from the heat. Stir until smooth. The peanut butter adds richness and a salty-sweet contrast that’s absolutely addictive.
- Funfetti Ghosts: Stir in 2 tablespoons of rainbow sprinkles with the cereal. The ghosts end up speckled with color, which is perfect for a non-scary Halloween party.
- Mini Ghost Bites: Instead of making 12 ghosts, make 24 tiny ones. They’re perfect for snacking and portion control. Just use about 2 tablespoons of mixture for each.
My personal favorite variation is the peanut butter version. I made it for a Halloween party a few years ago, and one of the guests asked for the recipe before she even finished her first ghost. It’s that good. Just be aware that peanut butter ghosts are a little softer and might not hold their shape as well in warm weather.
Serving & Storage Suggestions
These ghosts are best served at room temperature. They’re soft, chewy, and just the right amount of sweet. Here’s how to serve and store them:
- Serving: Arrange the ghosts on a platter or cake stand. For extra Halloween flair, place them on a bed of black or orange sprinkles. You can also stick them on lollipop sticks for a fun, portable treat — just insert the stick before the ghost sets.
- Pairings: These ghosts go perfectly with a warm mug of apple cider or a glass of cold milk. If you’re serving them at a party, set them out alongside a bowl of Halloween spider web chocolate bark for a complete dessert table.
- Storage: Store the ghosts in an airtight container at room temperature. They’ll stay fresh for up to 3 days. Don’t refrigerate them — the fridge dries them out and makes them hard.
- Freezing: You can freeze these ghosts for up to 2 months. Place them in a single layer in a freezer-safe container, with parchment paper between layers. Thaw at room temperature for about 30 minutes before serving.
- Flavor Development: These ghosts are actually best on the second day. The flavors meld together, and the texture softens just a little. I always try to make them a day ahead if I can.
One thing I’ve noticed: if you’re taking these to a party, transport them in a single layer. Stacking them can squish the faces and mess up the shapes. I learned this the hard way when I arrived at a party with a container full of faceless blobs. They still tasted good, but they didn’t look like ghosts anymore.
Nutritional Information & Benefits
Let’s be real — these are a treat, not a health food. But here’s a rough estimate of what you’re working with per ghost (based on 12 servings):
- Calories: Approximately 180 per ghost
- Fat: 6g
- Carbohydrates: 32g
- Sugar: 18g
- Protein: 1g
- Sodium: 120mg
Rice Krispies are fortified with iron and B vitamins, so you’re getting a tiny nutritional boost. The butter adds a small amount of vitamin A. But honestly, these are about fun and celebration, not daily nutrition. They’re a Halloween treat, and that’s okay. If you want a slightly healthier version, you can use brown rice cereal and reduce the butter to 2 tablespoons. The texture will be different — chewier and less tender — but it works in a pinch.
For those with dietary concerns: this recipe contains dairy (butter) and may contain gluten depending on the cereal brand. The vegan and gluten-free variations above address both issues. Always check labels if you’re serving people with allergies.
Conclusion
These Easy Halloween Rice Krispie Treat Ghosts are everything I want in a holiday recipe: quick, fun, and absolutely foolproof. They come together in fifteen minutes, use ingredients you probably already have, and look adorable without requiring any artistic talent. I’ve made them with toddlers who squished the faces into blobs, and with adults who carefully placed each chocolate chip with tweezers — both versions turned out great.
What I love most about this recipe is how it brings people together. There’s something about shaping little ghosts that makes everyone smile. It’s a simple joy, the kind that reminds you why holidays are special. Whether you’re making these for a classroom party, a Halloween potluck, or just a quiet evening at home with your kids, they deliver every time.
So go ahead — grab your ingredients, get the kids involved, and make some ghosts. And if you come up with a fun variation, I’d love to hear about it. Leave a comment below or tag me in your photos. Happy Halloween, friends. Let’s make it sweet.
Frequently Asked Questions
Can I use generic puffed rice cereal instead of Rice Krispies?
Yes, absolutely. Generic brands work just fine in this recipe. The texture might be slightly different — some generic cereals are a little softer — but the ghosts will still taste great. I’ve tested this with store-brand cereal and couldn’t tell the difference.
How do I keep the marshmallow mixture from sticking to my hands?
Keep a small bowl of water next to your work station. Dip your fingers in the water before you touch the mixture. The water creates a barrier that prevents the marshmallow from sticking. You’ll need to re-dip after every ghost or two.
Can I make these ghosts ahead of time?
Yes! These ghosts actually taste better on the second day. Make them up to 2 days in advance and store them in an airtight container at room temperature. Don’t refrigerate them — it makes them hard.
What can I use instead of chocolate chips for the faces?
Candy eyeballs from the baking aisle work great. You can also use M&Ms, Reese’s Pieces, or even small candied sprinkles. If you want a completely edible option, use black frosting in a piping bag to draw the faces on after the ghosts have set.
How do I make these ghosts dairy-free or vegan?
Use plant-based butter and vegan marshmallows. Dandies brand makes excellent vegan marshmallows that melt beautifully. Everything else in the recipe is already dairy-free and vegan-friendly. The texture will be slightly softer, but they still hold their shape perfectly.
Pin This Recipe!
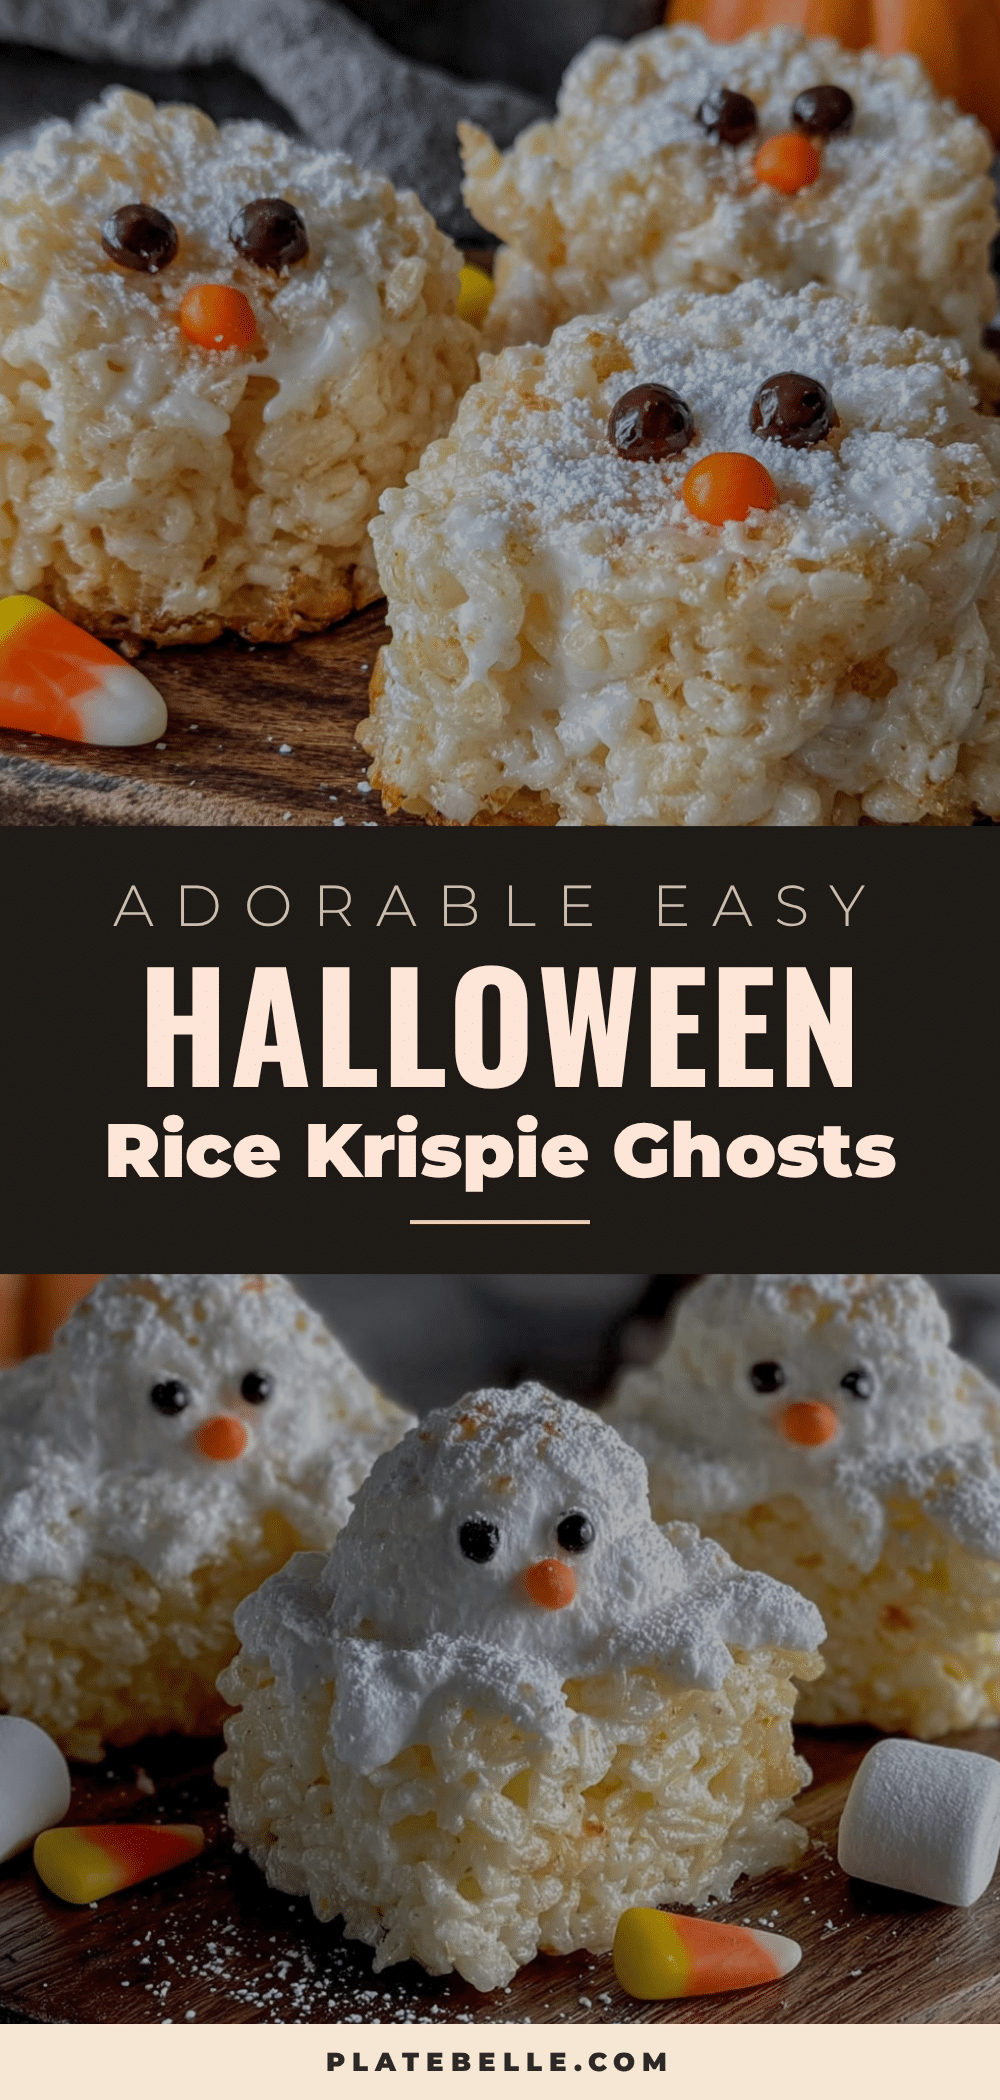
Easy Halloween Rice Krispie Treat Ghosts: Best 15-Minute Recipe
These Easy Halloween Rice Krispie Treat Ghosts come together in about fifteen minutes, and they look genuinely adorable without requiring any artistic talent. They’re the perfect last-minute Halloween treat that kids and adults alike will love.
- Prep Time: 5 minutes
- Cook Time: 10 minutes
- Total Time: 15 minutes
- Yield: 12-14 ghosts 1x
- Category: Dessert
- Cuisine: American
Ingredients
- 3 tablespoons unsalted butter
- 1 package (10 ounces) mini marshmallows
- 6 cups Rice Krispies cereal
- ¼ teaspoon salt
- 1 tablespoon vanilla extract
- Candy eyes or chocolate chips (for faces)
- Optional: powdered sugar for dusting
Instructions
- Line your work surface with a large sheet of parchment paper or wax paper. Lightly grease the paper with a tiny bit of butter or nonstick spray.
- Place a large pot over medium-low heat. Add 3 tablespoons of unsalted butter and let it melt slowly, swirling occasionally.
- Once the butter is fully melted, pour in the entire 10-ounce bag of mini marshmallows. Stir constantly until the marshmallows are completely melted and smooth, about 3 to 4 minutes.
- Remove the pot from the heat. Stir in ¼ teaspoon of salt and 1 tablespoon of vanilla extract until combined.
- Pour 6 cups of Rice Krispies cereal into the pot. Fold gently until every piece of cereal is coated, being careful not to crush the cereal.
- Let the mixture sit in the pot for exactly 2 minutes to cool slightly.
- Dip your fingers in a small bowl of water. Scoop up about ¼ cup of the mixture, roll into a ball, then gently flatten into an oval shape. Pinch one end to create a tail (the bottom of the ghost). Place on the parchment paper. Repeat with remaining mixture to make 12-14 ghosts.
- While the ghosts are still warm and slightly tacky, press in candy eyes or chocolate chips for the face (two mini chips for eyes, one larger chip for mouth).
- Allow the ghosts to cool completely at room temperature, about 15 to 20 minutes.
- Optional: Dust finished ghosts lightly with powdered sugar using a fine-mesh sieve.
Notes
Let the marshmallow mixture cool for exactly 2 minutes before shaping for the best texture. Keep a bowl of water nearby to dip your fingers in to prevent sticking. If the mixture hardens before you’re done shaping, return the pot to low heat for about 30 seconds to soften. These ghosts taste even better on the second day.
Nutrition
- Serving Size: 1 ghost
- Calories: 180
- Sugar: 18
- Sodium: 120
- Fat: 6
- Saturated Fat: 3.5
- Carbohydrates: 32
- Protein: 1
Keywords: Halloween treats, Rice Krispie treats, ghost recipe, easy Halloween dessert, no-bake treats, kid-friendly Halloween