“Mom, can we make s’mores for dinner?” my daughter asked, holding up a half-melted chocolate bar she’d found in the pantry. It was 5:30 PM on a Tuesday, I hadn’t started cooking, and honestly? The idea of building a campfire in the backyard felt like a lot. But then I remembered a skillet dip I’d seen somewhere years ago—a way to get all that gooey, toasted marshmallow goodness without the smoke in your eyes or the hassle of finding the perfect roasting stick. That night, I threw together a quick version with what we had, and we ate it straight from the skillet with graham crackers while sitting on the living room floor.
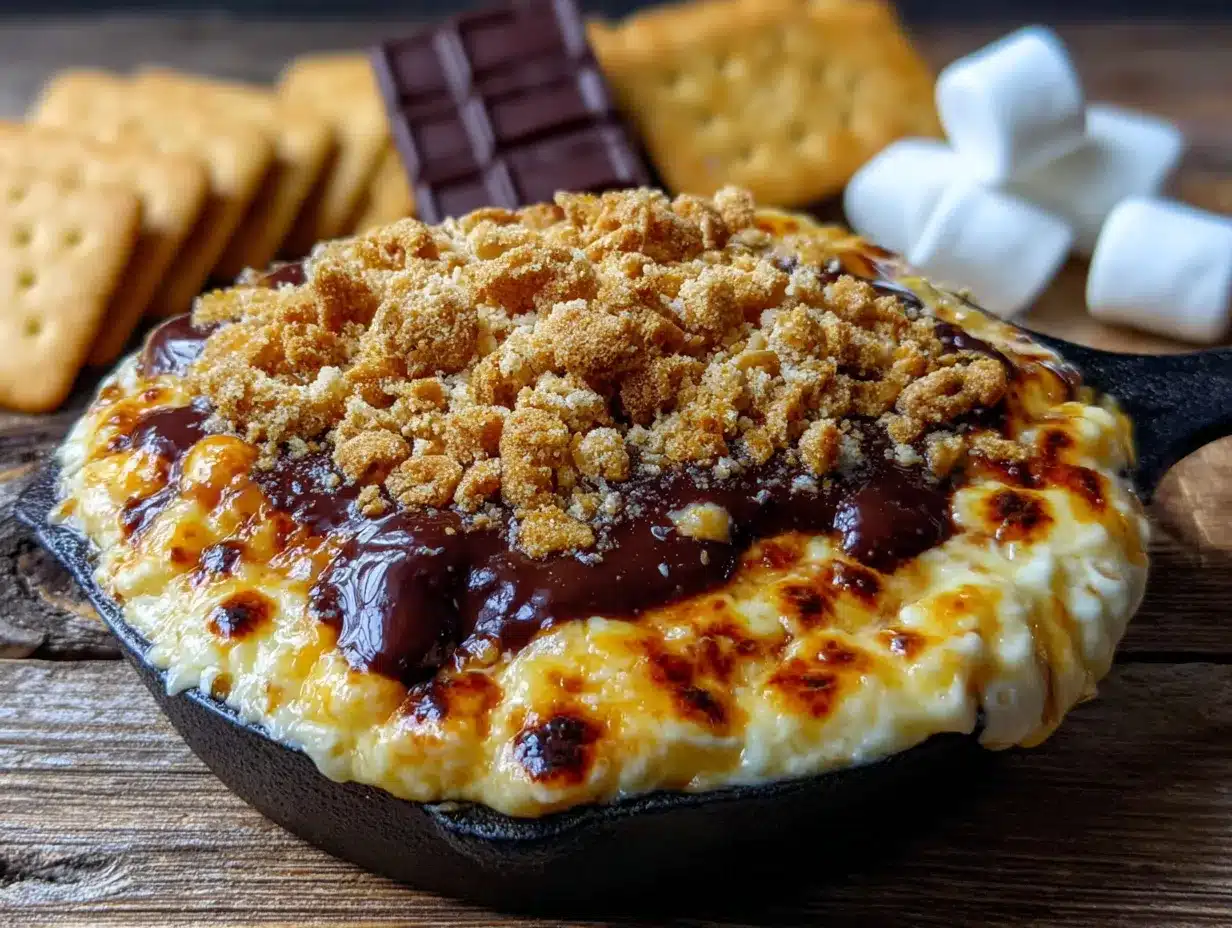
This recipe is my polished version of that chaotic Tuesday night dinner. It’s the best National S’mores Day Skillet Dip because it captures everything you love about the classic campfire treat—the melted chocolate, the charred marshmallow, the crunch of graham cracker—but it comes together in about five minutes flat. No fire pit required, just a skillet and a craving for something sweet and ridiculous. It’s the kind of dessert that feels like a celebration, even on a random weeknight. Honestly, it’s become our go-to for National S’mores Day (August 10th, mark your calendar) because it lets us focus on the fun part: eating.
Why You’ll Love This Recipe
This isn’t just another dessert dip. This skillet dip is the kind of recipe that makes people stop mid-conversation and just stare at the pan. Here’s why it works so well:
- Five Minutes to Gooey Perfection: From start to finish, you’re looking at about five minutes of hands-on time. The oven does the heavy lifting, and you just watch the magic happen.
- Simple Pantry Ingredients: You probably already have everything you need. Chocolate chips, marshmallows, butter, and graham crackers. That’s it. No special trip to the store required.
- Perfect for National S’mores Day: Whether you’re hosting a party or just want a fun after-dinner treat, this dip is the star of the show. It’s also great for movie nights, birthday parties, or any day that ends in “y.”
- Always a Crowd-Pleaser: Kids love it, adults love it, and people who claim they don’t have a sweet tooth suddenly have a second helping. It’s impossible to resist that pull of warm chocolate and toasted marshmallow.
- Unbelievably Delicious: The texture is what gets you. The chocolate gets perfectly melty, the marshmallows puff up and turn golden brown on top, and when you scoop it up with a graham cracker, it’s pure comfort food bliss.
What makes this version different from the rest is the technique. Instead of just layering everything and baking, I add a small amount of butter to the chocolate. It helps the chocolate stay silky and dippable, even as it starts to cool. It’s a tiny tweak, but it makes a huge difference. This is the kind of dessert that makes you close your eyes after the first bite. It’s comfort food at its most honest—simple, fast, and soul-soothing.
What Ingredients You Will Need
This recipe uses simple, everyday ingredients to deliver big, campfire-inspired flavor without any fuss. You’ll likely find everything in your pantry right now.
- Graham Crackers (about 8-10 full sheets, broken into dippable pieces): These are your scoops. Use honey or cinnamon flavor, whichever you prefer. For a gluten-free option, use gluten-free graham-style crackers.
- Semi-Sweet Chocolate Chips (1 ½ cups, or about 9 ounces): I prefer Ghirardelli or Toll House for consistent melting. You can also use a chopped semi-sweet chocolate bar if you have one. Milk chocolate chips will make it sweeter, and dark chocolate (60% or higher) will give it a deeper, more sophisticated flavor.
- Unsalted Butter (2 tablespoons, cut into small pieces): This is my secret ingredient. The butter helps the chocolate stay smooth and prevents it from seizing up as it bakes. Do not skip it.
- Mini Marshmallows (about 3 cups, or one 10-ounce bag): Mini marshmallows melt faster and more evenly than large ones. They create that perfect, gooey top layer. If you only have large marshmallows, cut them in half with kitchen shears.
- Optional Toppings: A pinch of flaky sea salt (like Maldon) right before serving really balances the sweetness. You can also add a few chocolate chunks or a drizzle of melted peanut butter for extra decadence.
Ingredient Selection Tips: For the best texture, use fresh marshmallows. Stale marshmallows get hard and won’t puff up as nicely. Look for a brand that feels soft when you squeeze the bag. For the chocolate, I’ve found that higher-quality chips (with more cocoa butter) melt into a smoother, creamier dip. It’s worth the extra dollar or two.
Substitution Guidance: If you’re dairy-free, use a dairy-free butter alternative (like Miyoko’s) and dairy-free chocolate chips. The dip will still be delicious. For a vegan version, use vegan marshmallows (Dandies is a great brand) and vegan butter. The texture will be slightly different, but the flavor is spot on.
Equipment Needed
You don’t need much for this recipe, which is part of its charm. Here’s what you’ll need:
- 10-Inch Cast Iron Skillet: This is the MVP. A cast iron skillet heats evenly and gives you that rustic, straight-from-the-oven look. If you don’t have one, an 8×8 or 9×9 inch baking dish or a small oven-safe skillet will work just fine. Just keep an eye on the baking time, as it might cook a little faster or slower.
- Mixing Bowl: For tossing the chocolate chips with the butter.
- Spatula or Spoon: For spreading the chocolate layer.
- Oven or Toaster Oven: A toaster oven works great for this and preheats faster. Just make sure your skillet or dish fits inside.
- Hot Pad or Oven Mitts: The skillet gets incredibly hot. Do not forget this one.
I’ve made this dip in a small ceramic baking dish, a mini cast iron skillet, and even a disposable aluminum pie plate when camping. It all works. The cast iron just gives you that perfect, even heat distribution and a beautiful presentation. If you’re using a non-stick skillet, just be careful not to scratch the surface when serving.
Preparation Method
This is where the magic happens. Follow these steps, and you’ll have a bubbling, golden-brown skillet dip in no time.
- Preheat Your Oven to 375°F (190°C). While it’s heating, get your ingredients ready. If you’re using a toaster oven, the same temperature works perfectly.
- Prepare the Chocolate Layer. In a small mixing bowl, combine the 1 ½ cups of semi-sweet chocolate chips and the 2 tablespoons of unsalted butter (cut into small pieces). Give it a quick stir so the butter is distributed among the chips. You don’t need to melt it first—the oven will do that.
- Assemble the Dip. Pour the chocolate chip and butter mixture into your 10-inch cast iron skillet (or baking dish). Spread it into an even layer with your spatula or the back of a spoon. It doesn’t need to be perfect; just make sure it covers the bottom.
- Add the Marshmallows. Sprinkle the 3 cups of mini marshmallows evenly over the chocolate layer. Don’t press them down—just let them sit on top. It should look like a fluffy white blanket covering the chocolate.
- Bake Until Golden and Bubbly. Place the skillet in the preheated oven and bake for 10-12 minutes. You’re looking for the marshmallows to puff up and turn a deep golden brown on top. The chocolate underneath should be bubbling around the edges. Every oven is a little different, so start checking at 8 minutes. You want the marshmallows to be toasted, not burnt.
- Rest for 2 Minutes. This is the hardest part. When you pull the skillet out of the oven, let it sit on a trivet or hot pad for 2 minutes. This allows the chocolate to set slightly so it doesn’t run everywhere when you dip. It will still be incredibly hot, so be careful.
- Serve Immediately. Place the skillet in the center of the table with a pile of graham cracker pieces. Everyone can dig in with their own cracker. The dip will stay warm and gooey for about 15-20 minutes, but honestly, it never lasts that long.
Sensory Cues: At the 5-minute mark, you’ll start to smell the chocolate and marshmallow. By 8 minutes, the marshmallows will look like little clouds. When it’s done, the top should be a beautiful, uneven golden brown with some darker spots—those are the best bites. The chocolate will be bubbling gently around the edges of the pan.
Troubleshooting Tip: If your marshmallows are browning too quickly but the chocolate isn’t bubbling yet, tent the skillet loosely with a piece of aluminum foil and continue baking. This will slow down the browning on top while the bottom catches up.
Cooking Tips & Techniques
I’ve made this dip more times than I can count, and I’ve learned a few things the hard way. Here’s what I know:
- Don’t Overbake. The biggest mistake people make is leaving it in the oven too long. Overbaked marshmallows turn into hard, sugary lumps. Take it out when the marshmallows are puffed and golden, even if there are a few white spots. The residual heat will finish the job.
- The Butter Trick. That small amount of butter isn’t just for flavor. Chocolate chips have stabilizers that can make them thick and pasty when melted. The butter keeps the dip silky and dippable, even after it’s been sitting out for a few minutes. It’s a game-changer.
- Use Room Temperature Ingredients. This isn’t strictly necessary, but if your butter is cold, it will take a little longer to melt. Let it sit out for 10 minutes while you preheat the oven.
- Prep Ahead. You can assemble the entire dip (without baking) up to 2 hours ahead of time. Just cover the skillet with foil and leave it on the counter. When you’re ready, pop it in the oven and add 2-3 minutes to the baking time.
- Broiler Option. If you’re in a hurry, you can use the broiler instead. Place the assembled skillet on the middle rack and broil on high for 2-3 minutes. Watch it like a hawk—it goes from perfect to burnt in seconds. This method gives you a more dramatic, charred marshmallow top.
I once forgot to add the butter and ended up with a dip that was thick and grainy. It was still edible, but it wasn’t the smooth, luscious experience I was going for. That mistake taught me to never skip that step. Now I even add a little butter to my hot chocolate for the same reason.
Variations & Adaptations
This recipe is incredibly forgiving and easy to customize. Here are a few of my favorite spins:
- Peanut Butter S’mores Dip: Drop 3-4 tablespoons of creamy peanut butter in small dollops over the chocolate layer before adding the marshmallows. It melts into ribbons of salty-sweet goodness. I’ve also used almond butter and cookie butter (speculoos) with great results.
- Dark Chocolate & Sea Salt: Use dark chocolate chips (60-70% cacao) and sprinkle a generous pinch of flaky sea salt over the hot dip right before serving. The salt cuts through the sweetness and makes the chocolate taste even richer. This is my personal favorite.
- Berry S’mores Dip: Scatter a handful of fresh raspberries or sliced strawberries over the chocolate layer before adding the marshmallows. The berries burst in the oven and add a bright, tart contrast to the sweet chocolate and marshmallow. It’s like a campfire version of chocolate-covered strawberries.
- Gluten-Free Version: Use gluten-free graham crackers or even gluten-free pretzel sticks for dipping. The dip itself is naturally gluten-free.
- Vegan Version: Use vegan chocolate chips, vegan butter, and vegan marshmallows. As I mentioned, Dandies marshmallows work beautifully. The texture is slightly different (a bit more chewy), but the flavor is spot on.
I once made a version with a layer of dulce de leche spread on the bottom before the chocolate. It was absurdly sweet, but my kids thought I was a culinary genius. Sometimes you just have to go for it.
Serving & Storage Suggestions
This dip is best served hot, straight from the oven. Here’s how to make the most of it:
- Serving Temperature: Serve immediately while the marshmallows are still warm and stretchy and the chocolate is molten. It will stay dippable for about 20 minutes. After that, the chocolate will start to firm up, but you can reheat it in the microwave for 15-20 seconds.
- What to Dip: Graham crackers are the classic choice, but you can also use pretzels (the salty-sweet combo is incredible), vanilla wafers, shortbread cookies, apple slices, or even strawberries. For a fun twist, try it with cinnamon-sugar pita chips.
- Presentation: Place the hot skillet on a wooden board or a trivet in the center of the table. Surround it with a variety of dippers in small bowls. It makes for a beautiful, interactive dessert that everyone loves.
- Storage: Leftovers are rare, but if you have any, let the dip cool completely in the skillet. Cover tightly with foil or plastic wrap and store in the refrigerator for up to 3 days. The texture won’t be the same as fresh, but it’s still delicious.
- Reheating: To reheat, place the covered skillet in a 300°F (150°C) oven for 5-7 minutes, or until the chocolate is melty again. You can also microwave individual portions for 15-20 seconds. The marshmallows will deflate and become chewy, almost like a marshmallow creme.
- How Flavors Develop: Honestly, this dip is best enjoyed fresh. The magic is in that first, hot, gooey bite. But if you do have leftovers, the chocolate and marshmallow meld together into a sort of fudge-like candy that’s pretty great on its own.
If you’re planning a party, this dip pairs beautifully with other shareable appetizers. You could even serve it alongside a savory sheet pan loaded nachos with pulled pork for a sweet-and-salty spread that covers all your cravings.
Nutritional Information & Benefits
Let’s be real—this is a treat. But here’s a rough estimate for one serving (about ¼ of the dip, without dippers):
- Calories: ~350
- Fat: 18g
- Carbohydrates: 48g
- Protein: 3g
- Sugar: 35g
- Fiber: 3g
Health Benefits of Key Ingredients: Dark chocolate is a source of antioxidants, specifically flavonoids, which can support heart health when consumed in moderation. The cocoa in chocolate also contains magnesium and iron. Marshmallows? Well, they’re made of sugar and gelatin, so they’re mostly for joy. And that’s okay. This is a dessert meant to be shared and enjoyed, not analyzed.
Dietary Considerations: This recipe can be made gluten-free, dairy-free, and vegan with simple substitutions (see Variations section). It is not low-carb or low-sugar. If you’re watching your sugar intake, consider using dark chocolate chips (which have less sugar than milk chocolate) and a light hand with the marshmallows.
Potential Allergens: This recipe contains dairy (butter, chocolate chips) and may contain traces of gluten (graham crackers). Check your ingredient labels carefully.
My personal philosophy is that food should nourish you—sometimes that means vitamins and fiber, and sometimes it means chocolate and marshmallows shared with people you love. This dip falls squarely in the second category, and I think that’s beautiful.
Conclusion
This Best National S’mores Day Skillet Dip is more than just a recipe—it’s an experience. It’s the taste of summer campfires and childhood memories, but without the mosquito bites and the smoky clothes. It’s quick enough for a Tuesday night dessert and impressive enough for a party. It’s forgiving, customizable, and absolutely, unapologetically indulgent.
I love this recipe because it reminds me that the best food doesn’t have to be complicated. Sometimes the most memorable meals are the ones you throw together in five minutes, eat straight from the pan, and share with the people who matter most. I hope you make this dip, customize it to your heart’s content, and create your own delicious memories.
If you try this recipe, I’d love to hear about it! Leave a comment below and let me know what variations you tried, or tag me in your photos on social media. Did you add peanut butter? Did you use dark chocolate? Did you eat the whole thing yourself? No judgment here. Happy National S’mores Day!
Frequently Asked Questions
Can I make this in a microwave instead of an oven?
Yes, you can! Assemble the dip in a microwave-safe dish and microwave on high in 30-second intervals, checking after each, until the marshmallows are puffed and the chocolate is melted. It will take about 1-2 minutes total. The marshmallows won’t get that golden-brown color, but it’s still delicious in a pinch.
Can I use milk chocolate instead of semi-sweet?
Absolutely. Milk chocolate will make the dip much sweeter, so you might want to add a pinch of salt to balance it out. I’ve also used a mix of milk and dark chocolate chips for a more complex flavor.
How do I prevent the marshmallows from burning?
Keep an eye on the dip during the last 2-3 minutes of baking. If the marshmallows are browning too quickly, tent the skillet loosely with foil. You want them golden, not black. Also, make sure your oven isn’t running too hot—an oven thermometer is a cheap and useful tool.
Can I double this recipe?
Yes, but you’ll need a larger skillet or a 9×13 inch baking dish. Bake for 12-15 minutes, or until the marshmallows are golden and the chocolate is bubbling. You may need to rotate the pan halfway through for even baking.
What else can I dip besides graham crackers?
So many things! Pretzels, vanilla wafers, shortbread cookies, apple slices, strawberries, banana chunks, or even just a spoon. For a fun twist, try it with crispy Parmesan zucchini fritters if you’re feeling adventurous—the salty-sweet combo is surprisingly good.
Pin This Recipe!

Best National Smores Day Skillet Dip: Easy 5-Minute Recipe
This skillet dip captures everything you love about the classic campfire treat—melted chocolate, charred marshmallow, and graham cracker crunch—but comes together in about five minutes flat. No fire pit required, just a skillet and a craving for something sweet and ridiculous.
- Prep Time: 5 minutes
- Cook Time: 10-12 minutes
- Total Time: 15-17 minutes
- Yield: 4 servings 1x
- Category: Dessert
- Cuisine: American
Ingredients
- 8–10 full sheets graham crackers, broken into dippable pieces
- 1 ½ cups semi-sweet chocolate chips (about 9 ounces)
- 2 tablespoons unsalted butter, cut into small pieces
- 3 cups mini marshmallows (about one 10-ounce bag)
- Optional: pinch of flaky sea salt for serving
Instructions
- Preheat your oven to 375°F (190°C).
- In a small mixing bowl, combine the semi-sweet chocolate chips and unsalted butter pieces. Stir to distribute the butter among the chips.
- Pour the chocolate chip and butter mixture into a 10-inch cast iron skillet (or baking dish). Spread into an even layer.
- Sprinkle the mini marshmallows evenly over the chocolate layer. Do not press them down.
- Bake for 10-12 minutes, until the marshmallows are puffed and golden brown and the chocolate is bubbling around the edges. Start checking at 8 minutes.
- Remove from the oven and let rest for 2 minutes on a trivet or hot pad.
- Serve immediately with graham cracker pieces for dipping.
Notes
For best results, use fresh marshmallows. The butter helps the chocolate stay silky and dippable. If marshmallows brown too quickly, tent loosely with foil. Can be assembled up to 2 hours ahead and baked when ready. For a quicker version, use the broiler on high for 2-3 minutes, watching carefully.
Nutrition
- Serving Size: 1/4 of the dip (with
- Calories: 350
- Sugar: 35
- Sodium: 150
- Fat: 18
- Saturated Fat: 10
- Carbohydrates: 48
- Fiber: 3
- Protein: 3
Keywords: s'mores dip, skillet dip, National S'mores Day, easy dessert, 5-minute recipe, chocolate marshmallow dip, campfire dessert