I figured the secret to getting my kids to eat baked chicken tenders was all about the coating—crunchy, golden, dusted with enough Parmesan to mask anything healthy. It took about three batches and one very honest four-year-old for that theory to fall apart completely. “It’s dry, Mommy,” she said, pushing her plate away. And she was right. The chicken was cooked through, sure, but it had that sad, chewy texture that makes you wonder why you didn’t just order takeout. So I went back to the drawing board, determined to crack the code on crispy baked Parmesan chicken tenders kids love—tenders that are actually juicy inside, shatteringly crisp outside, and don’t require a deep fryer or a culinary degree.
The answer wasn’t more breadcrumbs or a fancy technique. It was a buttermilk soak. Honestly, it felt almost too simple. But after a 30-minute bath in tangy buttermilk, the chicken transforms. It stays tender and moist even after a hot oven blast, and the coating—a mix of panko, Parmesan, and a few pantry spices—sticks like it was born there. These aren’t just kid-friendly; they’re parent-approved, too. No dry chicken. No complicated steps. Just a reliable recipe that makes everyone happy, and that’s the kind of win I can get behind.
Why You’ll Love This Recipe
These aren’t your average chicken tenders. They’re the result of a few simple tricks that make a world of difference, and I’ve tested every single one so you don’t have to.
- Juicy on the Inside, Crispy on the Outside: The buttermilk brine is the game-changer here. It tenderizes the chicken and locks in moisture, so you never get that dry, stringy texture. Plus, it helps the coating get extra golden and crunchy without burning.
- Baked, Not Fried: No oil splatters, no deep fryer to clean, and significantly less mess. These tenders get perfectly crisp in the oven using a wire rack, which lets hot air circulate all around for even browning.
- Made with Simple Ingredients: You probably have most of these in your kitchen right now. Panko breadcrumbs, Parmesan cheese, a few spices, and buttermilk. No weird additives or hard-to-find items.
- Kid-Approved (and Picky-Eater Tested): My own kids went from pushing their plates away to asking for seconds. The flavor is mild and cheesy, with just enough seasoning to be interesting without being overwhelming. They’re perfect for lunchboxes, quick dinners, or game-day snacks.
- So Versatile: Serve them with ranch, marinara, or honey mustard. Slice them up for a salad or wrap them in a tortilla. They reheat beautifully, too, which is a lifesaver for busy weeknights.
This recipe is the one I turn to when I need a guaranteed win. It’s the kind of meal that makes you close your eyes after the first bite—not because it’s fancy, but because it’s exactly what you wanted. Comfort food, made a little bit better.
What Ingredients You Will Need
This recipe relies on a short list of pantry staples and a few fresh ingredients to deliver big flavor and that perfect crunchy texture. Here’s what you’ll need to gather:
For the Chicken & Brine
- 1 ½ pounds boneless, skinless chicken breasts (or chicken tenders, if you want to skip the cutting). I prefer to buy whole breasts and slice them myself into even strips—about 1-inch thick. This ensures they all cook at the same rate.
- 1 cup buttermilk (well-shaken). This is non-negotiable for tender, juicy chicken. If you don’t have buttermilk, you can make a quick substitute by adding 1 tablespoon of lemon juice or white vinegar to a cup of regular milk and letting it sit for 5 minutes.
- ½ teaspoon salt (for the brine).
- ¼ teaspoon black pepper.
For the Coating
- 1 ½ cups panko breadcrumbs. Regular breadcrumbs won’t give you the same crunch. Panko is lighter and flakier, which is exactly what we’re after. I like the Kikkoman brand for consistent results.
- ½ cup finely grated Parmesan cheese. The kind in the green can works fine here, but freshly grated from a block will melt more evenly and give you a richer flavor. Avoid the pre-shredded stuff in bags, as it doesn’t stick as well.
- 1 teaspoon garlic powder (not garlic salt).
- 1 teaspoon onion powder.
- 1 teaspoon paprika (smoked or sweet—both work great).
- ½ teaspoon dried oregano (optional, but adds a nice Italian vibe).
- ¼ teaspoon salt.
- ¼ teaspoon black pepper.
- 2 tablespoons olive oil or melted butter. This is mixed into the breadcrumbs to help them brown and get extra crispy in the oven.
For Serving (Optional)
- Ranch dressing, honey mustard, or marinara sauce for dipping.
- Fresh lemon wedges for squeezing.
The beauty of this ingredient list is that it’s flexible. If you’re out of buttermilk, the DIY version works like a charm. If you want a gluten-free option, use gluten-free panko and double-check your Parmesan. For a dairy-free version, swap the buttermilk for almond milk with a splash of lemon juice and use a dairy-free Parmesan alternative. I’ve tested all of these substitutions, and while the texture shifts slightly, the result is still deliciously crispy.
Equipment Needed
You don’t need a lot of fancy tools to make these tenders, but a few key pieces will make your life easier and your results more consistent.
- Baking sheet: A standard half-sheet pan works perfectly. Look for one with a rim to catch any drips.
- Wire rack: This is the secret to crispy tenders. Placing the chicken on a wire rack set inside the baking sheet allows hot air to circulate underneath, so the coating crisps up on all sides instead of steaming on the bottom. A cooling rack from your baking stash works great.
- Two shallow bowls or pie plates: One for the buttermilk mixture and one for the breadcrumb coating. This makes the dredging process clean and efficient.
- Tongs or a fork: For transferring the chicken from the buttermilk to the breadcrumbs without making a huge mess.
- Sharp knife and cutting board: For slicing the chicken breasts into even tenders.
- Meat thermometer: Optional but highly recommended. Chicken is safe to eat at 165°F, and a thermometer takes the guesswork out of cooking.
If you don’t have a wire rack, you can place the chicken directly on a parchment-lined baking sheet. Just be aware that the bottoms won’t be quite as crispy. You can also flip the tenders halfway through cooking to help them brown evenly.
Preparation Method
Let’s get cooking. This recipe moves quickly once you start, so I like to have everything prepped and ready to go before I turn on the oven.
- Preheat your oven to 400°F (200°C). Place a wire rack inside a rimmed baking sheet and set it aside. A hot oven is key for getting that coating golden and crisp without drying out the chicken.
- Prep the chicken. If using chicken breasts, trim off any excess fat. Slice each breast lengthwise into strips about 1-inch thick. You should get 3-4 strips per breast, depending on the size. Pat the chicken dry with paper towels. This helps the buttermilk stick better.
- Make the buttermilk brine. In a shallow bowl, whisk together the buttermilk, ½ teaspoon salt, and ¼ teaspoon black pepper. Add the chicken strips, turning to coat them evenly. Let them sit for at least 15 minutes at room temperature, or up to 2 hours in the fridge. (I’ve let them soak for 30 minutes most times, and it makes a noticeable difference in tenderness.)
- Prepare the coating. In a separate shallow bowl, combine the panko breadcrumbs, Parmesan cheese, garlic powder, onion powder, paprika, oregano (if using), ¼ teaspoon salt, and ¼ teaspoon pepper. Drizzle the olive oil or melted butter over the top and use your fingers to work it into the breadcrumbs until they look slightly moist and clumpy. This step is what gives you that golden, crunchy crust.
- Dredge the chicken. Working with one piece at a time, lift a chicken strip out of the buttermilk, letting the excess drip off. Place it in the breadcrumb mixture and press firmly so the crumbs adhere to all sides. Don’t be shy—really pack it on. Transfer the coated tender to the prepared wire rack. Repeat with the remaining chicken.
- Bake. Arrange the tenders in a single layer on the wire rack, making sure they aren’t touching. This ensures even browning. Bake for 15-18 minutes, flipping the tenders halfway through, until the coating is deep golden brown and the chicken is cooked through. The internal temperature should reach 165°F (74°C) when checked with a meat thermometer.
- Rest and serve. Let the tenders rest on the wire rack for 2-3 minutes before serving. This helps the coating set and keeps it from falling off when you bite into it. Serve warm with your favorite dipping sauces.
A note on timing: If you’re making a double batch (which I highly recommend), you may need to bake them in two batches to avoid overcrowding. Overcrowding traps steam and makes the coating soggy. Trust me, I learned this the hard way.
Cooking Tips & Techniques
Over the years, I’ve made these tenders more times than I can count, and I’ve picked up a few tricks that make a real difference.
- Don’t skip the buttermilk soak. I know it adds an extra step, but it’s the single most important thing you can do to ensure juicy chicken. The acid in the buttermilk gently tenderizes the meat, and the thickness helps the breadcrumb coating stick. Even 15 minutes makes a difference, but 30 minutes is ideal.
- Use a wire rack. This is non-negotiable for maximum crispiness. If you don’t have one, you can place the tenders directly on a parchment-lined baking sheet, but flip them carefully halfway through. The bottoms won’t be as crunchy, but they’ll still be delicious.
- Don’t overcrowd the pan. Give each tender some breathing room. If they’re touching, they’ll steam instead of crisp up. If you’re making a large batch, bake in two separate pans or in batches.
- Flip halfway through. This ensures even browning on both sides. Use a thin spatula to gently flip them without knocking off the coating.
- Check the temperature. Chicken is safe at 165°F, but I’ve found that pulling them out at 160°F and letting them rest for 5 minutes results in even juicier meat. The carryover cooking will bring them up to the safe zone.
- My biggest failure: I once tried to skip the oil in the breadcrumb mixture to save a few calories. The result was pale, sad tenders that looked like they’d been boiled. The oil is essential for browning and crunch. Don’t skip it.
Variations & Adaptations
This recipe is a fantastic base for all kinds of flavor twists. Here are a few of my favorites:
- Spicy Buffalo Tenders: Add 1 teaspoon of cayenne pepper and ½ teaspoon of smoked paprika to the breadcrumb mixture. After baking, toss the tenders in your favorite buffalo sauce. Serve with blue cheese or ranch dressing.
- Gluten-Free Version: Use gluten-free panko breadcrumbs (I like the Ian’s brand) and make sure your Parmesan cheese is certified gluten-free. The texture will be slightly different, but they’ll still be wonderfully crispy.
- Air Fryer Adaptation: Preheat your air fryer to 375°F (190°C). Arrange the coated tenders in a single layer in the basket (cook in batches if needed). Spray lightly with cooking spray and cook for 8-10 minutes, flipping halfway through, until golden and cooked through. This method is even faster and yields an incredibly crunchy exterior.
- Lemon Herb Tenders: Add the zest of one lemon and 1 tablespoon of fresh chopped parsley (or 1 teaspoon dried) to the breadcrumb mixture. A squeeze of lemon juice over the finished tenders brightens everything up beautifully.
- Parmesan-Free Option: If you need to avoid dairy, simply omit the Parmesan cheese. The tenders will still be crisp, but they’ll have a milder flavor. You can add an extra ¼ cup of panko to compensate for the volume.
I’ve tried the lemon herb version on a whim one summer evening, and it was a revelation. It’s now my go-to when I want something a little lighter and brighter.
Serving & Storage Suggestions
These tenders are incredibly versatile, so feel free to get creative with how you serve them.
- Serving Temperature: They’re best served hot and fresh out of the oven, but they’re also delicious at room temperature—perfect for lunchboxes or picnics.
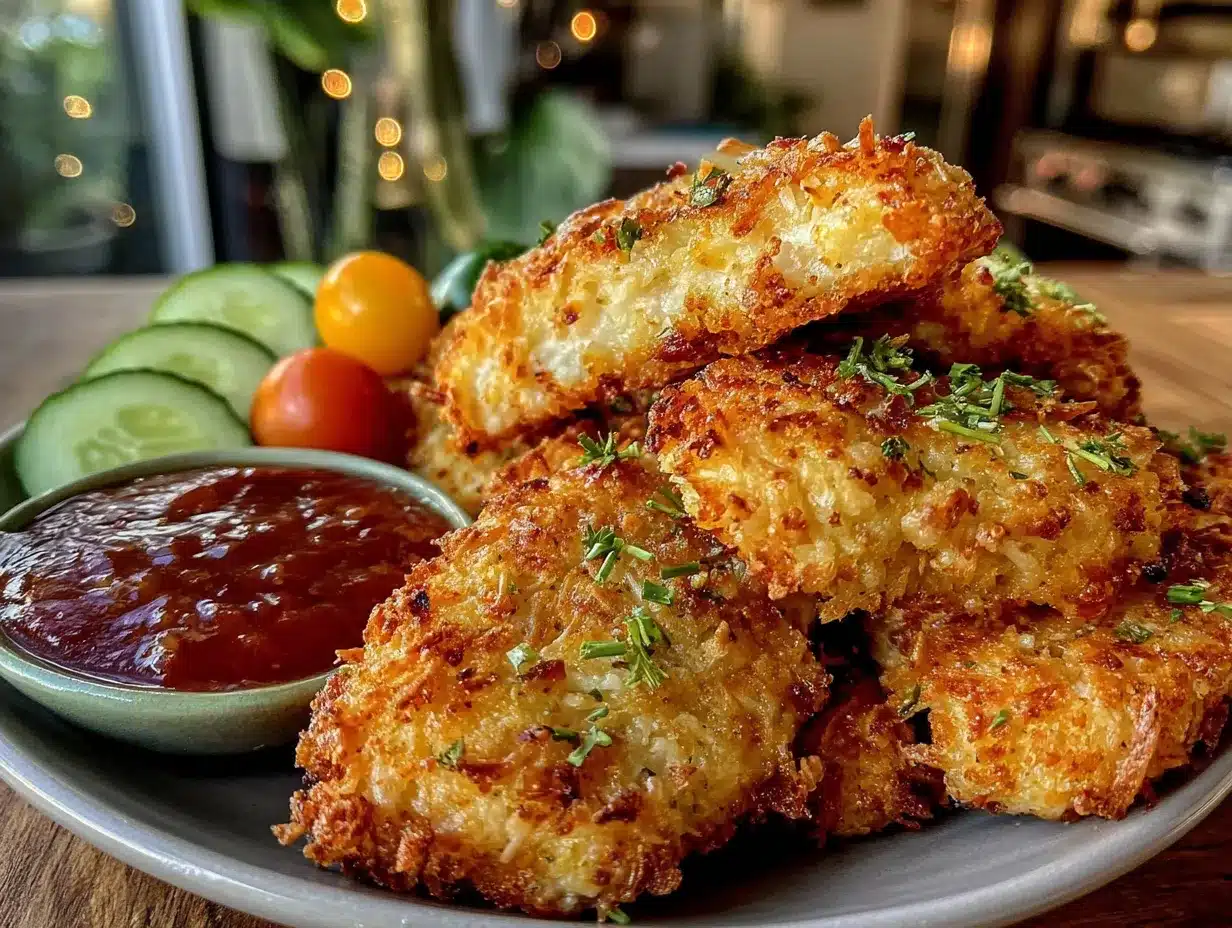
- Presentation: Arrange them on a platter with a small bowl of dipping sauce in the center. A sprinkle of fresh parsley or a few lemon wedges on the side adds a nice touch.
- What to Serve With: These pair beautifully with a simple green salad, roasted vegetables, sweet potato fries, or a side of mac and cheese. For a lighter meal, slice them up and serve over a bed of greens with your favorite dressing. If you’re looking for another easy weeknight meal, you might also enjoy this ground beef and rice skillet for a change of pace.
- Storage: Leftover tenders can be stored in an airtight container in the refrigerator for up to 4 days. The coating will soften slightly, but they’ll still taste great.
- Reheating: The best way to reheat them is in the oven or air fryer. Place them on a wire rack set over a baking sheet and bake at 375°F for 5-7 minutes, or until heated through and crisp. You can also reheat them in an air fryer at 350°F for 3-4 minutes. Avoid the microwave, as it will make the coating soggy.
- Freezing: These tenders freeze beautifully. Place the baked and cooled tenders in a single layer on a baking sheet and freeze until solid (about 2 hours). Transfer them to a freezer-safe bag or container. To reheat, bake from frozen at 375°F for 15-20 minutes, or until heated through. They’re a lifesaver for busy nights.
I’ve found that the flavors actually meld together even more after a day in the fridge, so don’t hesitate to make a double batch. They’re a fantastic option for meal prep, and they’re always a hit in lunchboxes alongside some cucumber slices and a fruit pouch. For another great make-ahead option for busy mornings, check out these freezer-friendly breakfast muffin cups.
Nutritional Information & Benefits
Here’s an approximate nutritional breakdown for one serving (about 3-4 tenders, based on the recipe as written):
- Calories: 380-420
- Protein: 38-42g
- Fat: 16-18g
- Carbohydrates: 18-20g
- Fiber: 1-2g
- Sugar: 3-4g
These tenders are a fantastic source of lean protein, which is essential for muscle growth and repair—especially important for growing kids. The Parmesan cheese adds a good dose of calcium, and the olive oil provides healthy fats. Plus, by baking instead of frying, you’re significantly reducing the overall fat and calorie content without sacrificing any of the crunch.
If you’re watching your sodium intake, you can reduce the salt in the coating and brine. The Parmesan cheese already adds a fair amount of saltiness, so you might not even miss it. For a lower-carb option, you can substitute the panko with crushed pork rinds or almond flour, though the texture will be different.
From my perspective, this recipe hits a sweet spot: it feels indulgent, but it’s actually a pretty wholesome meal. It’s a great way to get protein into picky eaters, and it’s far better for you than anything you’d get from a drive-through. If you’re looking for other high-protein options, you might also like these cottage cheese egg bites.
Conclusion
These crispy baked Parmesan chicken tenders are exactly what a weeknight dinner should be: easy, reliable, and loved by everyone at the table. They’re proof that you don’t need a deep fryer or a complicated recipe to get that golden, crunchy coating and juicy, tender chicken inside. The buttermilk soak does the heavy lifting, and the simple panko-Parmesan crust delivers every single time.
I love this recipe because it’s forgiving. You can swap in different spices, try a new dipping sauce, or double the batch for the freezer without worrying about it falling apart. It’s the kind of recipe that becomes a staple—the one you make when you’re tired, when the kids are hungry, and when you just need a win. I hope you give it a try and make it your own. Maybe add a little extra garlic, or a squeeze of lemon at the end.
Have you made these tenders? I’d love to hear how they turned out! Drop a comment below and let me know your favorite dipping sauce or any fun twists you tried. And if you loved them, don’t forget to share this recipe with a friend who could use a reliable dinner idea.
Frequently Asked Questions
Can I use chicken thighs instead of breasts?
Absolutely! Chicken thighs will be even juicier and more forgiving, though they may take a few extra minutes to cook through. Just make sure they reach 165°F internally.
Can I make these ahead of time for a party?
Yes. You can bread the tenders up to 24 hours in advance and keep them covered in the refrigerator. Bake them just before serving for the best texture. You can also bake them fully and reheat them in the oven or air fryer.
Why did my coating fall off?
This usually happens if the chicken wasn’t patted dry before the buttermilk soak, or if you didn’t press the breadcrumbs firmly enough. Make sure to let the excess buttermilk drip off, and really pack that coating on. Letting the coated tenders rest on the wire rack for 10 minutes before baking can also help the coating set.
Can I use regular breadcrumbs instead of panko?
You can, but the texture won’t be as crispy. Panko is lighter and flakier, which gives you that signature crunch. If you only have regular breadcrumbs, you can toast them lightly in a dry pan first to improve the texture.
How do I make these dairy-free?
Use a dairy-free buttermilk substitute (like almond milk with a splash of lemon juice) and omit the Parmesan cheese. You can add an extra ¼ cup of panko and a tablespoon of nutritional yeast for a cheesy flavor. The texture will be slightly different, but they’ll still be delicious.
Pin This Recipe!

Crispy Baked Parmesan Chicken Tenders Kids Love

Juicy on the inside and shatteringly crisp on the outside, these baked chicken tenders use a buttermilk soak and panko-Parmesan coating for a kid-approved, parent-friendly weeknight dinner that’s baked, not fried.
- Prep Time: 15 minutes
- Cook Time: 18 minutes
- Total Time: 33 minutes
- Yield: 4 servings 1x
- Category: Main Course
- Cuisine: American
Ingredients
- 1 ½ pounds boneless, skinless chicken breasts (or chicken tenders)
- 1 cup buttermilk (well-shaken)
- ½ teaspoon salt (for the brine)
- ¼ teaspoon black pepper (for the brine)
- 1 ½ cups panko breadcrumbs
- ½ cup finely grated Parmesan cheese
- 1 teaspoon garlic powder
- 1 teaspoon onion powder
- 1 teaspoon paprika (smoked or sweet)
- ½ teaspoon dried oregano (optional)
- ¼ teaspoon salt (for the coating)
- ¼ teaspoon black pepper (for the coating)
- 2 tablespoons olive oil or melted butter
- Ranch dressing, honey mustard, or marinara sauce for dipping (optional)
- Fresh lemon wedges for squeezing (optional)
Instructions
- Preheat your oven to 400°F (200°C). Place a wire rack inside a rimmed baking sheet and set it aside.
- If using chicken breasts, trim off any excess fat. Slice each breast lengthwise into strips about 1-inch thick. Pat the chicken dry with paper towels.
- In a shallow bowl, whisk together the buttermilk, ½ teaspoon salt, and ¼ teaspoon black pepper. Add the chicken strips, turning to coat them evenly. Let them sit for at least 15 minutes at room temperature, or up to 2 hours in the fridge.
- In a separate shallow bowl, combine the panko breadcrumbs, Parmesan cheese, garlic powder, onion powder, paprika, oregano (if using), ¼ teaspoon salt, and ¼ teaspoon pepper. Drizzle the olive oil or melted butter over the top and use your fingers to work it into the breadcrumbs until they look slightly moist and clumpy.
- Working with one piece at a time, lift a chicken strip out of the buttermilk, letting the excess drip off. Place it in the breadcrumb mixture and press firmly so the crumbs adhere to all sides. Transfer the coated tender to the prepared wire rack. Repeat with the remaining chicken.
- Arrange the tenders in a single layer on the wire rack, making sure they aren’t touching. Bake for 15-18 minutes, flipping the tenders halfway through, until the coating is deep golden brown and the chicken is cooked through. The internal temperature should reach 165°F (74°C) when checked with a meat thermometer.
- Let the tenders rest on the wire rack for 2-3 minutes before serving. Serve warm with your favorite dipping sauces.
Notes
Don’t skip the buttermilk soak—it ensures juicy chicken. Use a wire rack for maximum crispiness. Don’t overcrowd the pan; bake in batches if needed. Flip halfway through for even browning. For best results, pull chicken at 160°F and let rest for 5 minutes (carryover cooking will bring it to 165°F). The oil in the breadcrumb mixture is essential for browning and crunch.
Nutrition
- Serving Size: 3-4 tenders
- Calories: 380420
- Sugar: 34
- Fat: 1618
- Carbohydrates: 1820
- Fiber: 12
- Protein: 3842
Keywords: baked chicken tenders, crispy chicken tenders, Parmesan chicken tenders, kid-friendly chicken, easy chicken recipe, buttermilk chicken, baked not fried