I want pumpkin pie right now, but I don’t want to make a pie crust. That’s the honest thought that started this whole thing. I had a can of pumpkin puree in the pantry, a box of gingersnaps I bought on a whim, and absolutely zero patience for rolling dough. I stood there in my kitchen, staring at the cabinets, trying to convince myself that a traditional pie was worth the effort. It wasn’t. What I really wanted was all that creamy, spiced pumpkin filling, but I wanted it faster, and honestly, I wanted a crunchy, buttery crust that didn’t require a rolling pin or a cold butter panic attack.
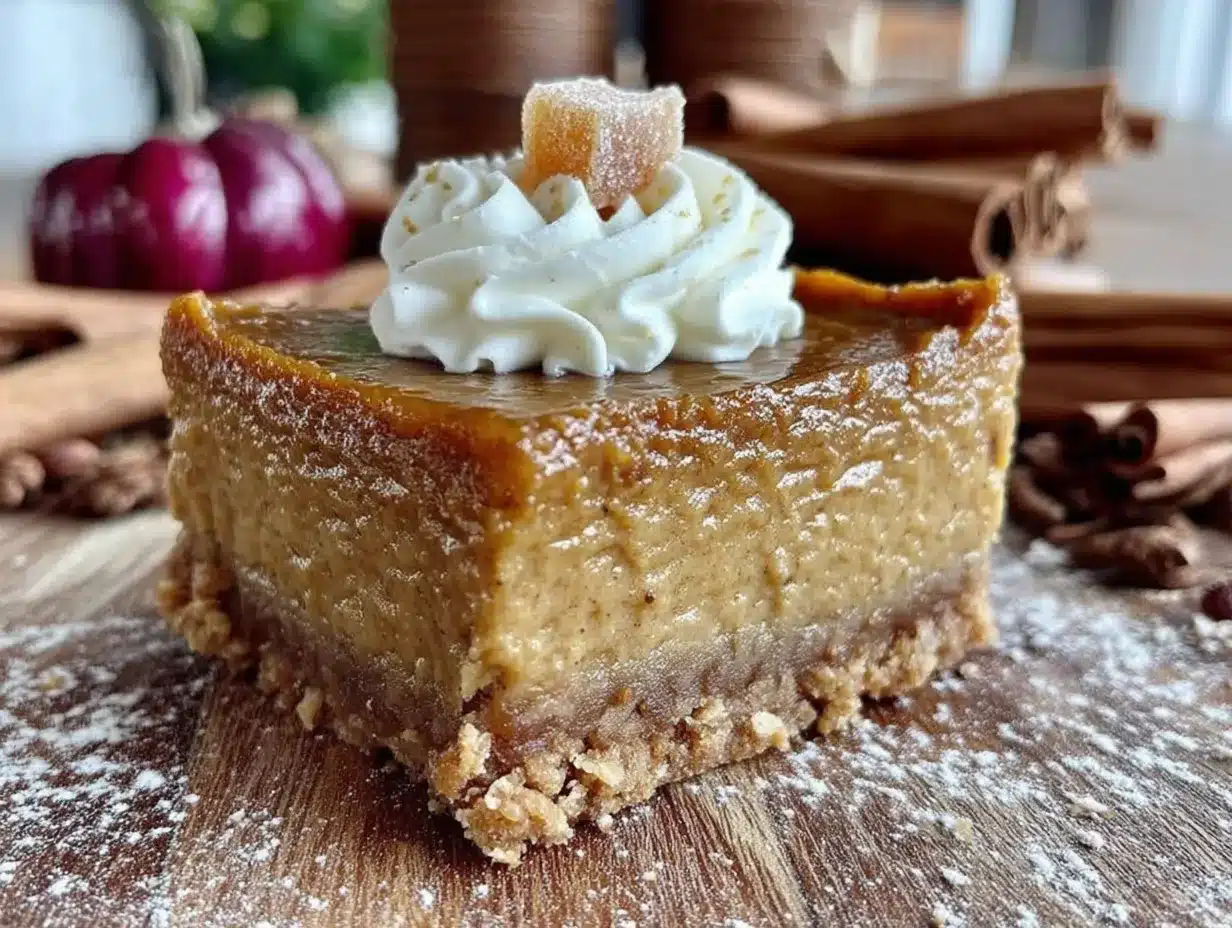
So I did what any reasonable person would do. I crushed those gingersnaps into crumbs, melted some butter, and pressed it into a pan. No chilling, no fussing, no flour on the counter. I mixed the filling right there in the same bowl I used for the crust (less dishes, you know?), poured it over the top, and slid it into the oven. Twenty minutes later, my kitchen smelled like autumn had exploded. The bars came out perfectly set, with that signature pumpkin spice aroma and a crust that stayed crunchy even after a day in the fridge. I cut myself a square while it was still slightly warm, and I knew right then I’d never go back to regular pumpkin pie.
These bars have that same nostalgic flavor you crave in the fall, but they’re way less fussy. They’re the kind of dessert that makes you look like you tried really hard when you actually just threw things together. And honestly? That’s my favorite kind of recipe.
Why You’ll Love This Recipe
I’ve tested this recipe about six times now, tweaking the spice ratio and the baking time until it was absolutely right. I even brought a pan to a Friendsgiving dinner last year, and someone asked for the recipe before they finished their first bite. That’s when I knew it was a keeper. Here’s why these bars stand out from every other pumpkin dessert out there:
- Quick & Easy : From start to finish, these bars take about 35 minutes. No rolling dough, no blind baking, no complicated steps. Just mix, press, pour, and bake.
- Simple Ingredients : You probably have most of these in your kitchen right now. The only special item is the gingersnaps, and those are easy to find in any grocery store.
- Perfect for Fall Gatherings : Whether it’s a Thanksgiving potluck, a Halloween party, or just a cozy Sunday afternoon, these bars fit right in. They travel well and don’t need any fancy plating.
- Crowd-Pleaser : I’ve served these to kids, adults, and even my picky mother-in-law. Everyone loves them. The gingersnap crust adds a little spice that complements the pumpkin perfectly.
- Unbelievably Delicious : The filling is creamy and smooth, with just the right amount of pumpkin flavor. The crust stays firm and crunchy, giving you that perfect texture contrast in every bite.
This isn’t just another pumpkin bar recipe. The secret is in the crust. Most recipes use a graham cracker base, but gingersnaps bring a warm, molasses-y kick that elevates the whole dessert. Plus, the filling uses a simple cornstarch slurry instead of eggs for a silkier texture that doesn’t crack on top. It’s a small change, but it makes a big difference.
These bars are the kind of dessert that makes you close your eyes after the first bite. It’s comfort food reimagined—easier, faster, but with the same soul-soothing satisfaction. Perfect for impressing guests without stress, or turning a simple evening into something memorable.
What Ingredients You Will Need
This recipe uses simple, wholesome ingredients to deliver bold flavor and satisfying texture without the fuss. Most of these are pantry staples, so you might not even need a trip to the store.
For the Gingersnap Crust
- 2 cups gingersnap cookie crumbs – About 8 ounces of cookies, crushed finely. I prefer Nabisco or a store-brand version, but any brand works. You can crush them in a food processor or by hand in a sealed bag with a rolling pin.
- 6 tablespoons unsalted butter, melted – Adds richness and helps the crust hold together. If you only have salted butter, just skip adding any extra salt later.
- 2 tablespoons granulated sugar – Just a little sweetness to balance the spicy gingersnaps.
- Pinch of salt – Only if your butter is unsalted. It enhances all the flavors.
For the Pumpkin Filling
- 1 can (15 ounces) pumpkin puree – Not pumpkin pie filling. Make sure it’s 100% pure pumpkin. Libby’s is my go-to brand for consistent texture.
- 1 cup heavy cream – Gives the filling a luscious, velvety texture. You can substitute full-fat coconut milk for a dairy-free option.
- 2/3 cup packed light brown sugar – Adds depth and moisture. Dark brown sugar works too, for a more molasses-forward flavor.
- 2 large eggs, room temperature – Helps the filling set properly. If you forget to take them out ahead of time, place them in a bowl of warm water for 5 minutes.
- 1 teaspoon vanilla extract – Pure vanilla is best, but imitation works in a pinch.
- 1 tablespoon cornstarch – This is my secret ingredient. It stabilizes the filling and prevents cracking on top.
- 1 1/2 teaspoons pumpkin pie spice – Store-bought is fine, but I like to make my own blend with cinnamon, nutmeg, ginger, and cloves.
- 1/2 teaspoon ground cinnamon – For that extra warm, cozy flavor.
- 1/4 teaspoon salt – Balances the sweetness and brings out the pumpkin flavor.
Equipment Needed
You don’t need any fancy tools for this recipe, which is part of why I love it so much. Here’s what you’ll need:
- 8×8-inch baking pan – A metal or glass pan works perfectly. If you use glass, you might need to add 5 extra minutes to the baking time.
- Parchment paper – For easy lifting and clean-up. I always leave an overhang on two sides to create handles.
- Mixing bowls – One large bowl for the filling and one medium bowl for the crust.
- Whisk – For smoothing out the filling without overmixing.
- Spatula – For scraping every last bit of filling into the pan.
- Food processor or rolling pin – For crushing the gingersnaps. I’ve used both methods, and honestly, the rolling pin in a zip-top bag works just as well and is easier to clean.
- Measuring cups and spoons – For accuracy, especially with the cornstarch and spices.
If you don’t have an 8×8 pan, you can use a 9×9 pan, but the bars will be slightly thinner and might bake a few minutes faster. A disposable aluminum pan works great for taking these to parties, by the way. No need to worry about getting your dish back!
Preparation Method
Let’s get baking. I promise this is straightforward, but I’ll walk you through every step so you get perfect results the first time.
- Preheat your oven to 350°F (175°C). Line your 8×8-inch baking pan with parchment paper, leaving an overhang on two opposite sides. This makes lifting the bars out later so much easier.
- Make the crust. Place the gingersnap cookies in a food processor and pulse until you have fine crumbs. You should have about 2 cups. If you don’t have a food processor, put the cookies in a zip-top bag and crush them with a rolling pin. I’ve done this on a cutting board with the bottom of a heavy skillet too, and it works fine. Transfer the crumbs to a medium bowl, add the melted butter, sugar, and salt, and stir with a fork until everything is evenly moistened. It should look like wet sand.
- Press the crust into the pan. Dump the crumb mixture into your prepared pan. Use the bottom of a measuring cup or a flat glass to press it down firmly and evenly. Don’t skip this step. A firmly packed crust holds together better after baking. Press it all the way to the edges and slightly up the sides if you want a little crust edge.
- Bake the crust for 8 minutes. This pre-bake step ensures the crust stays crunchy and doesn’t get soggy from the filling. While it’s baking, start on the filling.
- Make the filling. In a large bowl, whisk together the pumpkin puree, heavy cream, brown sugar, eggs, and vanilla extract until smooth. Make sure there are no lumps of brown sugar. In a small separate bowl, whisk the cornstarch, pumpkin pie spice, cinnamon, and salt together. This prevents the cornstarch from clumping when you add it to the wet ingredients.
- Combine everything. Sprinkle the dry spice mixture over the pumpkin mixture and whisk until fully incorporated. The filling will be smooth and slightly thick. Give it a good scrape at the bottom of the bowl to make sure everything is mixed in.
- Pour the filling over the crust. Take the pan out of the oven (carefully, it’s hot) and pour the pumpkin filling over the pre-baked crust. Gently tilt the pan to spread it evenly, or use a spatula. Don’t worry if it seems thin—it will set beautifully.
- Bake for 25 to 30 minutes. The edges should look set and slightly puffed, but the center will still jiggle a tiny bit when you gently shake the pan. That’s perfect. It will continue to set as it cools. If you overbake it, the filling can crack on top, so keep an eye on it around the 25-minute mark.
- Cool completely at room temperature. Place the pan on a wire rack and let it cool for at least 1 hour. Then transfer it to the refrigerator and chill for at least 2 hours, or overnight. This is crucial. The bars need to be fully chilled to slice cleanly. I know it’s hard to wait, but trust me on this one.
- Slice and serve. Once fully chilled, lift the bars out of the pan using the parchment paper handles. Place them on a cutting board and use a sharp knife to cut into 9 or 16 squares, depending on how generous you want to be. Wipe the knife clean between cuts for neat edges.
Cooking Tips & Techniques
Over the years, I’ve learned a few things the hard way, so let me save you some trouble. Here are my best tips for perfect pumpkin pie bars every time.
Don’t skip the pre-bake on the crust. I tried skipping this once because I was in a hurry, and the bottom of the crust turned out soft and almost doughy. That 8-minute pre-bake makes all the difference. It firms up the butter and gives the crust a head start before the wet filling goes in.
Room temperature eggs matter. Cold eggs can seize up the filling and make it lumpy. If you forget to set them out, place them in a bowl of warm (not hot) water for 5 minutes. Same goes for the heavy cream—it doesn’t need to be warm, but take the chill off if you can.
Watch the baking time carefully. Every oven is different. My old oven used to run hot, and I’d end up with cracked bars all the time. Start checking at 25 minutes. The filling should be set around the edges but still have a slight jiggle in the very center. It will firm up completely as it cools.
Let them chill fully. This is the hardest part, I know. But if you try to cut these bars while they’re still warm, you’ll end up with a gooey mess. The chilling time allows the cornstarch to fully thicken the filling and the crust to set. Overnight is best, but 2 hours in the fridge is the minimum.
Use a sharp knife for clean slices. A dull knife will drag through the filling and mess up your edges. Run the knife under hot water, wipe it dry, then slice. Wipe the blade clean between each cut for the prettiest presentation.
Variations & Adaptations
One of the best things about this recipe is how flexible it is. I’ve tried several variations over the years, and they all turned out delicious in their own way.
- Gluten-Free Version : Use gluten-free gingersnap cookies for the crust. Many brands are available now, and they work just as well. The filling is naturally gluten-free, so this swap is easy.
- Dairy-Free Version : Substitute the heavy cream with full-fat coconut cream or a dairy-free heavy cream alternative. Use a vegan butter stick (not margarine) for the crust. The texture will be slightly different but still creamy and delicious.
- Extra Spiced : If you love a bold pumpkin spice flavor, add an extra 1/2 teaspoon of ginger and a pinch of cloves to the filling. I did this for a holiday party once, and everyone raved about the warmth of the spices.
- Pecan Topping : Before baking, sprinkle 1/2 cup of chopped pecans over the filling. They toast up beautifully in the oven and add a lovely crunch. I’ve also used walnuts and pepitas with great results.
- Chocolate Drizzle : After the bars have chilled and been sliced, drizzle melted dark chocolate over the top. The combination of pumpkin, ginger, and chocolate is surprisingly amazing. I tried this on a whim one afternoon, and now it’s my favorite way to dress them up.
If you’re a fan of other fall desserts, you might also enjoy this creamy pumpkin cheesecake with candied pecans for a richer, more decadent treat. Or, if you’re in the mood for something warm and cozy, try these brown butter pumpkin chocolate chip cookies.
Serving & Storage Suggestions
These bars are incredibly versatile when it comes to serving. I love them chilled straight from the fridge on a warm fall afternoon, but they’re also amazing at room temperature. For an extra-special treat, serve them slightly warm with a scoop of vanilla ice cream or a dollop of freshly whipped cream. The contrast between the cold ice cream and the spiced pumpkin filling is pure heaven.
For presentation, I like to dust the tops with a little powdered sugar and a pinch of cinnamon right before serving. It makes them look bakery-worthy with almost no effort. You can also add a few fresh cranberries or a small mint leaf on the plate for a pop of color.
Storage : Keep the bars in an airtight container in the refrigerator for up to 5 days. They actually taste better on the second day, as the flavors have more time to meld together. I always make these a day ahead when I’m hosting a gathering.
Freezing : These bars freeze beautifully. Once they’re fully chilled and sliced, place them in a single layer on a baking sheet and freeze for 1 hour. Then transfer the frozen bars to a freezer-safe container or zip-top bag, separating layers with parchment paper. They’ll keep for up to 3 months. To thaw, just move them to the refrigerator overnight or let them sit at room temperature for about 30 minutes.
Reheating : If you prefer them warm, pop a single bar in the microwave for about 15 seconds. For a larger batch, reheat in a 300°F oven for 5 to 7 minutes.
Nutritional Information & Benefits
Here’s the estimated nutritional breakdown for one bar (based on 9 servings):
| Nutrient | Amount per Serving |
|---|---|
| Calories | 295 |
| Total Fat | 17g |
| Saturated Fat | 10g |
| Cholesterol | 85mg |
| Sodium | 210mg |
| Total Carbohydrates | 33g |
| Dietary Fiber | 2g |
| Sugars | 22g |
| Protein | 4g |
| Vitamin A | 120% DV |
| Vitamin C | 4% DV |
| Calcium | 6% DV |
| Iron | 8% DV |
Pumpkin is packed with vitamin A, which supports eye health and immune function. The ginger in the crust also has anti-inflammatory properties. While these bars are definitely a treat (they’re dessert, after all), they offer more nutritional value than your average sugar-laden snack. The protein from the eggs and the fiber from the pumpkin help keep you satisfied longer. If you’re watching your sugar intake, you can reduce the brown sugar by a couple of tablespoons without affecting the texture too much.
These bars are vegetarian-friendly and can easily be made gluten-free or dairy-free with the substitutions mentioned earlier. They contain dairy, eggs, and gluten in the standard version, so keep that in mind for any allergies.
Conclusion
These Easy Pumpkin Pie Bars with Gingersnap Crust are everything I want in a fall dessert. They’re simple enough for a weekday baking project but impressive enough for a holiday table. The crunchy, spicy crust paired with the silky pumpkin filling is a combination I just can’t get enough of. I’ve made these for casual family dinners and for fancy Thanksgiving feasts, and they disappear every single time.
I really hope you give these a try. Don’t be afraid to make them your own—add your favorite toppings, swap in different spices, or double the recipe for a crowd. That’s the beauty of a simple recipe like this. It’s a canvas for your creativity. And honestly, if you make them once, I think they’ll become a regular in your fall rotation, just like they have in mine.
I’d love to hear how yours turn out! Leave a comment below and let me know if you tried any fun variations. Did you add pecans? Drizzle chocolate? Or keep it classic? Share your photos too—I always get so excited seeing your creations. Happy baking, friends!
Frequently Asked Questions
Can I use fresh pumpkin instead of canned?
Yes, you can. Roast a small sugar pumpkin until tender, scoop out the flesh, and puree it in a food processor until smooth. Just make sure to drain off any excess liquid by pressing it through a fine-mesh sieve or cheesecloth. Fresh pumpkin has more water content than canned, so you might need to add an extra tablespoon of cornstarch to compensate.
Why did my pumpkin filling crack on top?
Cracking usually happens from overbaking. The filling continues to cook from the residual heat of the pan even after you take it out of the oven. That’s why it’s important to pull the bars out when the center still has a slight jiggle. Also, letting the bars cool slowly at room temperature before chilling helps prevent sudden temperature changes that cause cracks.
Can I make these bars ahead of time?
Absolutely. In fact, I recommend it. These bars taste even better the next day after the flavors have had time to meld together. You can make them up to 2 days in advance and keep them covered in the refrigerator. Just wait to slice them until you’re ready to serve for the freshest edges.
Can I use a different cookie for the crust?
Yes, you can experiment with different cookies. Graham crackers are the obvious substitute, but shortbread cookies or even vanilla wafers work well too. Keep in mind that different cookies have different sweetness levels and fat content, so you might need to adjust the butter and sugar. Gingersnaps are my favorite because their spicy flavor complements the pumpkin so perfectly.
How do I know when the bars are done baking?
The edges should look set and slightly puffed, and the center should still jiggle just a little when you gently shake the pan. If you insert a toothpick near the center, it should come out mostly clean with just a few moist crumbs. If the toothpick comes out wet with raw batter, bake for another 3 to 5 minutes and check again.
Pin This Recipe!
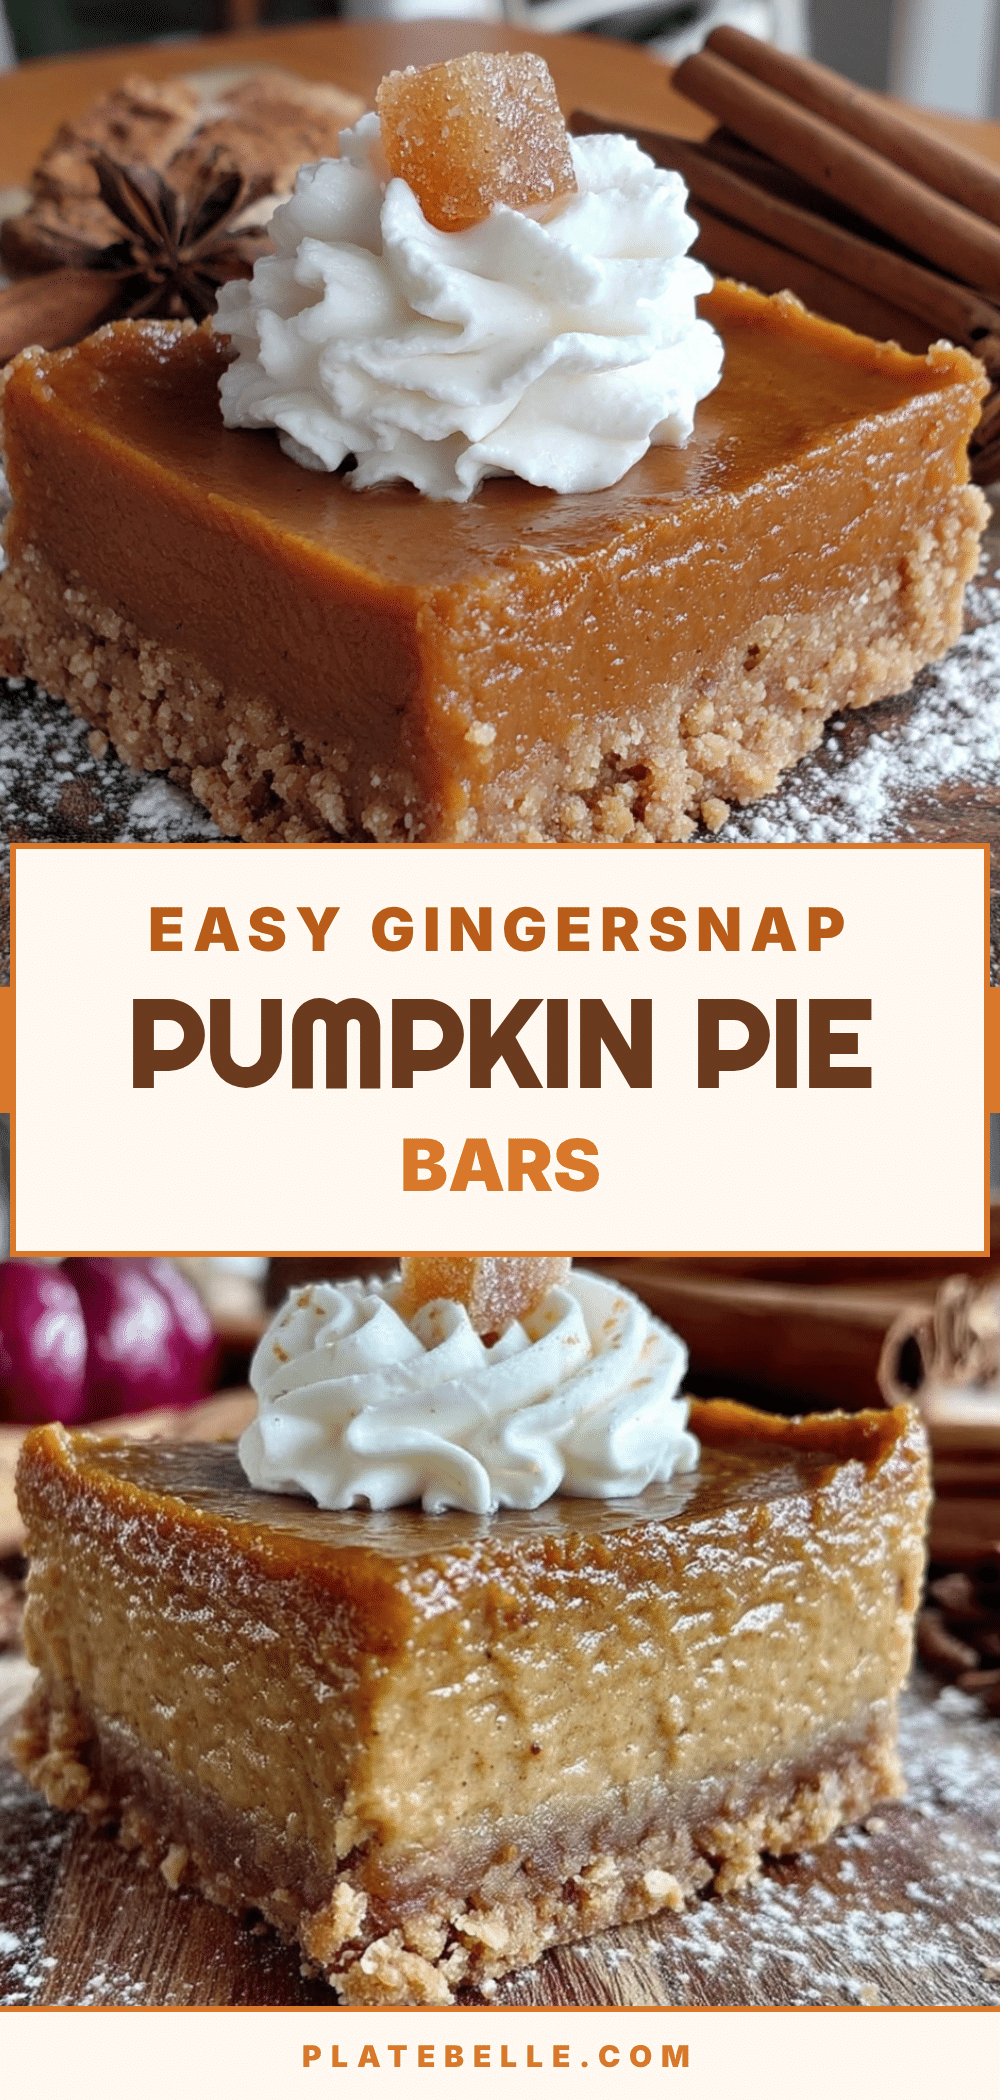
Easy Pumpkin Pie Bars with Gingersnap Crust: Easy Fall Dessert
These easy pumpkin pie bars feature a crunchy gingersnap crust and a creamy, spiced pumpkin filling. They’re a fuss-free alternative to traditional pumpkin pie, perfect for fall gatherings and weeknight baking.
- Prep Time: 15 minutes
- Cook Time: 33 minutes
- Total Time: 3 hours 48 minutes (includes cooling and chilling)
- Yield: 9 servings 1x
- Category: Dessert
- Cuisine: American
Ingredients
- 2 cups gingersnap cookie crumbs (about 8 ounces)
- 6 tablespoons unsalted butter, melted
- 2 tablespoons granulated sugar
- Pinch of salt (if using unsalted butter)
- 1 can (15 ounces) pumpkin puree (not pumpkin pie filling)
- 1 cup heavy cream
- 2/3 cup packed light brown sugar
- 2 large eggs, room temperature
- 1 teaspoon vanilla extract
- 1 tablespoon cornstarch
- 1 1/2 teaspoons pumpkin pie spice
- 1/2 teaspoon ground cinnamon
- 1/4 teaspoon salt
Instructions
- Preheat your oven to 350°F (175°C). Line an 8×8-inch baking pan with parchment paper, leaving an overhang on two opposite sides.
- Make the crust: Place the gingersnap cookies in a food processor and pulse until you have fine crumbs (about 2 cups). Alternatively, crush them in a zip-top bag with a rolling pin. Transfer the crumbs to a medium bowl, add the melted butter, sugar, and salt, and stir with a fork until evenly moistened (like wet sand).
- Press the crust into the prepared pan firmly and evenly using the bottom of a measuring cup or a flat glass. Press all the way to the edges and slightly up the sides if desired.
- Bake the crust for 8 minutes. While it bakes, start on the filling.
- Make the filling: In a large bowl, whisk together the pumpkin puree, heavy cream, brown sugar, eggs, and vanilla extract until smooth. In a small separate bowl, whisk the cornstarch, pumpkin pie spice, cinnamon, and salt together.
- Sprinkle the dry spice mixture over the pumpkin mixture and whisk until fully incorporated. The filling will be smooth and slightly thick.
- Pour the filling over the pre-baked crust. Gently tilt the pan to spread it evenly, or use a spatula.
- Bake for 25 to 30 minutes. The edges should look set and slightly puffed, but the center will still jiggle a tiny bit when gently shaken.
- Cool completely at room temperature (at least 1 hour), then transfer to the refrigerator and chill for at least 2 hours, or overnight.
- Once fully chilled, lift the bars out of the pan using the parchment paper handles. Place on a cutting board and slice into 9 or 16 squares using a sharp knife, wiping the blade clean between cuts.
Notes
Don’t skip pre-baking the crust to keep it crunchy. Use room temperature eggs to avoid lumps. Watch baking time carefully to prevent cracking. Chill fully before slicing for clean edges. For gluten-free, use gluten-free gingersnaps. For dairy-free, substitute heavy cream with full-fat coconut cream and use vegan butter.
Nutrition
- Serving Size: 1 bar (based on 9 se
- Calories: 295
- Sugar: 22
- Sodium: 210
- Fat: 17
- Saturated Fat: 10
- Carbohydrates: 33
- Fiber: 2
- Protein: 4
Keywords: pumpkin pie bars, gingersnap crust, easy fall dessert, pumpkin bars, Thanksgiving dessert, no-roll crust