I was standing in the middle of a hardware store last Tuesday — of all places — when the smell hit me. Not paint or lumber, but something sweet and warm, like brown sugar melting into butter. Somebody was burning a candle in the home fragrance aisle, and suddenly I was eight years old in my Aunt Clara’s tiny kitchen, watching her peel apples at the sink while the radio played softly. She’d let me sprinkle the cinnamon-sugar topping with my fingers, and I always made a mess on the counter. She never said a word. She passed away three years ago, and I still can’t walk past a bag of Honeycrisps without feeling that sharp little ache in my chest.
This salted caramel apple crisp for two is my attempt to hold onto that exact feeling — the warmth, the smell, the way she’d slide a steaming bowl toward me with a wink. It’s a scaled-down version, because honestly, most apple crisp recipes feed a crowd, and sometimes you just want one perfect serving for you and someone you love. Or just for you, no judgment here. I’ve tested this about six times now, tweaking the topping-to-apple ratio until it felt right, and I finally nailed it. Maybe you’ve been there too — chasing a taste from your past, hoping one bite will take you back.
The secret here is the homemade salted caramel sauce. It’s not complicated, I promise. You don’t need a candy thermometer or any fancy equipment. Just a little patience and a watchful eye. The salt cuts through the sweetness of the apples and the brown sugar topping, creating this balance that makes you close your eyes after the first forkful. And because it’s made in small batches, you get that crispy, buttery topping and tender, jammy fruit without a mountain of leftovers. This is the kind of dessert that feels special enough for company but easy enough for a random Tuesday night — which, let’s be honest, is exactly what happened here.
Why You’ll Love This Recipe
This isn’t just another apple crisp recipe. I’ve made enough versions to know the difference, and this one hits different. Here’s why you’ll keep coming back to it:
- Perfectly Portioned for Two : No more staring at a 9×13 dish of leftovers for a week. This recipe fits nicely in two small ramekins or a 5-inch baking dish. It’s designed for date night, a cozy evening, or treating yourself.
- Simple Pantry Ingredients : You likely have everything in your kitchen right now. Apples, oats, flour, butter, brown sugar, cinnamon — the only “special” item is heavy cream for the caramel, but you can even sub in milk in a pinch.
- Homemade Salted Caramel Sauce : This is the game-changer. It takes about 10 minutes to make and tastes light-years better than anything from a jar. The salt flakes on top? Pure magic.
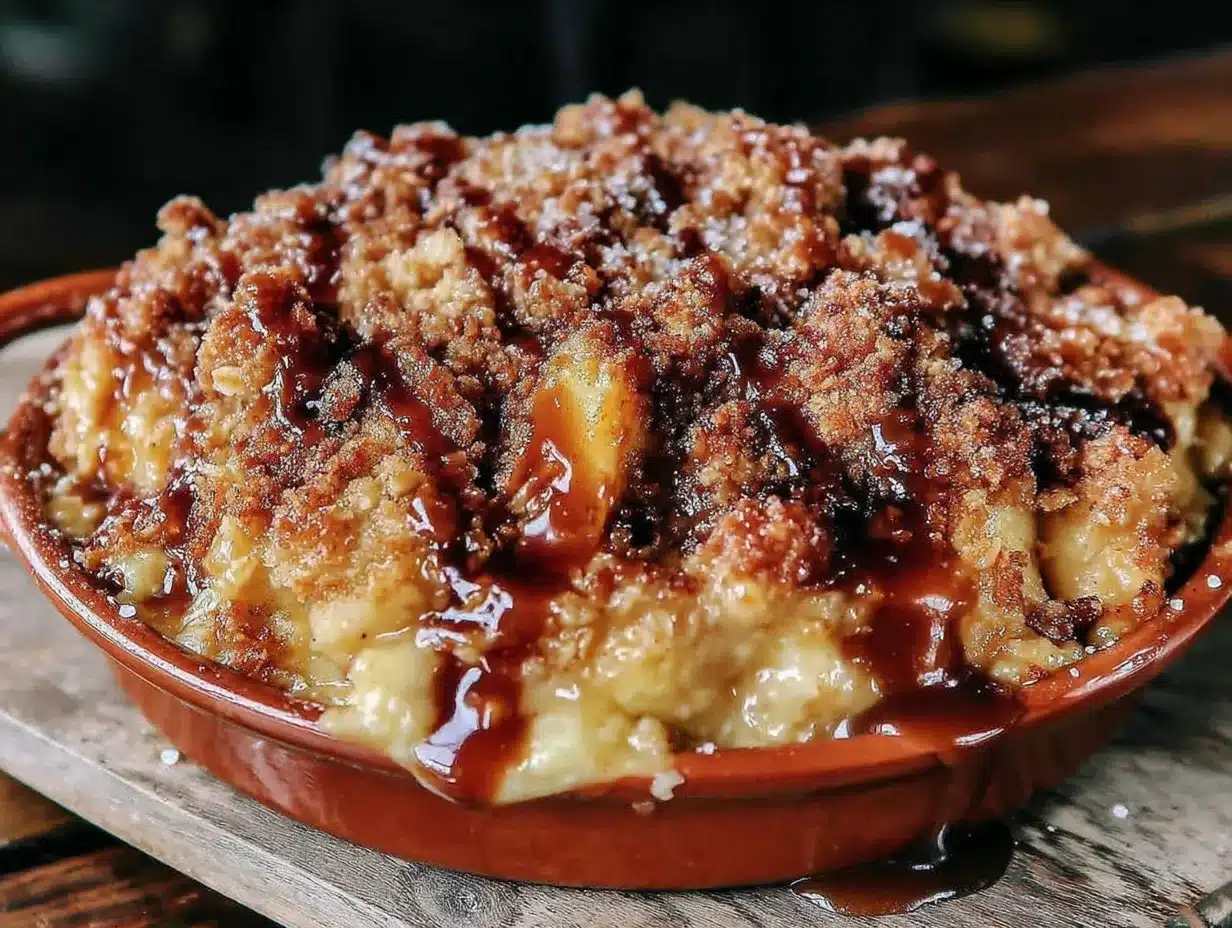
- Crowd-Pleaser for Intimate Gatherings : When you’re hosting friends or a special someone, this dessert steals the show. It looks impressive with that golden, bubbly topping and drizzle of caramel, but it’s secretly low-stress.
- Make-Ahead Friendly : You can prep the topping and caramel a day ahead. Assemble just before baking, and you’ve got a warm, impressive dessert in under 30 minutes. Perfect for when guests arrive and you want to actually enjoy the evening.
I’ve tested this recipe with different apple varieties, different oats, even gluten-free flour — and it works every time. The texture is that perfect contrast: soft, almost jammy apples underneath, with a crunchy, buttery oat topping that shatters a little when you dig in. And that caramel sauce seeps down into the apples as they bake, creating pockets of gooey sweetness. Honestly, it’s the kind of dessert that makes people ask for the recipe before they’ve finished their last bite. I’ve had friends text me the next morning saying they dreamt about it. Not kidding.
What Ingredients You Will Need
This recipe uses simple, wholesome ingredients to deliver bold flavor and satisfying texture without the fuss. Most of these are pantry staples, which means you can whip this up on a whim — and that’s exactly the point.
For the Salted Caramel Sauce
- 1/2 cup (100g) granulated sugar — White sugar works best for caramel. Don’t substitute brown sugar here; it changes the chemistry.
- 3 tablespoons (45g) unsalted butter, cut into small cubes — Use good-quality butter. I prefer Kerrygold for its richness.
- 1/4 cup (60ml) heavy cream, at room temperature — Cold cream will cause the caramel to seize. Let it sit out for 10 minutes.
- 1/2 teaspoon flaky sea salt, plus more for sprinkling — Maldon is my go-to. The flakes are delicate and melt beautifully.
- 1 teaspoon vanilla extract — Pure vanilla, not imitation. It adds depth.
For the Apple Filling
- 2 medium apples (about 300g total), peeled, cored, and diced into 1/2-inch cubes — I recommend Honeycrisp or Granny Smith. Honeycrisp for sweetness, Granny Smith for tartness. A mix of both is ideal.
- 1 tablespoon (12g) granulated sugar
- 1 tablespoon (8g) all-purpose flour — This thickens the juices as they bake. You can use cornstarch if you’re gluten-free.
- 1/2 teaspoon ground cinnamon
- 1/4 teaspoon ground nutmeg — Freshly grated if you have it. It makes a difference.
- 1 teaspoon lemon juice — Fresh is best. It prevents browning and brightens the flavor.
For the Crisp Topping
- 1/3 cup (40g) old-fashioned rolled oats — Not quick oats. They get mushy. Old-fashioned oats give that perfect chewy-crunchy texture.
- 1/3 cup (45g) all-purpose flour
- 1/4 cup (55g) packed light brown sugar
- 1/4 teaspoon ground cinnamon
- Pinch of salt
- 3 tablespoons (42g) cold unsalted butter, cut into small cubes
I always use Bob’s Red Mill oats for their texture, and King Arthur Flour for consistent results. For the apples, I’ve found that a mix of sweet and tart gives the most complex flavor. If you only have sweet apples like Fuji or Gala, add an extra squeeze of lemon juice to balance it. You can also swap the flour in the topping with almond flour for a nuttier flavor and gluten-free option — just add an extra tablespoon of butter since almond flour absorbs more moisture.
Equipment Needed
You don’t need a fancy kitchen for this recipe. Here’s what you’ll need:
- Two 6-ounce ramekins or one 5-inch baking dish — I use these classic white ramekins from Crate & Barrel. They’re perfect for individual portions.
- Small saucepan — For the caramel sauce. A light-colored pan helps you see the color change.
- Medium mixing bowl — For the topping.
- Small mixing bowl — For the apple filling.
- Whisk — For the caramel.
- Pastry cutter or two forks — To cut butter into the topping. Your fingers work too, just work quickly so the butter stays cold.
- Baking sheet — Place the ramekins on a baking sheet to catch any bubbly overflow. Trust me on this one.
- Measuring cups and spoons
- Sharp knife and cutting board
If you don’t have ramekins, you can use small oven-safe bowls or even a muffin tin. Just adjust the baking time slightly — smaller portions will cook faster. I’ve also used a cast iron skillet for a rustic look, which works beautifully. No pastry cutter? No problem. Use a box grater to grate cold butter directly into the flour mixture. It’s a trick I learned from a pastry chef friend, and it creates the most perfectly distributed butter bits.
Preparation Method
Let’s make this happen. The total time is about 45 minutes, with 15 minutes of active prep. Here’s the step-by-step:
Step 1: Make the Salted Caramel Sauce (10 minutes)
Place a small saucepan over medium heat. Add the granulated sugar in an even layer. Watch it carefully — don’t stir yet. Let it melt around the edges, then gently swirl the pan (don’t use a spoon) to help it melt evenly. This takes about 4-5 minutes. The sugar will turn a deep amber color, like a penny. As soon as it reaches that color, remove it from the heat. Add the cubed butter and whisk vigorously — it will bubble up dramatically, don’t panic. Once the butter is fully incorporated, slowly drizzle in the heavy cream while whisking continuously. The sauce will smooth out. Stir in the vanilla and flaky sea salt. Let it cool slightly while you prepare the rest. You’ll have about 1/2 cup of caramel sauce — more than enough for two servings.
Step 2: Prep the Apples (5 minutes)
Preheat your oven to 375°F (190°C). Peel, core, and dice the apples into 1/2-inch cubes. I like to keep them uniform so they cook evenly. In a small bowl, toss the diced apples with granulated sugar, flour, cinnamon, nutmeg, and lemon juice. Make sure every piece is coated. Let them sit while you make the topping — this draws out some juice and starts the maceration process, which creates that lovely syrupy texture as they bake.
Step 3: Make the Crisp Topping (5 minutes)
In a medium bowl, combine the rolled oats, flour, brown sugar, cinnamon, and salt. Add the cold cubed butter. Use a pastry cutter, two forks, or your fingertips to work the butter into the dry ingredients until the mixture resembles coarse crumbs with some pea-sized butter pieces remaining. Don’t overwork it — those little chunks of butter create steam pockets in the oven, which gives you that crispy, craggy topping. Pop the bowl in the fridge while you assemble the ramekins.
Step 4: Assemble the Crisps (5 minutes)
Divide the apple mixture evenly between your two ramekins (or your single baking dish). Drizzle about 1 tablespoon of the salted caramel sauce over each portion of apples — don’t use all of it, you’ll save some for drizzling later. Sprinkle the crisp topping evenly over the apples, pressing down gently so it sticks. Place the ramekins on a baking sheet to catch any drips.
Step 5: Bake (25-30 minutes)
Bake for 25-30 minutes, until the topping is golden brown and the apple filling is bubbling up around the edges. If the topping is browning too quickly (around 20 minutes), tent loosely with foil. You’ll know it’s done when you see those dark caramel bubbles at the sides. Let them cool on a wire rack for 5-10 minutes — the filling will be molten hot straight out of the oven.
Step 6: Serve (2 minutes)
Drizzle the remaining salted caramel sauce over the warm crisps. Sprinkle with a pinch of flaky sea salt. Serve as is, or top with a scoop of vanilla ice cream or a dollop of whipped cream. The contrast between warm, gooey apples and cold, creamy ice cream is absolutely unbeatable.
Cooking Tips & Techniques
I’ve made this recipe at least a dozen times, and I’ve learned a few things the hard way. Here’s what I wish someone had told me:
Don’t rush the caramel. The first time I made this, I cranked the heat to high and ended up with burnt sugar that tasted like regret. Low and slow is the way. Swirl the pan, don’t stir. If you see smoke, you’ve gone too far. And if you accidentally burn it? Just start over. It’s only sugar and butter — not worth serving something bitter.
Use cold butter for the topping. This is non-negotiable. If your butter is soft, you’ll end up with a dense, doughy topping instead of a crispy, crumbly one. I pop my butter in the freezer for 10 minutes before cutting it into the flour mixture. Also, work quickly — warm hands melt butter fast.
Let the apples sit after tossing. That 5-minute rest allows the sugar to draw out moisture, which creates a natural syrup as they bake. If you skip this step, your filling might be dry or watery. Patience pays off.
Watch your oven like a hawk. Every oven runs differently. My friend’s oven bakes this in 22 minutes; mine takes 28. Start checking at 20 minutes. The topping should be deep golden brown, and you should see thick bubbles at the edges of the ramekins. If the bubbles are thin and watery, it needs more time.
Make extra caramel sauce. Seriously. Double the recipe. You’ll thank me when you’re drizzling it over ice cream, pancakes, or just eating it by the spoonful (no judgment). It keeps in the fridge for up to two weeks — just warm it gently before using.
Variations & Adaptations
This recipe is wonderfully flexible. Here are some ways to make it your own:
Dietary Adaptations
Gluten-Free: Swap the all-purpose flour in both the filling and topping with a 1:1 gluten-free flour blend. Use certified gluten-free oats. I’ve tested this with Bob’s Red Mill 1:1 Baking Flour, and the texture is nearly identical.
Dairy-Free: Use vegan butter (I like Miyoko’s) and full-fat coconut cream instead of heavy cream in the caramel. The coconut flavor is subtle and actually pairs beautifully with the apples.
Lower Sugar: Reduce the brown sugar in the topping to 3 tablespoons and skip the extra granulated sugar in the filling. The caramel sauce will still add sweetness, so you won’t miss it.
Flavor Twists
Spiced Apple Crisp: Add 1/4 teaspoon ground cardamom and a pinch of cloves to the apple mixture. It adds a warm, aromatic depth that’s perfect for fall.
Bourbon Caramel Apple Crisp: Add 1 tablespoon of bourbon to the caramel sauce after removing it from the heat. The alcohol cooks off, leaving a rich, smoky undertone.
Pear and Apple Crisp: Swap one apple for a ripe but firm pear. The pear adds a delicate sweetness and a slightly different texture. Use Bosc or Anjou pears.
Different Cooking Methods
Air Fryer: Assemble in oven-safe ramekins and air fry at 350°F (175°C) for 15-18 minutes. The topping gets extra crispy. No preheating needed.
Slow Cooker: Double the recipe and cook on low for 2-3 hours in a small slow cooker. The topping won’t be as crispy, but the apples become incredibly tender and jammy.
Serving & Storage Suggestions
This dessert is best served warm, straight from the oven. The contrast between the hot, bubbly filling and cold ice cream is what makes it unforgettable. Here’s how to serve and store it:
Serving Temperature: Let the crisps cool for 5-10 minutes before serving. The filling will be molten hot, and you don’t want anyone burning their tongue. A 5-minute rest also allows the juices to thicken slightly.
Presentation Tips for Hosting: Place the ramekins on small plates with a linen napkin underneath. Add a scoop of vanilla bean ice cream, a drizzle of extra caramel, and a final pinch of flaky sea salt. A sprig of fresh mint or a cinnamon stick adds a beautiful pop of color. Your guests will feel like they’re at a fancy restaurant.
What to Serve Alongside: A scoop of vanilla ice cream is classic, but try salted caramel gelato, whipped cream with a dash of cinnamon, or even a dollop of Greek yogurt for a lighter option. For a boozy pairing, a glass of bourbon or a warm spiced cider is heavenly.
Storage: Leftovers can be covered and refrigerated for up to 3 days. The topping will soften, but it’s still delicious. To reheat, pop it in a 350°F (175°C) oven for 10-12 minutes, or microwave for 45-60 seconds. The microwave will soften the topping further, so if you want some crunch back, use the oven.
Freezing: You can freeze the assembled but unbaked crisps for up to 3 months. Wrap tightly in plastic wrap and foil. Bake from frozen, adding 10-15 minutes to the baking time. This is a lifesaver for last-minute guests.
Nutritional Information & Benefits
This recipe makes two generous servings. Here’s the approximate nutritional breakdown per serving (without ice cream):
| Nutrient | Amount |
|---|---|
| Calories | 485 |
| Total Fat | 22g |
| Saturated Fat | 13g |
| Cholesterol | 55mg |
| Sodium | 310mg |
| Total Carbohydrates | 68g |
| Dietary Fiber | 5g |
| Sugars | 42g |
| Protein | 4g |
While this is definitely a treat, there are some nutritional bright spots. Apples are rich in fiber and vitamin C, and the oats provide soluble fiber that supports heart health. The cinnamon has anti-inflammatory properties, and a small amount of healthy fats from the butter and cream help you feel satisfied. If you’re watching your sugar intake, you can reduce the caramel drizzle or use a sugar substitute in the topping. I personally love that this portion-controlled dessert lets me enjoy something decadent without overindulging. It’s about balance, not deprivation.
Conclusion
This salted caramel apple crisp for two has become my go-to dessert for those quiet, meaningful moments — a cozy night in, a catch-up with a close friend, or a date night that feels special without being fussy. It’s the recipe I turn to when I want to recreate that feeling of warmth and connection I felt in Aunt Clara’s kitchen, even if she’s not here to share it with me.
What I love most about this recipe is how forgiving it is. You can swap the apples, adjust the spices, or double the caramel (please do). It always turns out delicious. And when you drizzle that golden caramel over the top and watch it pool around the ice cream, you’ll feel like a pastry chef — even if you’re just wearing sweatpants.
I’d love to hear how yours turns out. Did you try a variation? Did you serve it at a dinner party? Drop a comment below and let me know. And if you’re looking for more cozy desserts, check out our classic apple crisp recipe for a larger batch, or our homemade caramel sauce that you’ll want to put on everything. Happy baking, friends!
Frequently Asked Questions
Can I use pre-made caramel sauce instead of making it from scratch?
Absolutely. If you’re short on time, use a high-quality store-bought salted caramel sauce. Just warm it slightly before drizzling. The homemade version is worth the extra 10 minutes, but I won’t tell if you take the shortcut.
What’s the best apple for this recipe?
Honeycrisp or Granny Smith are my top picks. Honeycrisp holds its shape well and offers natural sweetness, while Granny Smith provides a tart contrast. A mix of both is ideal for complex flavor.
Can I make this recipe vegan?
Yes! Use vegan butter, full-fat coconut cream for the caramel, and a plant-based ice cream for serving. The texture will be slightly different but still delicious. I’ve tested it with Miyoko’s butter and it works beautifully.
How do I prevent the topping from burning?
If the topping is browning too quickly, tent the ramekins loosely with aluminum foil around the 20-minute mark. This allows the apples to continue cooking without the topping getting too dark. Also, make sure your oven isn’t running hot — an oven thermometer is a worthwhile investment.
Can I double this recipe for a crowd?
Definitely. Double all ingredients and bake in an 8×8-inch baking dish. Increase the baking time to 35-40 minutes, checking for doneness when the topping is golden and the filling is bubbly. It’s perfect for a small dinner party or holiday gathering.
PrintEasy Salted Caramel Apple Crisp for Two

A perfectly portioned apple crisp for two with homemade salted caramel sauce, featuring tender apples and a crunchy oat topping. This cozy dessert is ideal for date night or a quiet evening at home.
- Prep Time: 15 minutes
- Cook Time: 30 minutes
- Total Time: 45 minutes
- Yield: 2 servings 1x
- Category: Dessert
- Cuisine: American
Ingredients
- 1/2 cup (100g) granulated sugar
- 3 tablespoons (45g) unsalted butter, cut into small cubes
- 1/4 cup (60ml) heavy cream, at room temperature
- 1/2 teaspoon flaky sea salt, plus more for sprinkling
- 1 teaspoon vanilla extract
- 2 medium apples (about 300g total), peeled, cored, and diced into 1/2-inch cubes
- 1 tablespoon (12g) granulated sugar
- 1 tablespoon (8g) all-purpose flour
- 1/2 teaspoon ground cinnamon
- 1/4 teaspoon ground nutmeg
- 1 teaspoon lemon juice
- 1/3 cup (40g) old-fashioned rolled oats
- 1/3 cup (45g) all-purpose flour
- 1/4 cup (55g) packed light brown sugar
- 1/4 teaspoon ground cinnamon
- Pinch of salt
- 3 tablespoons (42g) cold unsalted butter, cut into small cubes
Instructions
- Make the Salted Caramel Sauce: Place a small saucepan over medium heat. Add the granulated sugar in an even layer. Let it melt around the edges, then gently swirl the pan to help it melt evenly, about 4-5 minutes, until deep amber. Remove from heat. Add cubed butter and whisk vigorously until incorporated. Slowly drizzle in heavy cream while whisking continuously. Stir in vanilla and flaky sea salt. Let cool slightly.
- Prep the Apples: Preheat oven to 375°F (190°C). In a small bowl, toss diced apples with granulated sugar, flour, cinnamon, nutmeg, and lemon juice until coated. Let sit while making topping.
- Make the Crisp Topping: In a medium bowl, combine rolled oats, flour, brown sugar, cinnamon, and salt. Add cold cubed butter. Use a pastry cutter, two forks, or fingertips to work butter into dry ingredients until mixture resembles coarse crumbs with some pea-sized butter pieces. Refrigerate while assembling.
- Assemble the Crisps: Divide apple mixture evenly between two 6-ounce ramekins or one 5-inch baking dish. Drizzle about 1 tablespoon of salted caramel sauce over each portion. Sprinkle crisp topping evenly over apples, pressing down gently. Place ramekins on a baking sheet.
- Bake: Bake for 25-30 minutes, until topping is golden brown and apple filling is bubbling around edges. If topping browns too quickly, tent loosely with foil. Let cool on a wire rack for 5-10 minutes.
- Serve: Drizzle remaining salted caramel sauce over warm crisps. Sprinkle with a pinch of flaky sea salt. Serve as is or with vanilla ice cream or whipped cream.
Notes
Don’t rush the caramel; use low heat and swirl the pan. Use cold butter for the topping to ensure a crispy texture. Let apples sit after tossing to draw out moisture. Watch oven closely as baking times vary. Make extra caramel sauce for other uses.
Nutrition
- Serving Size: 1 ramekin
- Calories: 485
- Sugar: 42
- Sodium: 310
- Fat: 22
- Saturated Fat: 13
- Carbohydrates: 68
- Fiber: 5
- Protein: 4
Keywords: apple crisp, salted caramel, dessert for two, apple dessert, fall dessert, easy apple crisp, individual dessert