“Wait—you made these for the game?” My brother-in-law had three of these sliders in his hand before I could even set the platter down. I just nodded, because honestly, I was still a little surprised myself at how well they turned out.
It was the Saturday before the big rivalry game, and I needed something that would feed a crowd without chaining me to the kitchen. You know how it is—you want to actually watch the game, not miss the touchdown because you’re flipping burgers on the stove. I’d been messing around with sheet pan recipes for a while, but nothing clicked until I thought about combining two things everyone at our tailgate already loves: bacon and ranch. Throw in some shredded chicken, and suddenly you’ve got something that disappears in minutes.
These Easy Sheet Pan Bacon Ranch Chicken Sliders aren’t just another party appetizer. They’re the kind of recipe that makes you look like you planned something fancy when really, you just threw everything on a pan and let the oven do the work. The first time I made them, I watched a grown man argue with his cousin over the last one. That’s when I knew I had something worth sharing.
So here they are—the sliders that turned me into the tailgate hero. No stress, no complicated steps, just really good food that brings people together.
Why You’ll Love This Recipe
Look, I’ve tested a lot of game day recipes over the years. Some are too fussy, some don’t travel well, and some just don’t deliver on flavor. These sliders hit every single mark. Here’s why they’ve become my go-to for every tailgate, watch party, and casual get-together.
- Ready in Under 30 Minutes : From start to finish, you’re looking at about 25 minutes. That’s less time than it takes to find parking at the stadium.
- Simple Pantry Ingredients : No weird specialty items here. Chicken, bacon, ranch seasoning, cheese, and slider buns—that’s basically it. You probably have most of this stuff already.
- Perfect for Tailgates and Game Days : These sliders hold up beautifully in a cooler, reheat like a dream, and feed a crowd without any last-minute fuss.
- Guaranteed Crowd-Pleaser : I’ve served these to kids, picky eaters, and serious foodies. Every single time, the platter comes back empty.
- Unbelievably Delicious : The bacon gets crispy, the ranch seasoning soaks into the chicken, and the cheese gets all melty and golden. It’s comfort food at its finest.
What really sets this recipe apart is the sheet pan method. Instead of assembling each slider individually and hoping they cook evenly, you layer everything on one pan and bake it together. The buns toast perfectly on the bottom, the cheese bubbles up around the edges, and the bacon stays crispy instead of getting soggy. I’ve tried making these in a slow cooker and on the stovetop, and nothing compares to the texture you get from the oven.
These sliders are the kind of food that makes people close their eyes after the first bite. It’s simple, it’s satisfying, and it’s exactly what you want to eat while cheering on your team.
What Ingredients You Will Need
This recipe keeps things simple, but every ingredient pulls its weight. Here’s what you’ll need to grab at the store.
- Cooked shredded chicken – About 3 cups. I usually grab a rotisserie chicken from the store to save time, but leftover grilled chicken works great too. If you’re cooking from scratch, two medium chicken breasts will do the trick.
- Bacon – 8 to 10 slices, cooked until crispy and crumbled. Thick-cut bacon gives you the best texture, but regular works just fine. Pro tip: cook the bacon in the oven while you prep everything else—it saves a mess on the stovetop.
- Ranch seasoning mix – One 1-ounce packet. I prefer Hidden Valley for that classic flavor, but any brand works. If you’re watching sodium, you can use a homemade ranch seasoning blend.
- Cream cheese – 4 ounces, softened to room temperature. This is the secret to making the chicken filling extra creamy and rich. Don’t skip it—it binds everything together beautifully.
- Sour cream – ¼ cup. Adds tanginess and helps the ranch seasoning spread evenly through the chicken.
- Shredded cheddar cheese – 1½ cups, divided. I use sharp cheddar for more flavor, but mild cheddar or a Mexican blend works too.
- Slider buns – 12-count package. Hawaiian sweet rolls are my absolute favorite here—the slight sweetness balances the salty bacon and tangy ranch perfectly. Regular dinner rolls or potato buns also work well.
- Melted butter – 3 tablespoons, for brushing the tops of the buns.
- Optional toppings – Everything bagel seasoning, sesame seeds, or flaky sea salt for sprinkling on top before baking.
One thing I’ve learned the hard way—don’t use low-fat cream cheese or sour cream. The full-fat versions give you that luscious, creamy texture that makes these sliders so addictive. Trust me on this one.
If you’re feeding a smaller crowd, you can easily halve the recipe and use an 8×8 baking dish instead of a sheet pan. Just adjust the baking time slightly and keep an eye on the cheese.
Equipment Needed
You don’t need a fancy kitchen to pull these off. Here’s what you’ll need.
- Sheet pan or rimmed baking sheet – A half-sheet pan (about 13×18 inches) is ideal. If you don’t have one, a 9×13 baking dish works in a pinch.
- Mixing bowl – For combining the chicken, cream cheese, sour cream, ranch seasoning, and bacon.
- Parchment paper or aluminum foil – Line your pan for easy cleanup. Trust me, you’ll thank yourself later.
- Pastry brush – For brushing melted butter on the buns. A silicone brush works best, but a paper towel works in a pinch.
- Sharp knife – For slicing the slider buns in half. A serrated knife works great for cutting through all the rolls at once.
- Small skillet or oven – For cooking the bacon. I prefer baking it at 400°F for about 15 minutes—it comes out perfectly crispy every time.
Honestly, if you have a sheet pan and a mixing bowl, you’re good to go. I’ve made these in a friend’s tiny apartment kitchen with minimal tools, and they turned out just as amazing.
Preparation Method
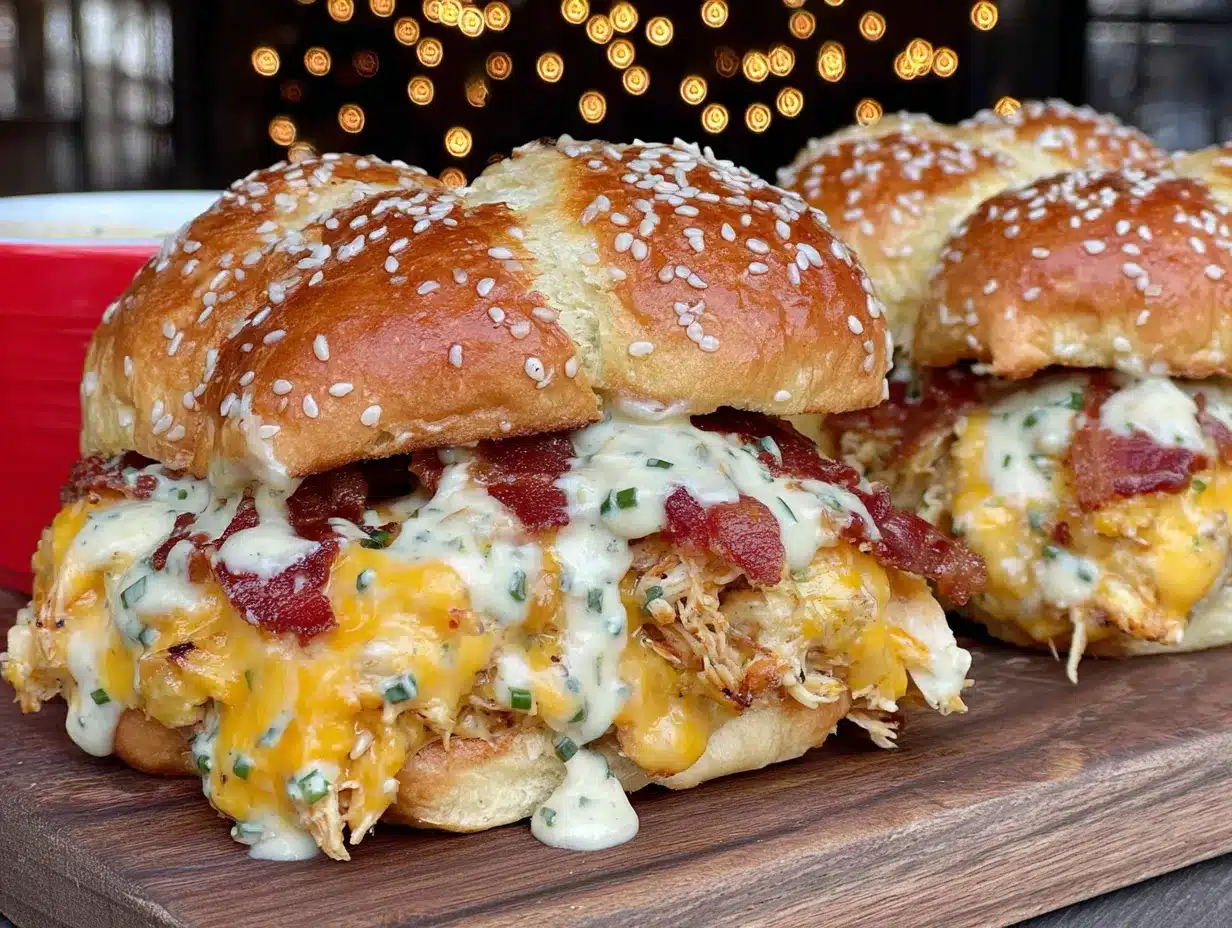
Let’s get cooking. This comes together faster than you’d think.
- Preheat your oven to 375°F. While it’s heating up, line your sheet pan with parchment paper or foil. This makes cleanup ridiculously easy—no scrubbing baked-on cheese later.
- Cook the bacon. If you’re baking it (my preferred method), lay the slices on a foil-lined baking sheet and pop them in the oven for 12-15 minutes at 400°F. You can do this while you prep everything else. Once crispy, transfer to a paper towel-lined plate and crumble once cool.
- Make the chicken filling. In a large mixing bowl, combine the shredded chicken, softened cream cheese, sour cream, ranch seasoning mix, and about half of the crumbled bacon. Stir everything together until the cream cheese is fully incorporated and the mixture looks creamy and uniform. If the cream cheese isn’t soft enough, you’ll end up with lumps—so make sure it’s truly room temperature.
- Prepare the buns. Keeping the slider buns connected as a whole slab, carefully slice them in half horizontally. Place the bottom half of the buns on your prepared sheet pan. I like to leave them all connected—it makes assembly so much easier and keeps everything neat.
- Assemble the sliders. Spread the chicken mixture evenly over the bottom layer of buns. Don’t be shy with it—you want every bite to have plenty of filling. Sprinkle about 1 cup of the shredded cheddar cheese over the chicken mixture, then top with the remaining crumbled bacon. Place the top half of the buns over everything.
- Brush with butter. Melt the 3 tablespoons of butter and brush it generously over the tops of the buns. This is what gives them that gorgeous golden-brown finish. If you’re using everything bagel seasoning or sesame seeds, sprinkle it on now.
- Bake. Place the sheet pan in the preheated oven and bake for 12-15 minutes, or until the cheese is fully melted and the tops of the buns are golden and slightly crispy. Keep an eye on them after the 12-minute mark—ovens vary, and you don’t want burnt buns.
- Rest and serve. Let the sliders rest on the pan for about 5 minutes before slicing. This helps everything set so the filling doesn’t ooze out when you cut them. Use a sharp knife to cut between the individual sliders, then transfer to a platter.
A few things I’ve learned from making these more times than I can count: If the tops of your buns are browning too quickly but the cheese isn’t melted yet, tent a piece of foil loosely over the pan for the last few minutes. And if you want extra-crispy edges, turn on the broiler for the last 30 seconds—but watch it like a hawk, because it goes from perfect to burnt in seconds.
The smell that fills your kitchen during those last few minutes of baking is absolutely ridiculous. Warm butter, crispy bacon, melted cheese—it’s the kind of aroma that makes people wander into the kitchen asking, “What are you making?”
Cooking Tips & Techniques
Over the years, I’ve made every mistake you can imagine with these sliders. Here’s what I’ve learned so you don’t have to make the same mistakes.
Don’t skip softening the cream cheese. I know, I know—you’re in a hurry. But cold cream cheese won’t blend smoothly into the chicken mixture, and you’ll end up with weird white lumps throughout the filling. Leave it on the counter for 30 minutes, or if you’re really pressed for time, microwave it in 10-second bursts until it’s soft.
Toast the buns first for extra crunch. If you want the bottom of your sliders to have a little more structure, pop the bottom buns in the oven for 3-4 minutes before adding the filling. This prevents them from getting too soggy, especially if you’re making these ahead of time.
Use a rotisserie chicken. This is my number one time-saving hack. Store-bought rotisserie chickens are already cooked, perfectly seasoned, and easy to shred. One chicken gives you about 3 cups of shredded meat—exactly what you need for this recipe. If you’re cooking chicken specifically for this, poaching it in salted water gives you the most tender results.
Keep the sliders connected until after baking. I learned this one the hard way. If you separate the buns before baking, the filling leaks out and the edges dry out. Keeping them connected as one big slab helps everything stay moist and contained.
Double the batch if you’re feeding a crowd. These go fast. I’ve seen a dozen sliders disappear in under ten minutes at a tailgate. If you’re serving more than six people, make two sheet pans. You won’t regret having leftovers either—they reheat beautifully.
One of my biggest failures with this recipe happened early on when I used pre-crumbled bacon from a bag. Don’t do it. Fresh-cooked bacon has so much more flavor and texture, and the difference is noticeable. Take the extra ten minutes to cook real bacon—your taste buds will thank you.
Variations & Adaptations
These sliders are incredibly forgiving, and I’ve tried quite a few twists on the original. Here are some of my favorites.
Buffalo Ranch Sliders: Stir ¼ cup of buffalo sauce into the chicken mixture along with the ranch seasoning. The spicy-savory combo is absolutely killer, and it’s perfect if you’re feeding people who like a little heat. Top with blue cheese crumbles instead of extra cheddar for the full buffalo experience.
BBQ Bacon Ranch Sliders: Swap the ranch seasoning for BBQ seasoning or just mix in ¼ cup of your favorite BBQ sauce. The smoky sweetness pairs beautifully with the bacon and cheese. This version is especially good during summer tailgates.
Jalapeño Popper Sliders: Add 2-3 diced jalapeños (seeds removed unless you want serious heat) and an extra 2 ounces of cream cheese to the filling. Top with pepper jack cheese instead of cheddar. It’s like a jalapeño popper in slider form, and honestly, it might be my favorite variation.
Healthier Version: Use turkey bacon, reduced-fat cream cheese, and Greek yogurt instead of sour cream. Whole wheat slider buns add extra fiber. The flavor is slightly different, but it’s still really satisfying—and you won’t feel quite as guilty when you eat four of them.
Vegetarian Option: Substitute the shredded chicken with 3 cups of finely chopped mushrooms and black beans. Sauté the mushrooms first to remove excess moisture, then mix everything together. It’s not the same, obviously, but it’s surprisingly good and holds up well on the sheet pan.
I once made a batch with leftover Thanksgiving turkey instead of chicken, and honestly, it was incredible. So if you have leftover turkey from a holiday meal, don’t hesitate to use it here.
Serving & Storage Suggestions
These sliders are at their absolute best straight out of the oven, when the cheese is still stretchy and the buns have that perfect crispy-soft texture. But they’re also surprisingly good at room temperature—which makes them perfect for tailgates where you’re eating outside.
Serving temperature: Serve them warm, but don’t stress if they cool down a bit. I’ve eaten these cold the next day and still loved them. If you’re taking them to a tailgate, wrap the sheet pan tightly in foil and throw it in a cooler. They’ll stay warm for about an hour.
What to serve with them: These sliders pair beautifully with almost anything. A simple roasted tomato basil soup makes for a cozy fall pairing, or you can go classic with loaded nachos with slow cooker chili meat sauce for the ultimate game day spread. For something lighter, a crunchy coleslaw or fresh veggie platter balances out the richness. And if you’re feeling extra indulgent, football-shaped Rice Krispie treats make a fun dessert that fits the theme perfectly.
Storage: Leftover sliders keep well in an airtight container in the refrigerator for up to 3 days. To reheat, pop them in a 350°F oven for about 8-10 minutes, or until warmed through. The microwave works in a pinch, but the buns get a little soft. If you’re meal prepping, you can assemble the sliders completely (without baking) and refrigerate them for up to 24 hours. Just add a few extra minutes to the baking time.
Freezing: These freeze surprisingly well. Assemble the sliders, wrap the entire sheet pan tightly in plastic wrap and then foil, and freeze for up to 3 months. When you’re ready to bake, thaw overnight in the refrigerator, then bake as directed. I’ve done this for several tailgates, and nobody ever guesses they were made weeks in advance.
The flavors actually meld together even more after a day in the fridge. I’ve found that day-old sliders taste even better than fresh ones—the ranch seasoning has more time to soak into every layer.
Nutritional Information & Benefits
Let’s be real—these aren’t health food. But here’s the thing: they’re made with real ingredients, and there’s some nutritional value hiding in all that deliciousness.
Estimated nutrition per slider (based on 12 servings):
- Calories: 320
- Protein: 18g
- Fat: 19g
- Carbohydrates: 22g
- Fiber: 1g
- Sugar: 5g
- Sodium: 680mg
Health highlights: The chicken provides a solid dose of lean protein, which helps keep you full and satisfied. Bacon gets a bad rap, but it does add protein and B vitamins to the mix. The calcium from the cheese and sour cream is good for bone health. And if you use whole wheat slider buns, you’ll get a little extra fiber.
Dietary considerations: This recipe contains gluten, dairy, and meat. For a gluten-free version, use gluten-free slider buns and double-check your ranch seasoning label (some brands contain gluten). For a dairy-free version, use dairy-free cream cheese, sour cream, and cheese alternatives—though I’ll be honest, the texture won’t be quite the same.
I’m not going to pretend these are a health food. But they’re made with real food, and sometimes that’s enough. Balance is everything—enjoy these sliders on game day, and eat your veggies the rest of the week.
Conclusion
These Easy Sheet Pan Bacon Ranch Chicken Sliders have become my official tailgate MVP. They’re simple enough to throw together on a busy Saturday, impressive enough to get compliments from everyone at the party, and delicious enough that people actually argue over the last one. I’ve seen it happen more than once.
What I love most about this recipe is how adaptable it is. You can spice it up, cool it down, make it healthier, or load it with extra cheese—it always works. It’s the kind of recipe that becomes a staple because it never lets you down.
I’d love to hear how these turn out for you. Did you try one of the variations? Add your own twist? Did someone at your tailgate try to claim the last slider as their own? Drop a comment below and let me know. And if you’re looking for more game day inspiration, check out my creamy jalapeño popper dip and one-pan ground beef and rice skillet for more crowd-pleasing favorites.
Now go make these sliders, invite some people over, and enjoy the game. You’ve got this.
Frequently Asked Questions
Can I make these sliders ahead of time?
Absolutely. You can assemble the entire dish up to 24 hours in advance, cover it tightly with foil, and refrigerate. When you’re ready to bake, add about 5 extra minutes to the cooking time since everything starts out cold. This is actually my preferred method for tailgates—I assemble everything the night before, then bake right before I head out the door.
Can I use pre-cooked bacon or bacon bits?
You can, but I really don’t recommend it. Fresh-cooked bacon has so much more flavor and a better texture. Pre-cooked bacon tends to be chewy and doesn’t crisp up the same way. If you’re short on time, cook the bacon in the oven while you prep everything else—it only takes about 15 minutes and requires almost no effort.
What’s the best way to reheat leftover sliders?
The oven is your best bet. Preheat to 350°F, place the sliders on a baking sheet, and warm them for 8-10 minutes. The microwave works in a pinch, but the buns will get soft and the bacon loses its crunch. If you’re reheating just one or two, an air fryer at 350°F for 3-4 minutes works beautifully.
Can I use chicken thighs instead of chicken breasts?
Yes, and honestly, I prefer thighs for this recipe. They’re more flavorful and stay juicier during baking. Just make sure the chicken is fully cooked before shredding—thighs need to reach 165°F internally. Dark meat adds richness that pairs perfectly with the bacon and ranch.
How do I keep the bottom buns from getting soggy?
Toasting the bottom buns for 3-4 minutes before adding the filling makes a big difference. Also, make sure your chicken mixture isn’t too wet—if it looks watery, drain off any excess liquid before spreading it on the buns. And let the sliders rest for 5 minutes after baking before cutting them. This gives the filling time to set up instead of soaking into the bread.
Pin This Recipe!

Easy Sheet Pan Bacon Ranch Chicken Sliders: Best Tailgate Recipe

These Easy Sheet Pan Bacon Ranch Chicken Sliders are the ultimate tailgate recipe, combining shredded chicken, crispy bacon, and creamy ranch on soft slider buns, all baked together on one pan for a crowd-pleasing appetizer that disappears in minutes.
- Prep Time: 10 minutes
- Cook Time: 15 minutes
- Total Time: 25 minutes
- Yield: 12 servings 1x
- Category: Appetizer
- Cuisine: American
Ingredients
- 3 cups cooked shredded chicken (about 2 medium chicken breasts or 1 rotisserie chicken)
- 8–10 slices bacon, cooked crispy and crumbled
- 1 (1-ounce) packet ranch seasoning mix
- 4 ounces cream cheese, softened to room temperature
- 1/4 cup sour cream
- 1 1/2 cups shredded cheddar cheese, divided
- 12-count package slider buns (Hawaiian sweet rolls recommended)
- 3 tablespoons melted butter
- Optional: everything bagel seasoning, sesame seeds, or flaky sea salt for topping
Instructions
- Preheat your oven to 375°F. Line a sheet pan with parchment paper or aluminum foil.
- Cook the bacon: Bake at 400°F for 12-15 minutes until crispy. Transfer to a paper towel-lined plate and crumble once cool.
- Make the chicken filling: In a large mixing bowl, combine shredded chicken, softened cream cheese, sour cream, ranch seasoning mix, and about half of the crumbled bacon. Stir until creamy and uniform.
- Prepare the buns: Keeping the slider buns connected as a whole slab, carefully slice them in half horizontally. Place the bottom half on the prepared sheet pan.
- Assemble the sliders: Spread the chicken mixture evenly over the bottom layer of buns. Sprinkle about 1 cup of shredded cheddar cheese over the chicken, then top with remaining crumbled bacon. Place the top half of the buns over everything.
- Brush with butter: Melt 3 tablespoons of butter and brush generously over the tops of the buns. Sprinkle with optional toppings if desired.
- Bake: Place the sheet pan in the preheated oven and bake for 12-15 minutes, until cheese is melted and tops are golden and slightly crispy.
- Rest and serve: Let the sliders rest on the pan for about 5 minutes before slicing. Use a sharp knife to cut between individual sliders, then transfer to a platter.
Notes
Don’t skip softening the cream cheese to avoid lumps. For extra crunch, toast the bottom buns for 3-4 minutes before adding filling. Keep sliders connected until after baking to prevent filling from leaking. Use a rotisserie chicken to save time. If tops brown too quickly, tent with foil. For extra-crispy edges, broil for the last 30 seconds but watch carefully.
Nutrition
- Serving Size: 1 slider
- Calories: 320
- Sugar: 5
- Sodium: 680
- Fat: 19
- Saturated Fat: 9
- Carbohydrates: 22
- Fiber: 1
- Protein: 18
Keywords: sheet pan sliders, bacon ranch chicken sliders, tailgate recipe, game day appetizer, easy sliders, chicken sliders, bacon ranch


