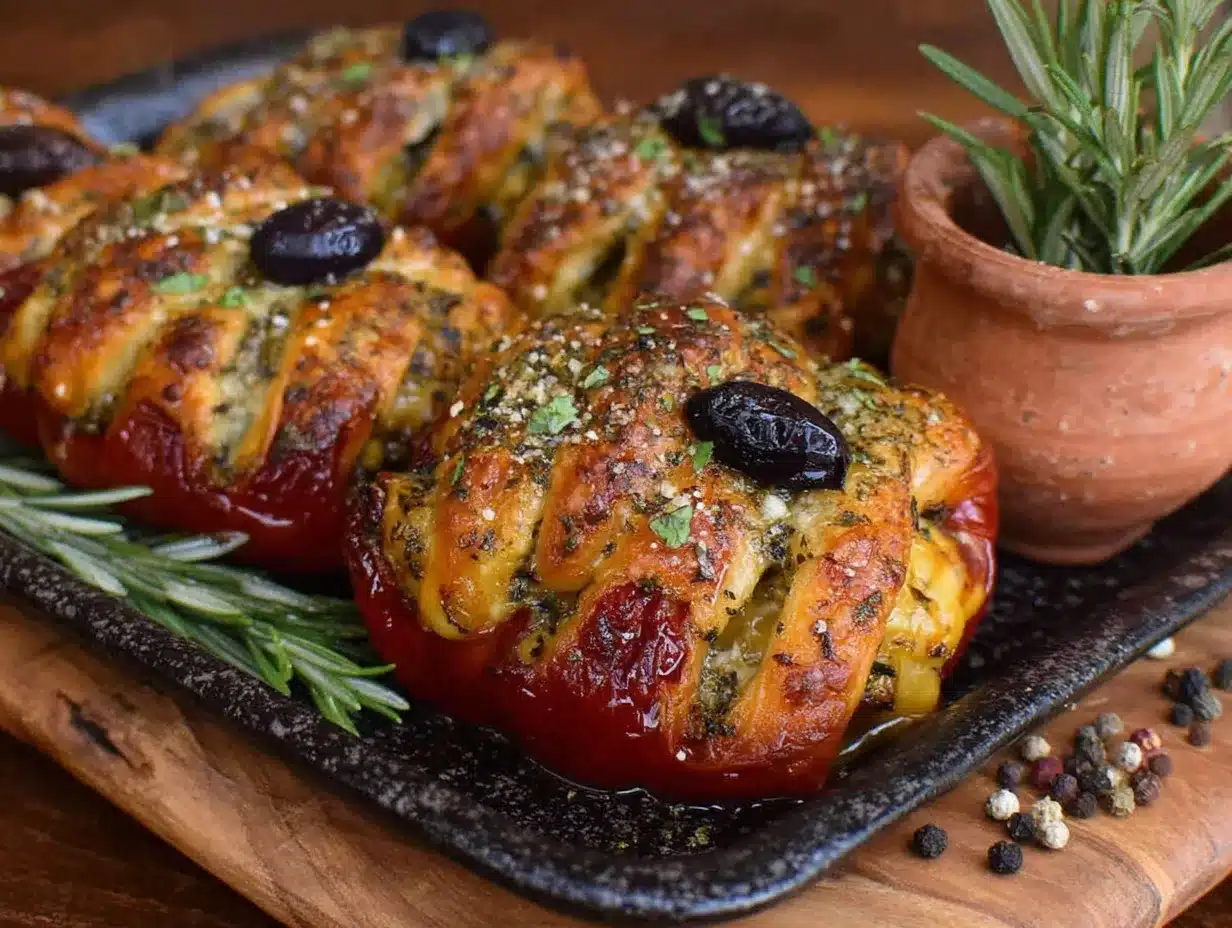
Pulling a baking sheet out of the oven when the timer went off, steam curling around what was supposed to be a normal stuffed pepper, when my youngest squinted and said, “Mom, it looks like a mummy.” And honestly, she wasn’t wrong. The mozzarella had melted and stretched in ragged strips across the top, the black olive eyes I’d absentmindedly pressed in before baking stared back at me, and suddenly a regular Tuesday night dinner became something I wished I’d thought of three weeks ago for Halloween.
That’s how these Spooky Mummy Stuffed Peppers were born. Not from a Pinterest board or a carefully planned holiday menu, but from a weeknight where I needed dinner on the table and my kids needed a reason to be excited about eating bell peppers. Because let’s face it, getting kids to eat vegetables on Halloween week is like asking them to clean their room before the candy haul. It takes a little creativity.
These peppers are basically a full meal wrapped in a disguise. Ground beef or turkey, rice, black beans, corn, and cheese, all stuffed inside a hollowed-out pepper that gets wrapped in mozzarella “bandages” and baked until bubbly. The best part? They taste like comfort food but look like something from a haunted house menu. I’ve made these every October since that accidental discovery, and they’ve become the dinner that gets my kids to the table without complaints, even when they know I’m hiding vegetables in plain sight. Call it Halloween magic or just really good melted cheese.
Why You’ll Love This Recipe
These Spooky Mummy Stuffed Peppers aren’t just a gimmick. They’re actually one of those rare recipes that delivers on both looks and taste without making you sacrifice your sanity. Here’s why they work so well:
- Quick & Easy : From start to finish, you’re looking at about 45 minutes. That’s faster than ordering takeout on Halloween night, especially when you’re juggling costumes and last-minute candy runs.
- Simple Ingredients : Everything in this recipe is stuff you probably already have in your pantry or can grab in one aisle at the grocery store. No fancy trips to specialty shops.
- Perfect for Halloween Dinner : Whether you’re hosting a spooky dinner party or just trying to get the kids to eat before trick-or-treating, these peppers fit the theme without being overly complicated.
- Crowd-Pleaser : I’ve served these to kids, adults, picky eaters, and even my mother-in-law who “doesn’t do themed food.” They all went back for seconds.
- Unbelievably Delicious : The filling is savory and satisfying, the cheese gets all gooey and golden, and the peppers soften just enough to be tender without falling apart. It’s comfort food that happens to look like a Halloween decoration.
What makes these different from every other stuffed pepper recipe out there is the presentation, sure, but also the balance of flavors. I tested this filling about four times before landing on the right ratio of black beans to corn to meat. Too much bean and it gets dry. Too much corn and it’s sweet. This version hits that savory-sweet-smoky spot that makes you close your eyes after the first bite. It’s the kind of dinner that feels special without being stressful, which is exactly what you need on a night when your front door is going to be ringing every ten minutes.
Honestly, I love this recipe because it makes me look like a fun mom without requiring me to be a crafty one. If you can hollow out a bell pepper and shred some mozzarella, you’ve got this.
What Ingredients You Will Need
This recipe uses simple, wholesome ingredients that come together to create something that tastes way more complicated than it actually is. Most of these are pantry staples, which means you can probably make these peppers on a whim without a special grocery trip.
- 4 large bell peppers (any color works, but green gives the most “mummy” vibe since it’s pale and ghostly; red and orange are sweeter if you prefer that)
- 1 pound ground beef (85/20 works well; ground turkey or chicken are great swaps if you want something leaner)
- 1 cup cooked white rice (leftover rice is perfect here; brown rice works too but takes longer to soften in the oven)
- 1 can black beans (15 oz, drained and rinsed; kidney beans or pinto beans are fine substitutes)
- 1 cup frozen corn (no need to thaw; fresh corn cut off the cob works beautifully in summer)
- 1 small yellow onion (diced fine; red onion adds a sharper flavor if that’s what you have)
- 3 cloves garlic (minced; jarred minced garlic works in a pinch, about 1 teaspoon)
- 1 can diced tomatoes (14.5 oz, drained; fire-roasted adds a nice smoky depth)
- 1 teaspoon ground cumin
- 1 teaspoon smoked paprika (regular paprika works, but smoked gives that cozy campfire flavor)
- 1/2 teaspoon chili powder (adjust up or down depending on your heat tolerance)
- Salt and black pepper (to taste; I usually do about 1 teaspoon salt and 1/2 teaspoon pepper)
- 2 cups shredded mozzarella cheese (low-moisture, part-skim is best for melting; fresh mozzarella gets too watery)
- 8-10 black olives (sliced into rounds for the mummy eyes; you can also use sliced black olive rings)
- 2 tablespoons olive oil
For the optional tomato sauce base:
- 1 cup marinara sauce (store-bought is fine; I like Rao’s for the clean ingredient list)
- 1/2 teaspoon dried oregano
- 1/4 teaspoon red pepper flakes (optional, for heat)
A few notes on ingredients. I recommend using low-moisture mozzarella for the “bandages” because it melts into those lovely stretchy strips without releasing too much water. Fresh mozzarella will work, but you’ll want to pat it dry with paper towels first or your peppers might end up sitting in a puddle. For the ground beef, if you’re using a leaner blend like 90/10, add a splash of olive oil to the pan when cooking so the filling doesn’t dry out. And if you want to make this vegetarian, skip the meat entirely and double up on the black beans and corn, maybe add some chopped mushrooms for texture.
Equipment Needed
You don’t need much fancy equipment for these peppers, which is exactly how I like my Halloween recipes. Here’s what you’ll need:
- Large baking dish (9×13 works perfectly; you want something that holds the peppers snugly so they don’t tip over)
- Large skillet (for cooking the filling; any non-stick or stainless steel pan works)
- Sharp knife (for cutting the tops off the peppers and slicing the olives)
- Cutting board
- Mixing bowl (for combining the filling ingredients)
- Measuring cups and spoons
- Cheese grater (if you’re shredding your own mozzarella, which I highly recommend for better melting)
- Small spoon (for scooping out the pepper seeds and membranes)
- Aluminum foil (for covering the dish during the first part of baking)
If you don’t have a 9×13 baking dish, you can use a cast iron skillet or even a rimmed baking sheet. Just make sure the peppers are stable and not rolling around. I’ve also made these in a muffin tin before when I wanted smaller, individual-sized mummy peppers for a party. It worked surprisingly well, just reduce the baking time by about 10 minutes. And if you’re using a glass baking dish, keep in mind that it retains heat longer, so your peppers might continue cooking a bit after you pull them out of the oven. Let them rest for five minutes before serving.
Preparation Method
Alright, let’s get into the step-by-step. This is where the magic happens, and honestly, it’s simpler than you think.
- Preheat your oven to 375°F (190°C). While it’s heating up, bring a large pot of water to a boil. You’re going to blanch the peppers briefly to soften them up so they cook evenly in the oven.
- Prepare the peppers. Cut the tops off each bell pepper about half an inch from the stem. Set the tops aside if you want to use them as little “hats” for serving (my kids love this). Scoop out the seeds and white membranes from inside each pepper using a small spoon. Be gentle — you want the peppers to stay intact. If the peppers are wobbly, slice a tiny bit off the bottom to make them flat, but don’t cut through the walls.
- Blanch the peppers. Drop the hollowed peppers into the boiling water for 3-4 minutes. You want them to soften just slightly, not turn into mush. Use tongs to carefully remove them and set them upside down on a paper towel to drain. This step is optional, but I’ve found it makes a big difference in the final texture. Skipping it can leave you with crunchy peppers that don’t quite soften by the time the filling is done.
- Cook the filling. Heat the olive oil in a large skillet over medium-high heat. Add the diced onion and cook for about 3 minutes until it’s translucent and starting to brown at the edges. Add the minced garlic and cook for another 30 seconds until fragrant. Then add the ground beef, breaking it up with a wooden spoon. Cook until browned, about 6-8 minutes. Drain any excess fat if needed, though I usually skip this step since the fat adds flavor.
- Add the remaining filling ingredients. Stir in the drained black beans, frozen corn, cooked rice, and drained diced tomatoes. Add the cumin, smoked paprika, chili powder, salt, and pepper. Stir everything together and let it cook for about 3-4 minutes so the flavors meld. Taste it and adjust the seasoning. This is your chance to fix it before it goes into the oven.
- Stuff the peppers. Place the blanched peppers upright in your baking dish. If you’re using the tomato sauce base, spread the marinara mixed with oregano and red pepper flakes across the bottom of the dish first. Then spoon the filling into each pepper, packing it gently but firmly. Don’t overstuff or the peppers will split. You want the filling to be level with the top of the pepper, maybe slightly mounded.
- Create the mummy bandages. This is the fun part. Take your shredded mozzarella and lay strips of it across each pepper, going in different directions to mimic mummy wrappings. Leave small gaps for the eyes. Don’t cover the entire pepper — you want some of the green or red to show through so it looks like a wrapped mummy. I usually do about 4-5 strips per pepper, crisscrossing them loosely.
- Add the eyes. Press two olive slices into the cheese on each pepper where you want the eyes to be. They should stick out slightly, giving your mummy that classic startled Halloween look. If the olives keep falling off, press them into the filling through the cheese layer.
- Bake. Cover the baking dish with aluminum foil and bake for 20 minutes. Then remove the foil and bake for another 10-15 minutes until the cheese is melted, bubbly, and starting to brown in spots. The peppers should be tender when pierced with a fork.
- Rest and serve. Let the peppers sit for 5 minutes before serving. This helps the filling set and keeps the mummies from collapsing when you cut into them. Serve with the tomato sauce from the bottom of the dish spooned over the top if you used it.
A quick note on timing. The filling can be made a day ahead and stored in the fridge, which makes Halloween night assembly a breeze. Just reheat it slightly before stuffing the peppers so everything cooks evenly. And if you’re short on time, you can skip the blanching step, but add 10 minutes to the covered baking time. Your peppers will be slightly firmer, but still delicious.
Cooking Tips & Techniques
After making these peppers about a dozen times across different ovens and seasons, I’ve picked up a few tricks that make the process smoother and the results more reliable.
First, don’t skip the step where you drain the diced tomatoes. I learned this the hard way. The first time I made these, I dumped the whole can in without draining and ended up with soupy filling that made the peppers soggy. Now I always drain them well, and sometimes I even give them a gentle squeeze over the sink to get rid of extra liquid. Same goes for the black beans — rinse and drain thoroughly.
Second, if you want extra-crispy cheese bandages with those beautiful browned edges, switch your oven to broil for the last 2-3 minutes of baking. Watch it closely though. Broiling can go from perfect to burnt in about 30 seconds, and there’s nothing sadder than a charred mummy. I usually stand right in front of the oven door and don’t walk away.
Third, use room temperature cheese. Cold cheese straight from the fridge doesn’t melt as evenly and can leave you with clumpy bandages instead of smooth, stretchy ones. Let the shredded mozzarella sit on the counter for about 15 minutes before you start assembling. This is one of those small details that makes a noticeable difference.
Fourth, if your peppers keep tipping over in the baking dish, you can nestle them against each other or use crumpled aluminum foil as little supports around the base. I’ve also used small ramekins placed upside down between peppers to keep them upright. It looks a little ridiculous, but it works.
Finally, don’t stress about the mummy faces looking perfect. The first batch I made looked more like confused ghosts than mummies, and my kids still loved them. The uneven cheese strips and slightly crooked olive eyes add character. Honestly, the wonkier they look, the more Halloween-y they feel. There’s something charming about a mummy pepper that looks like it just rolled out of a sarcophagus after a thousand years.
Variations & Adaptations
One of the best things about this recipe is how flexible it is. You can change almost everything about it and still end up with something delicious that looks like a mummy. Here are a few variations I’ve tried and loved:
Vegetarian Mummy Peppers. Skip the ground beef and add an extra can of black beans plus a cup of finely chopped mushrooms. Sauté the mushrooms with the onions until they release their liquid and start to brown. The texture is surprisingly meaty, and the mushrooms add that umami depth that makes you forget there’s no meat. I’ve also used crumbled firm tofu seasoned with soy sauce and smoked paprika, and it worked beautifully.
Spicy Southwest Version. Add a diced jalapeño (seeds removed if you want less heat) to the onion mixture, swap the diced tomatoes for a can of Rotel, and use pepper jack cheese instead of mozzarella for the bandages. The pepper jack melts just as well and adds a nice kick. Top with fresh cilantro and a squeeze of lime before serving. This version is my personal favorite when I’m making dinner just for the adults.
Low-Carb/Keto Adaptation. Omit the rice entirely and replace it with riced cauliflower that you’ve sautéed to remove excess moisture. Use ground beef or turkey with a higher fat content. The filling will be a little less cohesive, but the cheese bandages hold everything together. Each pepper ends up with about 8-10 grams of net carbs depending on the size of the pepper.
Cheesy Chicken Mummies. Swap the ground beef for shredded rotisserie chicken. Mix the chicken with the black beans, corn, and a little cream cheese for extra richness. This version comes together even faster since the chicken is already cooked. It’s also a great way to use up leftover roast chicken from earlier in the week.
Gluten-Free Option. This recipe is naturally gluten-free as written, but double-check your diced tomatoes and spices for any hidden gluten. Some spice blends contain wheat flour as an anti-caking agent. I like using Simply Organic or Morton & Bassett brands for peace of mind.
If you’re looking for other Halloween-themed recipes to round out your spooky dinner, I’ve got you covered. This Halloween Spider Web Chocolate Bark is the perfect dessert to follow these mummy peppers, and it takes about 15 minutes to throw together. For a savory side, these football-shaped treats work just as well for a Halloween party if you swap the football decorations for spider rings or candy eyes.
Serving & Storage Suggestions
These mummy peppers are best served warm, straight from the oven, when the cheese is still stretchy and the filling is piping hot. I like to let them rest for exactly 5 minutes before serving — any longer and the cheese starts to set, any shorter and the filling might burn someone’s mouth. Trust me on this one. I’ve served them too early and watched my husband do the hot-mouth dance.
For presentation, arrange the peppers on a platter with a little pool of marinara sauce underneath. You can scatter some fresh basil leaves around for color contrast, or go full Halloween with fake spider webs and plastic spiders on the plate. My kids love when I serve these with a side of “witches’ brew” (green punch or limeade) and a bowl of “monster fingers” (breadsticks).
These peppers pair beautifully with a simple side salad dressed with lime vinaigrette, or with some crusty bread to soak up any extra sauce from the bottom of the dish. If you’re serving them as part of a Halloween spread, consider adding a pot of roasted tomato basil soup on the side. The colors are perfect for the theme, and the soup adds warmth without taking over the meal.
Storage: Leftover stuffed peppers keep well in the refrigerator for up to 4 days. Store them in an airtight container with the sauce separate if possible. The peppers will soften more over time, but the flavors actually get better as they meld together. I often make a double batch on purpose just for leftovers.
Freezing: These freeze beautifully. Assemble the peppers completely but don’t bake them. Wrap each pepper individually in plastic wrap, then place them in a freezer bag. They’ll keep for up to 3 months. When you’re ready to eat, thaw them in the refrigerator overnight, then bake as directed, adding about 10 minutes to the covered baking time.
Reheating: The best way to reheat a single pepper is in the microwave for about 2 minutes, but the cheese won’t be as crispy. For that fresh-baked texture, reheat in a 350°F oven for 15-20 minutes, covered with foil. The cheese will re-melt and the edges will crisp up again. If the pepper looks dry, add a tablespoon of water or sauce to the dish before reheating.
Nutritional Information & Benefits
These stuffed peppers aren’t just fun to look at — they’re actually pretty good for you, especially compared to most Halloween dinner options. Here’s the estimated breakdown for one pepper made with ground beef and mozzarella:
| Nutrient | Amount per Pepper |
|---|---|
| Calories | 385 |
| Protein | 28g |
| Carbohydrates | 32g |
| Fiber | 8g |
| Fat | 16g |
| Saturated Fat | 7g |
| Sodium | 680mg |
Bell peppers are an excellent source of vitamin C — one pepper contains more than double the recommended daily intake. They’re also packed with vitamin A, which is great for eye health, and antioxidants that help reduce inflammation. Black beans add fiber and plant-based protein, while the corn brings B vitamins and a little natural sweetness. Even the cheese contributes calcium and protein, so this is one of those rare dinners that feels indulgent but actually delivers real nutrition.
If you’re watching your sodium, you can use no-salt-added diced tomatoes and black beans, and reduce the added salt in the filling. The spices provide plenty of flavor without relying on salt. And if you’re serving these to kids, the protein and fiber will keep them full through the sugar rush of trick-or-treating, which is honestly a parenting win.
Conclusion
These Spooky Mummy Stuffed Peppers have become a Halloween tradition in my house, and I think they deserve a spot in yours too. They’re the kind of recipe that makes you feel like you did something special for the holiday without spending hours in the kitchen or buying a bunch of specialty ingredients. The kids get excited about the mummy faces, the adults get a genuinely good dinner, and everyone leaves the table full and happy.
What I love most about this recipe is how adaptable it is. You can make it as spicy or mild as you want, swap in whatever protein or beans you have on hand, and dress it up or down depending on the occasion. It works for a casual family dinner, a Halloween party, or even a meal prep lunch that happens to look festive. And if your mummies turn out a little lopsided or the cheese bandages slide off in the oven, that’s okay. They’re supposed to look a little rough around the edges. That’s the whole point.
I’d love to hear how yours turn out. Did your kids help with the olive eyes? Did you try a fun variation? Drop a comment below and let me know. And if you’re looking for more easy, family-friendly Halloween recipes, don’t forget to check out that spider web chocolate bark for dessert. Happy Halloween, and happy cooking!
Frequently Asked Questions
Can I make these mummy stuffed peppers ahead of time?
Absolutely. You can assemble the peppers completely up to 24 hours in advance and keep them covered in the refrigerator. Just add about 10 minutes to the covered baking time since you’re starting from cold. You can also prep the filling separately and stuff the peppers right before baking.
What if I don’t have black olives for the eyes?
No problem at all. You can use sliced green olives, capers, or even small pieces of sun-dried tomato. For a less traditional look, try using candy eyes from the baking aisle. They won’t melt in the oven, so just press them into the cheese after baking for the same spooky effect.
Can I use different types of cheese for the bandages?
Yes, but mozzarella works best because it melts into those stretchy, stringy strips that look like mummy wrappings. Provolone is a decent substitute, and provolone melts similarly. Cheddar or Colby Jack will work but won’t give you the same “bandage” look since they melt more flatly.
How do I keep the peppers from falling over in the baking dish?
Cut a thin slice off the bottom of each pepper to create a flat surface. If they’re still wobbly, arrange them close together in the dish so they support each other. You can also use crumpled foil as little props around the base of each pepper.
Can I make these in an air fryer?
You can, but you’ll need to adjust the method. Cook the filling first, stuff the peppers, then air fry at 350°F for about 12-15 minutes. Add the cheese bandages during the last 5 minutes so they melt without burning. The peppers won’t be as tender as oven-baked ones, but they’ll still be delicious and the cheese gets extra crispy.
Pin This Recipe!
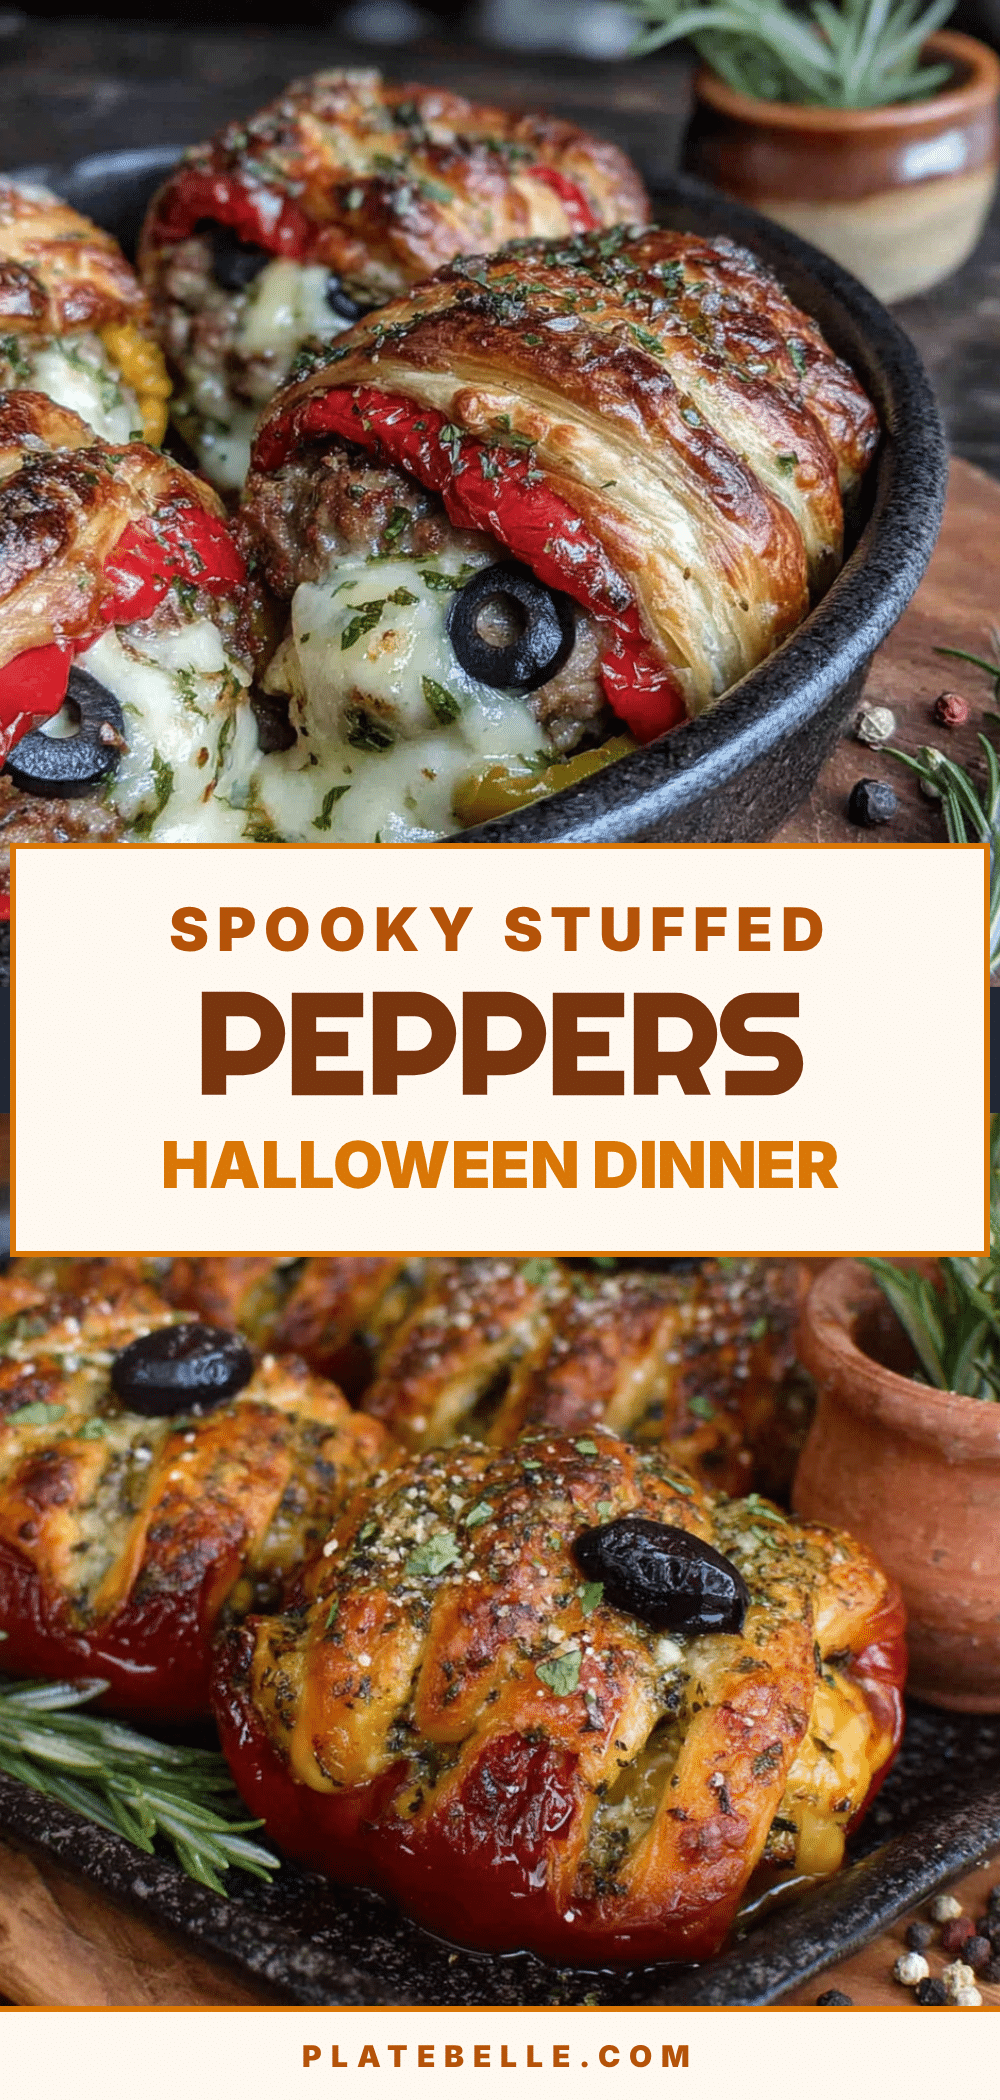
Spooky Mummy Stuffed Peppers: Easy Halloween Dinner Recipe
These Spooky Mummy Stuffed Peppers are a fun and delicious Halloween dinner that kids and adults will love. Bell peppers are stuffed with a savory mix of ground beef, rice, black beans, corn, and cheese, then wrapped in mozzarella ‘bandages’ and baked until bubbly.
- Prep Time: 15 minutes
- Cook Time: 30 minutes
- Total Time: 45 minutes
- Yield: 4 servings 1x
- Category: Main Course
- Cuisine: American
Ingredients
- 4 large bell peppers (any color, green gives the most ‘mummy’ vibe)
- 1 pound ground beef (85/20 works well; ground turkey or chicken are great swaps)
- 1 cup cooked white rice (leftover rice is perfect; brown rice works too)
- 1 can black beans (15 oz, drained and rinsed)
- 1 cup frozen corn (no need to thaw; fresh corn works beautifully)
- 1 small yellow onion (diced fine)
- 3 cloves garlic (minced)
- 1 can diced tomatoes (14.5 oz, drained; fire-roasted adds smoky depth)
- 1 teaspoon ground cumin
- 1 teaspoon smoked paprika (regular paprika works, but smoked is better)
- 1/2 teaspoon chili powder (adjust to taste)
- Salt and black pepper to taste (about 1 teaspoon salt and 1/2 teaspoon pepper)
- 2 cups shredded mozzarella cheese (low-moisture, part-skim is best)
- 8–10 black olives (sliced into rounds for the mummy eyes)
- 2 tablespoons olive oil
- For the optional tomato sauce base:
- 1 cup marinara sauce
- 1/2 teaspoon dried oregano
- 1/4 teaspoon red pepper flakes (optional, for heat)
Instructions
- Preheat your oven to 375°F (190°C). Bring a large pot of water to a boil.
- Prepare the peppers: Cut the tops off each bell pepper about half an inch from the stem. Scoop out the seeds and white membranes. If the peppers are wobbly, slice a tiny bit off the bottom to make them flat.
- Blanch the peppers: Drop the hollowed peppers into the boiling water for 3-4 minutes. Use tongs to remove them and set them upside down on a paper towel to drain.
- Cook the filling: Heat the olive oil in a large skillet over medium-high heat. Add the diced onion and cook for about 3 minutes until translucent. Add the minced garlic and cook for another 30 seconds. Add the ground beef, breaking it up with a wooden spoon, and cook until browned, about 6-8 minutes. Drain excess fat if needed.
- Add the remaining filling ingredients: Stir in the drained black beans, frozen corn, cooked rice, and drained diced tomatoes. Add the cumin, smoked paprika, chili powder, salt, and pepper. Cook for 3-4 minutes. Taste and adjust seasoning.
- Stuff the peppers: Place the blanched peppers upright in a 9×13 baking dish. If using the tomato sauce base, spread the marinara mixed with oregano and red pepper flakes across the bottom of the dish first. Spoon the filling into each pepper, packing gently but firmly.
- Create the mummy bandages: Lay strips of shredded mozzarella across each pepper in different directions to mimic mummy wrappings. Leave small gaps for the eyes. Use about 4-5 strips per pepper.
- Add the eyes: Press two olive slices into the cheese on each pepper where you want the eyes to be.
- Bake: Cover the baking dish with aluminum foil and bake for 20 minutes. Remove the foil and bake for another 10-15 minutes until the cheese is melted, bubbly, and starting to brown. The peppers should be tender when pierced with a fork.
- Rest and serve: Let the peppers sit for 5 minutes before serving. Serve with the tomato sauce from the bottom of the dish spooned over the top if used.
Notes
The filling can be made a day ahead and stored in the fridge. For extra-crispy cheese bandages, switch to broil for the last 2-3 minutes of baking. Use room temperature cheese for even melting. If peppers tip over, nestle them together or use crumpled foil as supports.
Nutrition
- Serving Size: 1 stuffed pepper
- Calories: 385
- Sugar: 8
- Sodium: 680
- Fat: 16
- Saturated Fat: 7
- Carbohydrates: 32
- Fiber: 8
- Protein: 28
Keywords: Halloween, stuffed peppers, mummy, ground beef, black beans, corn, mozzarella, easy dinner, spooky, kid-friendly