My niece took one look at the tray and screamed. Not a scared scream—a delighted, shrieking, “Auntie, these are disgusting!” kind of scream. And honestly, that’s the highest compliment a Halloween treat can get. I’d spent the afternoon trying to come up with something fun for her annual Halloween party, and these Spooky Witch Finger Pretzel Rods were born out of pure desperation and a half-empty bag of almond slivers. The green-tipped pretzels looked exactly like gnarled, witchy fingers reaching out of a cauldron. I knew I was onto something.
I’m not a big fan of overly complicated Halloween desserts. You know, the ones that require fondant and food coloring and three hours of your life you’ll never get back. These pretzel rods are the opposite of that. They’re quick, they’re creepy, and they actually taste amazing. The salty crunch of the pretzel against the sweet candy coating is a combo that disappears fast. I’ve made them every year since, and they always steal the show.
There’s something deeply satisfying about watching people do a double-take. They reach for a “finger,” then pause, then laugh. It’s a little moment of Halloween magic that doesn’t require a costume or a haunted house. Just a few ingredients and a willingness to get a little weird with your food. Trust me on this one.
Why You’ll Love This Recipe
These Spooky Witch Finger Pretzel Rods aren’t just cute—they’re genuinely easy. I’ve tested them with kids, with my sister who claims she can’t bake, and even at a grown-up Halloween party where they were the first thing to disappear. Here’s why they work so well:
- Quick & Easy: You can make a whole batch in under 30 minutes. No baking, no complicated steps. Just dip, decorate, and let them set.
- Simple Ingredients: You only need a few things—pretzel rods, green candy melts, a little butter, and sliced almonds. Chances are you already have most of them in your pantry.
- Perfect for Halloween Parties: Whether it’s a classroom party, a spooky movie night, or a trick-or-treat alternative, these fingers fit right in. They’re portable, too.
- Crowd-Pleaser: Kids love the gross-out factor. Adults love the salty-sweet crunch. Honestly, I’ve never seen anyone turn one down.
- Unbelievably Delicious: That combination of crunchy pretzel, creamy green candy coating, and buttery almond “nail” is just… chef’s kiss. It’s addictive.
What makes these different from other Halloween treats? It’s the texture. The pretzel stays crunchy, the candy coating firms up with a slight snap, and the almond adds that real-finger feel. No soggy, sad snacks here. Plus, you can customize the color—use white chocolate with green food coloring, or go for a ghostly white finger instead. I’ve even made a version with dark chocolate for a “dirtier” finger look. It’s your spooky kitchen, after all.
What Ingredients You Will Need
This recipe uses simple, straightforward ingredients to create maximum creepy effect. The magic is in the combination—salty, sweet, and a little bit weird.
- Pretzel rods (1 package, about 12-16 rods): Look for thick, sturdy pretzel rods. Thin ones break too easily when you’re coating them. I like the brand Snyder’s of Hanover—they’re consistently crunchy and hold up well to dipping.
- Green candy melts (1 cup): These are the easiest way to get that witchy green color. Wilton makes a good green candy melt that melts smoothly. If you can’t find green, use white chocolate chips or vanilla candy melts and add green gel food coloring. Avoid liquid food coloring—it can seize the chocolate.
- Coconut oil or vegetable shortening (1 tablespoon): This helps thin out the candy melts for a smoother dip. It also gives the coating a nice sheen. You can skip it if your candy melts are already thin, but I find it helps prevent clumps.
- Sliced almonds (about 24-32, one per finger): These become the fingernails. Look for whole sliced almonds, not slivered. You want a nice, wide shape that looks like a nail. I prefer raw almonds, but roasted and salted work too—just be aware they’ll add a little extra saltiness.
- Optional: Red food coloring or red gel (for “blood” effect): A tiny dab at the cuticle area or a drip down the side makes them extra gruesome. Totally optional, but kids love it.
- Optional: Sprinkles or edible glitter (for a magical touch): If you want a more playful, less scary look, add some Halloween sprinkles before the coating sets. I’ve done orange and black sprinkles for a friend’s party, and they were a hit.
That’s it. No weird ingredients, no exotic spices. Just stuff you can find at any grocery store or online. The almonds are the key—they really sell the finger illusion. I’ve tried using slivered almonds, and they just look like sad little splinters. Stick with the whole slices.
Equipment Needed
You don’t need a professional pastry kit for these. Here’s what you’ll actually use:
- Microwave-safe bowl or double boiler: For melting the candy melts. I use a glass measuring cup—it’s deep enough for dipping but narrow so the coating stays deep.
- Baking sheet lined with parchment paper or wax paper: This is where your finished fingers will set. Parchment is best because the candy won’t stick.
- Small spatula or spoon: For stirring the melts and helping coat the pretzels.
- Knife or small offset spatula: For spreading a little melted candy on the almond “nail” to help it stick. A butter knife works fine too.
- Toothpick or skewer: For creating the knuckle lines and other witchy details on the coating.
- Piping bag or small zip-top bag (optional): If you want to pipe extra details like “wrinkles” or “blood” on the fingers. Not necessary, but fun.
- Refrigerator space: You’ll need to chill the pretzels for about 10-15 minutes to set the coating. Make sure you have room on a shelf.
I’ve made these with just a bowl, a spoon, and a plate. You really don’t need fancy equipment. If you don’t have parchment paper, wax paper works fine. In a pinch, I’ve even used a silicone baking mat—just make sure the coating doesn’t stick by lightly greasing it.
Preparation Method
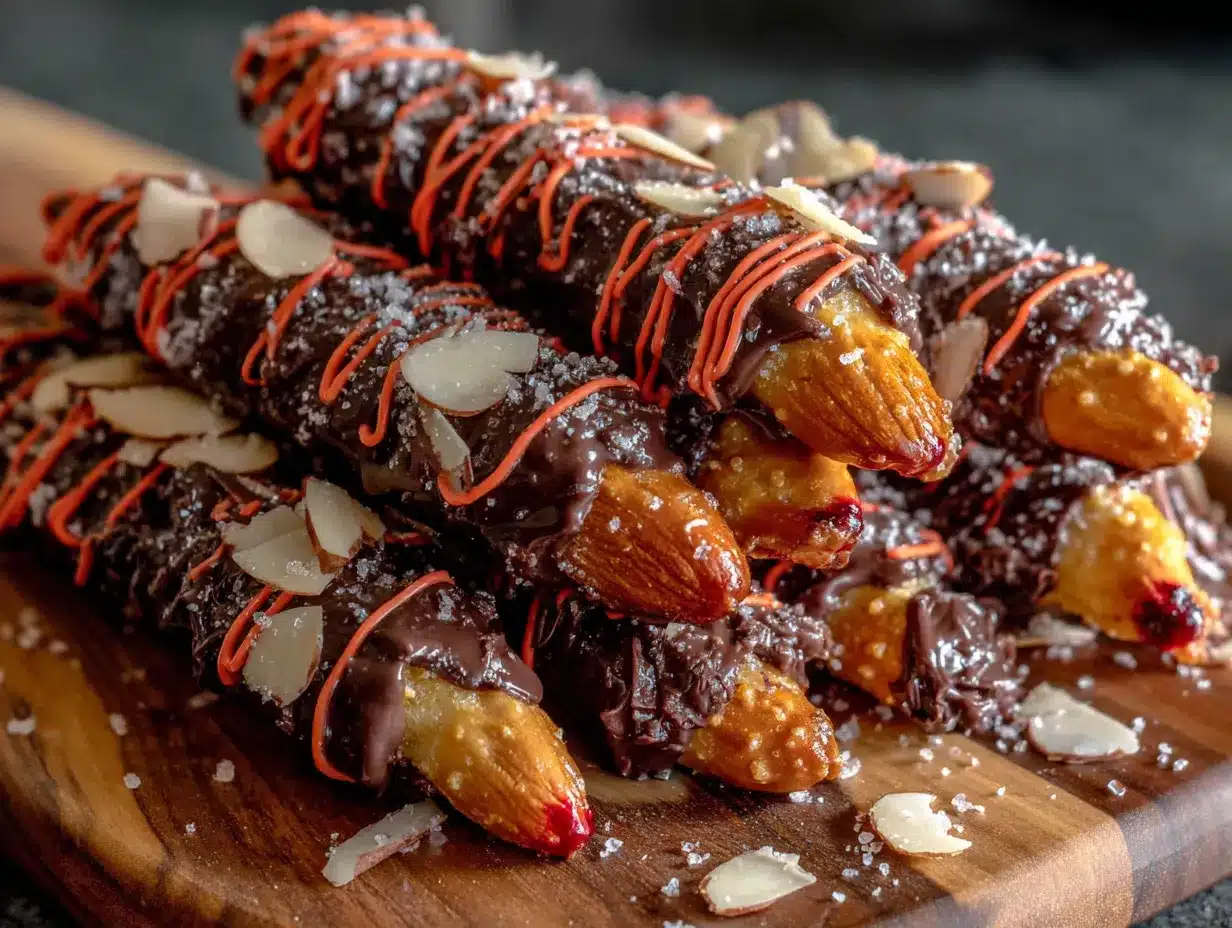
Let’s get creepy. Follow these steps, and you’ll have a tray of witch fingers in no time. I’ve included all the little tricks I’ve learned from making these year after year.
- Prep your workstation. Line a baking sheet with parchment paper. Lay out your pretzel rods, sliced almonds, and candy melts. Make sure everything is within reach—once you start dipping, you don’t want to be hunting for an almond.
- Melt the candy coating. Place the green candy melts and 1 tablespoon of coconut oil in a microwave-safe bowl. Microwave in 30-second intervals, stirring well after each, until completely smooth. This usually takes about 1.5 to 2 minutes total. Don’t overheat—candy melts can seize and turn into a lumpy mess. If that happens, add another teaspoon of coconut oil and stir vigorously. (I’ve done this. It’s fixable, but annoying.)
- Dip the pretzel rods. Hold a pretzel rod by one end and dip it into the melted candy, leaving about an inch undipped at the top (this will be the “wrist” area). Twirl the pretzel as you lift it out to let excess coating drip off. You want a nice, even layer—not too thick, or it’ll look clumpy. Place the dipped pretzel on the parchment paper.
- Attach the fingernail. While the coating is still wet, press a sliced almond onto the tip of the pretzel, with the pointed end facing outward. Gently press it down so it sticks. The almond should look like a nail growing out of the finger. If the coating has started to set, dip the back of the almond in the melted candy first, then attach it.
- Create the knuckle lines. Use a toothpick or skewer to gently drag lines across the coating to create knuckle wrinkles. I usually make 2-3 lines about halfway down the pretzel. You can also add a small dot of red food coloring at the “cuticle” area for a bloody effect. Don’t overdo it—a little goes a long way.
- Add details (optional). If you want extra creepy details, use a toothpick to drag a little more coating down the sides to look like warts or wrinkles. You can also sprinkle on some edible glitter for a magical twist. I’ve even added a tiny drop of red gel at the tip for a “freshly chopped” look.
- Set the coating. Place the baking sheet in the refrigerator for 10-15 minutes, or until the candy coating is completely firm. Don’t skip this step—it helps the almond stay attached and prevents the coating from smudging when you handle them.
- Repeat with remaining pretzels. Work in batches if your bowl isn’t big enough. You can reuse the melted candy—just reheat it gently if it starts to thicken.
- Serve and spook. Arrange the witch fingers on a platter, maybe with a small bowl of “blood” (raspberry jam or red dipping sauce) on the side. Watch your guests’ reactions. It’s the best part.
A quick note: If your candy coating starts to get too thick as you work, pop it back in the microwave for 10 seconds and stir. It should loosen right up. Also, if the almonds keep falling off, you’re probably not pressing them into wet enough coating. Dip the almond itself in the melted candy before attaching—it acts like glue.
Cooking Tips & Techniques
I’ve made plenty of mistakes so you don’t have to. Here’s what I’ve learned:
- Don’t overheat the candy melts. This is the number one mistake. High heat makes them seize into a grainy, unworkable paste. Low and slow is the way to go. If they do seize, a teaspoon of coconut oil can sometimes save them.
- Work in a cool, dry environment. Humidity is the enemy of candy coating. If your kitchen is steamy (like after boiling pasta), the coating can get sticky and never fully set. I’ve had to redo a batch because of this—annoying, but now I know.
- Use a deep container for dipping. A tall, narrow glass or a small measuring cup works best. It lets you dip the whole pretzel at once without wasting coating. A wide bowl means you’ll need more candy to get the same depth.
- Let the coating set completely before moving. If you try to pick them up too soon, you’ll leave fingerprints (pun intended) in the coating. The fridge is your friend here. Ten minutes is usually enough, but if your kitchen is warm, give it fifteen.
- Make extra almonds. Some almonds will break or look weird. Have a few extra on hand so you don’t have to stop mid-dip to hunt for a good one. I always buy a small bag and pick out the best-looking slices.
- Practice your knuckle lines. The first few might look more like tree bark than fingers. That’s okay. You’ll get the hang of it after a couple tries. The uneven ones actually look more realistic—witch fingers aren’t supposed to be perfect.
Variations & Adaptations
These witch fingers are endlessly customizable. Here are a few ways I’ve switched them up:
- White Chocolate Ghost Fingers: Use white candy melts instead of green. Add a tiny dollop of black frosting or a mini chocolate chip for a “ring” effect. They look like undead fingers reaching out of a grave. Creepy in a different way.
- Dark Chocolate “Dirt” Fingers: Dip the pretzels in dark chocolate, then roll them in crushed Oreo crumbs or chocolate sprinkles before the coating sets. The texture is amazing, and they look like they’ve been dug up from the garden. I made these for a “witch’s garden” party, and they were a hit.
- Spicy Witch Fingers: Add a pinch of cayenne pepper or chili powder to the melted candy coating. The heat cuts through the sweetness and gives the fingers a little kick. It’s unexpected but really good. Start with 1/8 teaspoon and adjust to taste.
- Nut-Free Version: Instead of almonds, use a small piece of dried apple or a banana chip for the nail. You can also use a sliver of white chocolate that’s been shaped into a nail. The texture is different, but it still looks the part.
- Vegan Option: Use vegan dark chocolate chips or vegan candy melts. Most candy melts are accidentally vegan (check the label), but some contain milk solids. Coconut oil is already plant-based, so you’re good there. Skip the butter if your recipe calls for it.
- Bloody Fingers: After the coating sets, drizzle a little red candy melt or strawberry syrup down the side for a bloody effect. I’ve also used raspberry jam thinned with a drop of water. It’s messy but very Halloween.
My personal favorite variation? I once made a batch with a mix of green and white melts, swirled together, so each finger had a unique, marbled look. They were like a coven of witches, each with their own style. Took a little extra time, but totally worth it.
Serving & Storage Suggestions
These witch fingers are best served at room temperature. The candy coating should be firm but not rock-hard. If you’ve stored them in the fridge, let them sit out for about 5 minutes before serving—they’ll have a better texture.
For presentation, I like to arrange them on a black platter or a dark-colored cake stand. You can also stand them up in a small jar or vase (filled with sugar or candy corn to hold them in place) so they look like a hand reaching up. A little dry ice around the base adds a spooky fog effect—just be careful handling it.
They pair well with other Halloween treats. I’ve served them alongside a batch of spider web chocolate bark for a full spooky spread. The combination of salty pretzels and sweet bark is hard to beat. For a savory option, try them with a side of jalapeño popper dip—the heat contrasts nicely with the sweet coating.
Storage: Keep the witch fingers in an airtight container at room temperature for up to 5 days. If your kitchen is warm, store them in the refrigerator—they’ll last up to 2 weeks. Just let them come to room temperature before serving to avoid condensation on the coating.
Freezing: You can freeze these for up to 3 months. Place them in a single layer on a baking sheet and freeze until solid, then transfer to a freezer-safe bag or container. Thaw at room temperature for about 30 minutes before serving. The coating might get a little dull, but the taste is still great.
One note: The pretzels can soften slightly over time, especially if stored in a humid environment. If you’re making them ahead for a party, I recommend storing them in a cool, dry place and adding the almonds right before serving for maximum crunch.
Nutritional Information & Benefits
Let’s be honest—these are a treat, not a health food. But here’s the breakdown so you know what you’re getting into. Per serving (one witch finger pretzel rod):
- Calories: Approximately 120-150
- Fat: 6-8g (mostly from the candy coating and almonds)
- Carbohydrates: 15-18g (from the pretzel and sugar in the coating)
- Protein: 2-3g (from the pretzel and almonds)
- Fiber: 1g
- Sugar: 8-10g (depending on the candy coating used)
The almonds do offer some nutritional value—they’re a good source of vitamin E, healthy fats, and a little protein. The pretzel provides some carbohydrates for quick energy. But really, these are about fun and flavor, not daily nutrition. They’re a great occasional treat for Halloween parties, movie nights, or any time you want to add a little spooky fun to your day.
If you’re watching your sugar intake, you can use sugar-free candy melts or dark chocolate with a higher cocoa content. The almonds also add a little healthy fat that can help slow down sugar absorption. For a lower-carb option, use a small piece of cheese or a pickle spear instead of the pretzel—though honestly, that’s a whole different recipe.
Conclusion
These Spooky Witch Finger Pretzel Rods are exactly what Halloween treats should be—fun, easy, and just a little bit creepy. They come together in minutes, use simple ingredients, and always get a reaction. Whether you’re making them for a classroom party, a spooky movie marathon, or just because you want to eat something that looks like a witch’s hand, they deliver.
I love that they’re customizable. You can make them as scary or as silly as you want. Add blood, skip the blood, use different colors, go nut-free—it’s your kitchen. The base recipe is forgiving and foolproof. Even if your first few fingers look more like alien tentacles than witch fingers, they’ll still taste amazing.
So go ahead. Get weird with your food. Make a batch of these fingers, arrange them on a platter, and watch your friends and family do a double-take. Then watch them reach for another one. That’s the best part.
If you make these, I’d love to hear about it. Drop a comment below and tell me how they turned out—did you make them extra bloody? Add sprinkles? Use a different color? Share your spooky creations. And if you’re looking for more Halloween fun, check out my football-shaped Rice Krispie treats for a game-day twist, or the pumpkin cheesecake for a more elegant fall dessert. Happy Halloween, and happy snacking!
Frequently Asked Questions
Can I use white chocolate instead of candy melts?
Yes, absolutely. White chocolate chips or bars work fine. Just add a little coconut oil to thin it out, and use green gel food coloring to get the witchy shade. Avoid liquid food coloring—it can make the chocolate seize. White chocolate has a slightly different texture than candy melts, but it tastes great.
How far in advance can I make these?
You can make them up to 5 days ahead if stored in an airtight container at room temperature. For longer storage, freeze them for up to 3 months. Just let them thaw at room temperature before serving. I’ve made them a week ahead for a party, and they were still perfect.
My candy coating is too thick. What do I do?
Add a little more coconut oil or vegetable shortening—about 1 teaspoon at a time—and stir well. You can also warm it gently in the microwave for 5-10 seconds. Don’t add water, milk, or butter, as these can cause the coating to seize. If it’s already seized, try adding a teaspoon of coconut oil and stirring vigorously—sometimes it’s salvageable.
Can I make these without almonds for a nut-free version?
Definitely. Use a small piece of dried apple, a banana chip, or a sliver of white chocolate shaped into a nail. You can also use a small piece of fruit leather or a candy corn for a colorful nail. The texture will be different, but the visual effect is still creepy and fun.
How do I make the fingers look more realistic?
Focus on the knuckle lines. Use a toothpick to drag 2-3 lines across the coating while it’s still wet. You can also add a small dab of red food coloring at the base of the almond for a “cuticle” effect. For extra realism, vary the length of the pretzels—break a few in half for shorter fingers. No two witch fingers should look exactly alike.
Pin This Recipe!

Spooky Witch Finger Pretzel Rods: Easy Halloween Treat

These Spooky Witch Finger Pretzel Rods are quick, creepy, and delicious—salty pretzel rods dipped in green candy coating with almond fingernails. Perfect for Halloween parties, they come together in under 30 minutes with simple ingredients.
- Prep Time: 15 minutes
- Cook Time: 0 minutes
- Total Time: 25 minutes
- Yield: 12-16 servings 1x
- Category: Dessert
- Cuisine: American
Ingredients
- 1 package pretzel rods (about 12–16 rods)
- 1 cup green candy melts
- 1 tablespoon coconut oil or vegetable shortening
- 24–32 sliced almonds (one per finger)
- Optional: red food coloring or red gel (for blood effect)
- Optional: sprinkles or edible glitter (for magical touch)
Instructions
- Prep your workstation: Line a baking sheet with parchment paper. Lay out pretzel rods, sliced almonds, and candy melts.
- Melt the candy coating: Place green candy melts and 1 tablespoon coconut oil in a microwave-safe bowl. Microwave in 30-second intervals, stirring well after each, until completely smooth (about 1.5 to 2 minutes total).
- Dip the pretzel rods: Hold a pretzel rod by one end and dip it into the melted candy, leaving about an inch undipped at the top (the wrist area). Twirl as you lift to let excess drip off. Place on parchment paper.
- Attach the fingernail: While coating is still wet, press a sliced almond onto the tip with pointed end outward. If coating has started to set, dip the back of the almond in melted candy first.
- Create knuckle lines: Use a toothpick or skewer to gently drag 2-3 lines across the coating to create knuckle wrinkles. Optionally add a small dot of red food coloring at the cuticle area.
- Add details (optional): Use a toothpick to drag extra coating down sides for warts or wrinkles. Add edible glitter or a tiny drop of red gel at the tip for a bloody effect.
- Set the coating: Place baking sheet in refrigerator for 10-15 minutes until candy coating is completely firm.
- Repeat with remaining pretzels: Work in batches if needed. Reheat melted candy gently if it thickens.
- Serve and spook: Arrange witch fingers on a platter, optionally with a small bowl of raspberry jam or red dipping sauce.
Notes
Don’t overheat candy melts—they can seize. Work in a cool, dry environment. Use a deep container for dipping. Let coating set completely before moving. Make extra almonds in case some break. Practice knuckle lines; uneven ones look more realistic.
Nutrition
- Serving Size: 1 pretzel rod
- Calories: 120150
- Sugar: 810
- Sodium: 150200
- Fat: 68
- Saturated Fat: 34
- Carbohydrates: 1518
- Fiber: 1
- Protein: 23
Keywords: Halloween treats, witch fingers, pretzel rods, easy Halloween dessert, no-bake Halloween recipe, spooky snacks, candy melts, almond fingernails


