My husband took a bite of these chicken thighs and just stopped mid-sentence. That pause—the one where someone closes their eyes and forgets they were talking—happened on a random Tuesday night with zero planning involved. I had thrown together what I thought was going to be just another weeknight dinner, and he looked up after that first forkful and said, “Wait, what did you do to this chicken?”
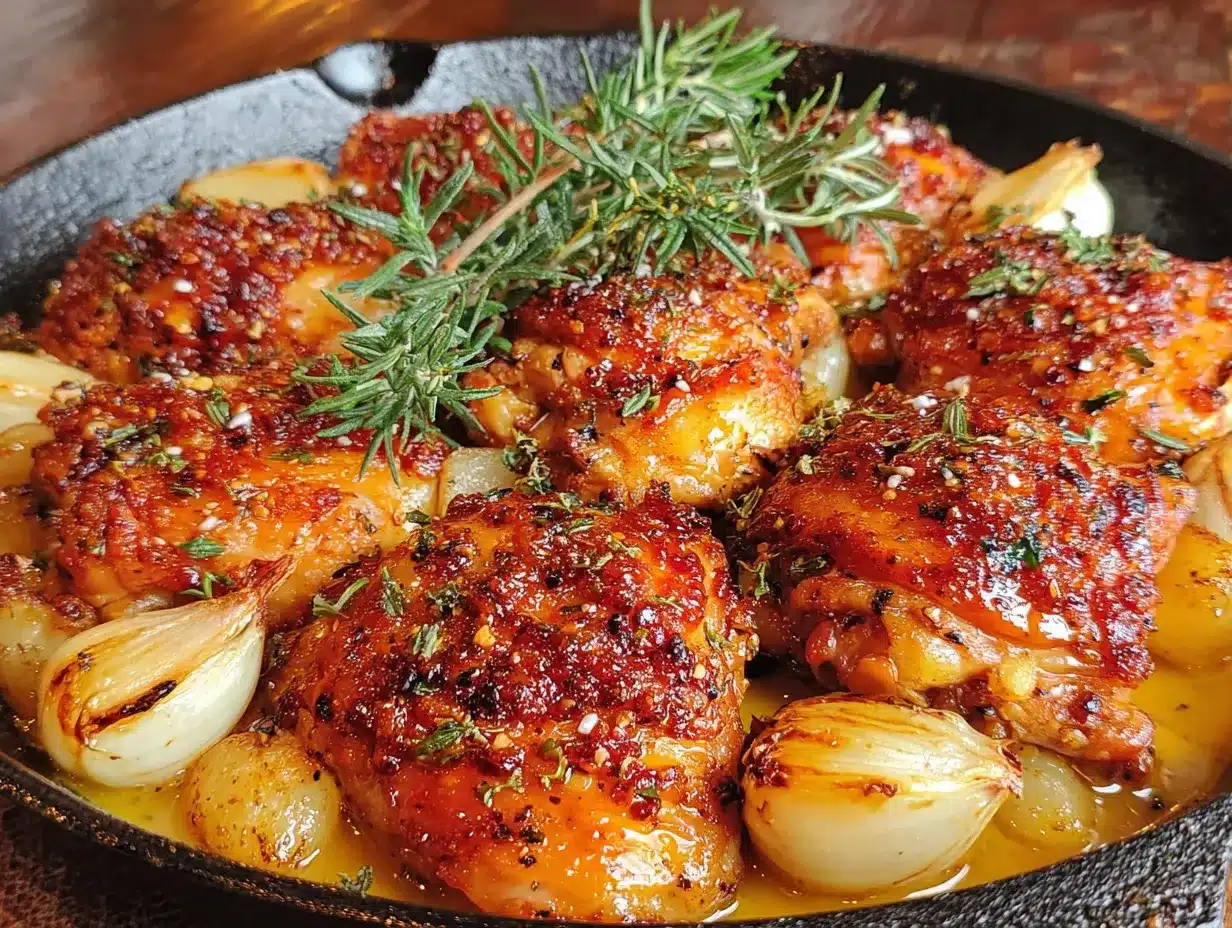
That’s the thing about this recipe. It doesn’t try to be impressive. It just is. The skin turns shatteringly crisp without any dredging or flipping halfway through. The garlic butter sauce comes together in the same pan while the chicken rests. And the whole thing—from fridge to table—takes about 35 minutes. Honestly, I’ve made more complicated dinners that got a fraction of the reaction.
I’ve tested this method about seven times now, tweaking the heat levels and the timing, trying to get that perfect balance where the skin crackles when you bite into it and the meat underneath stays fork-tender. What I landed on is almost embarrassingly simple. You don’t need a thermometer or a special pan or any technique you haven’t already used a hundred times. You just need patience at the stove and chicken thighs with the skin still on. That’s really the whole secret.
So if you’ve been looking for a dinner that feels like a little more without actually being more work, this is it. The kind of meal that makes a plain Tuesday feel like you planned something special.
Why You’ll Love This Recipe
- One Pan, No Fuss : Everything happens in a single skillet. The chicken gets crispy, the sauce builds right in the pan, and you’re left with one pan to wash instead of a counter full of dishes.
- Restaurant-Quality Skin at Home : That ultra-crispy, golden-brown skin isn’t luck. It comes from a specific technique that uses the chicken’s own fat to fry itself. No deep frying, no complicated breading—just heat and patience.
- Ready in Under 40 Minutes : From the moment you pull the chicken out of the fridge to the moment you’re spooning garlic butter over the top, you’re looking at about 35 minutes. Perfect for busy weeknights when you still want something that feels like a real meal.
- Pantry-Friendly Ingredients : You probably already have garlic, butter, salt, and pepper. If you have chicken thighs and a lemon, you’re basically there. No specialty grocery trips required.
- Naturally Low-Carb and Gluten-Free : There’s no flour in this recipe, no breading, no sugar. It fits into a low-carb or gluten-free lifestyle without tasting like a compromise.
- Built for Leftovers : If you somehow have any left, the chicken reheats beautifully. The sauce stays rich, and the meat doesn’t dry out. I’ve even chopped it up and thrown it over a salad the next day for lunch.
What Ingredients You Will Need
This recipe relies on a short list of ingredients, but each one plays a specific role. The quality of your chicken and your butter matters more here than you might think, so don’t skimp if you can help it.
- Bone-in, skin-on chicken thighs (about 2 pounds, or 4–6 thighs): This is non-negotiable. The bone keeps the meat moist while it cooks, and the skin is what gives you that crackly, crispy exterior. Boneless thighs will cook faster and won’t have the same structure. If you can, look for thighs that have the skin still attached and intact—sometimes grocery stores sell them with the skin partially torn, which makes it harder to get even crispiness. I usually buy from the butcher counter at my local market and ask them to leave the skin on.
- Unsalted butter (4 tablespoons, or 56 grams): Butter is the backbone of the sauce and helps with browning. Using unsalted butter lets you control the salt level. If you only have salted butter, just reduce the added salt by about ¼ teaspoon.
- Garlic (6 cloves, thinly sliced or minced): Fresh garlic is a must here. Pre-minced garlic from a jar tends to burn faster and doesn’t have the same sweet, mellow flavor. Slice the cloves thinly so they cook evenly and don’t scorch before the chicken is done.
- Kosher salt (1½ teaspoons, or 9 grams): You need enough salt to season the skin and the meat underneath. Diamond Crystal kosher salt is my go-to because it’s less salty by volume than Morton’s. If you’re using Morton’s, reduce to about 1 teaspoon.
- Black pepper (½ teaspoon, freshly ground): Freshly cracked pepper adds a subtle heat that cuts through the richness of the butter. Pre-ground pepper works, but it won’t have the same punch.
- Lemon juice (from ½ a lemon, about 1 tablespoon): A squeeze of lemon at the end brightens the whole dish. It balances the fat and keeps the sauce from feeling heavy. Don’t skip it—it’s not optional.
- Fresh parsley or thyme (2 tablespoons, chopped): Fresh herbs add color and a fresh, herbaceous note. Flat-leaf parsley is my favorite here, but thyme or even chives work beautifully.
- Chicken broth or white wine (¼ cup, or 60 ml): This deglazes the pan and becomes the base of your sauce. Chicken broth keeps it simple; dry white wine like Sauvignon Blanc adds a little acidity. Both work, so use what you have.
Equipment Needed
You don’t need a lot of fancy gear for this recipe, but the right pan makes a real difference.
- A 12-inch cast iron skillet or heavy stainless steel pan: Cast iron holds heat evenly and gives you that deep, even browning that nonstick pans just can’t replicate. If you don’t have cast iron, a heavy-bottomed stainless steel skillet works well. Avoid nonstick here—you won’t get the same crust on the skin.
- Tongs: A good pair of metal tongs makes flipping the chicken easy without tearing the skin. Silicone-tipped tongs are fine, but metal ones grip better.
- A sharp knife and cutting board: For mincing garlic and chopping herbs. A microplane also works for garlic if you want it to melt right into the butter.
- A splatter screen (optional but helpful): Chicken skin can pop and splatter as it renders. A splatter screen keeps your stovetop clean without trapping steam, which would make the skin soggy.
- Paper towels: For patting the chicken dry. This step is crucial, so don’t skip it.
I’ve made this recipe in a cheaper stainless steel pan from a big-box store and it still worked fine. The key is making sure the pan is heavy enough to hold steady heat. If your pan is too thin, the chicken will cool the pan down when you add it, and you’ll lose that sizzle.
Preparation Method
- Pat the chicken thighs completely dry. This is the most important step. Use paper towels and press firmly on both sides of each thigh until no moisture remains. If the skin is wet, it will steam instead of sear, and you’ll never get that crispy crust. Let the chicken sit uncovered on a plate for 10 minutes after drying—this helps the surface dry out even more.
- Season generously. Sprinkle the kosher salt and black pepper over both sides of the chicken. Don’t be shy. Most of the seasoning will stay on the skin, and the meat underneath needs enough salt to be flavorful. Rub it in gently with your fingers so it adheres.
- Preheat your pan over medium heat. Place your cast iron skillet on the stove and let it warm up for about 3 minutes. You want the pan hot but not smoking. Add 1 tablespoon of the butter and let it melt. The butter should sizzle gently when it hits the pan—if it browns immediately, the pan is too hot. If it just sits there, it’s not hot enough.
- Place the chicken skin-side down. Lay each thigh into the pan with the skin side facing down. Don’t crowd the pan—if your thighs are touching, use a larger pan or cook in two batches. The chicken needs space for the skin to crisp evenly. Press down gently on each thigh with a spatula for about 10 seconds to ensure full contact with the pan.
- Cook without moving for 10–12 minutes. This is the hardest part. Resist the urge to peek, flip, or adjust the chicken. Let it sit. The skin needs uninterrupted contact with the hot pan to render its fat and turn golden brown. You’ll see the fat pooling around the chicken and the edges of the skin turning deep amber. If you try to flip it too early, the skin will stick and tear.
- Flip and cook the other side. Use tongs to carefully flip each thigh. The skin should be deep golden brown and crispy. Cook for another 6–8 minutes on the second side. The internal temperature should reach 165°F (74°C) when measured at the thickest part of the thigh, not touching the bone.
- Remove the chicken and set aside. Transfer the thighs to a plate and tent loosely with foil. Don’t stack them—keep them in a single layer so the skin stays crisp.
- Make the garlic butter sauce. Pour off all but about 1 tablespoon of the rendered fat from the pan. Leave the browned bits (fond) stuck to the bottom—that’s flavor. Reduce the heat to low and add the remaining 3 tablespoons of butter. Once it melts, add the sliced garlic. Cook for 30–45 seconds, stirring constantly, until the garlic is fragrant but not browned. Garlic burns fast, so keep it moving.
- Deglaze the pan. Pour in the chicken broth or white wine and stir, scraping up the browned bits from the bottom of the pan. Let it simmer for about 1 minute until it reduces slightly. Squeeze in the lemon juice and stir.
- Return the chicken to the pan. Place the thighs back in the skillet, skin-side up. Spoon the garlic butter sauce over the top of each piece. Let everything warm through together for about 2 minutes.
- Garnish and serve. Sprinkle the fresh parsley or thyme over the top and serve immediately. Spoon any remaining sauce from the pan over the chicken at the table.
Cooking Tips & Techniques
I’ve burned my share of garlic butter sauce. It smells awful and there’s no coming back from it. The trick I’ve learned is to add the garlic after you’ve removed the chicken and lowered the heat. If you add garlic to a screaming hot pan, it will go from raw to bitter in about 15 seconds. Low heat, constant stirring, and patience are your friends here.
Another thing I messed up the first few times: I didn’t let the skin render long enough. I was nervous about burning it, so I’d flip the chicken after 6 or 7 minutes, and the skin would be pale and flabby. The magic happens between minutes 8 and 12. That’s when the fat fully renders and the skin tightens and crisps. Trust the process. If your kitchen gets a little smoky, that’s normal—just crack a window.
If you’re using a stainless steel pan and the skin sticks when you try to flip, it’s not ready. Give it another minute or two. The skin will release naturally once it’s properly browned. Forcing it off the pan will tear the skin every time.
For the crispiest results, I sometimes let the salted chicken sit uncovered in the fridge for an hour before cooking. This dries the skin out even further. It’s not required, but if you have the time, it makes a noticeable difference.
If you’re serving this with vegetables, I recommend making something simple like roasted asparagus or a quick green salad. The chicken is rich enough that it doesn’t need a heavy side. I’ve also served it over a bed of arugula with lemon vinaigrette, and it was perfect.
Variations & Adaptations
- Spicy Garlic Butter Version : Add ½ teaspoon of red pepper flakes along with the garlic. The heat cuts through the butter beautifully and gives the dish a little kick. My husband loves this version—he adds extra flakes at the table like a maniac.
- Herb-Infused Butter : Toss a sprig of fresh rosemary or a couple of thyme sprigs into the butter while it melts. Let them infuse for a minute before adding the garlic. The herbs perfume the sauce without being overpowering.
- Dairy-Free Adaptation : Substitute the butter with a high-quality vegan butter or ghee (if you can tolerate clarified dairy). Avocado oil works in a pinch, but you’ll lose some of the richness. The sauce won’t be as thick, but the chicken will still be delicious.
- Oven-Finished Method : After searing the chicken skin-side down for 10 minutes, flip the thighs and transfer the entire pan to a 400°F (200°C) oven for 12–15 minutes. This method is more forgiving if you’re nervous about stovetop timing, and it frees up your hands for making sides.
- Lemon-Herb Variation : Add the zest of one lemon along with the garlic, and use a mix of parsley, dill, and chives for the garnish. The extra lemon brightness makes it feel lighter, almost like a spring dish.
Serving & Storage Suggestions
Serve these chicken thighs hot, straight from the pan, with extra sauce spooned over the top. I like to serve them with crusty bread to soak up the garlic butter, or over a bed of rice or mashed potatoes. If you’re keeping it low-carb, roasted broccoli or a simple cucumber salad works beautifully. For a complete meal that comes together fast, try pairing this with my Quick One-Pan Lemon Garlic Shrimp and Zucchini for a surf-and-turf twist that still uses just one pan.
Leftovers keep well in an airtight container in the refrigerator for up to 4 days. The skin will lose some of its crispness, but the meat stays juicy and the sauce gets even more flavorful as it sits. To reheat, place the chicken in a skillet over medium-low heat with a splash of water or broth. Cover and let it warm through for about 5 minutes. The steam will soften the skin, but the meat will stay tender. If you want to recrisp the skin, pop the thighs under the broiler for 2–3 minutes after reheating.
You can also freeze the cooked chicken. Wrap each thigh individually in plastic wrap, then place them in a freezer-safe bag. They’ll keep for up to 3 months. Thaw overnight in the refrigerator before reheating.
The sauce alone is worth saving. I’ve used leftover garlic butter sauce the next day tossed with pasta or drizzled over steamed vegetables. It’s too good to waste.
Nutritional Information & Benefits
Per serving (based on 4 servings, using bone-in skin-on chicken thighs):
- Calories: 425
- Protein: 32g
- Fat: 32g
- Saturated Fat: 14g
- Carbohydrates: 2g
- Fiber: 0g
- Sugar: 0g
- Sodium: 680mg
Chicken thighs are higher in fat than chicken breasts, but that fat is what keeps the meat moist and flavorful. They’re also rich in selenium, which supports thyroid function, and B vitamins, which help convert food into energy. Garlic has been studied for its potential immune-boosting and anti-inflammatory properties. Butter provides a small amount of vitamin A and butyrate, a fatty acid that may support gut health.
This recipe is naturally gluten-free, low-carb, and keto-friendly. If you’re watching your sodium, reduce the salt to 1 teaspoon and use unsalted butter. The lemon juice helps balance the richness without adding sugar or carbs.
Frequently Asked Questions
Can I use boneless, skinless chicken thighs?
You can, but you won’t get the same crispy skin (obviously) and the cooking time will be shorter. Boneless thighs cook in about 8–10 minutes total. The sauce will still be delicious, but the texture will be completely different. If you go this route, I recommend adding a little extra butter to compensate for the missing fat from the skin.
Why is my chicken skin sticking to the pan?
Two reasons: either the pan wasn’t hot enough when you added the chicken, or you tried to flip it too early. Let the skin cook undisturbed for the full 10–12 minutes. When it’s ready, it will release from the pan easily. If it’s sticking, give it another minute or two.
Can I make this recipe in a nonstick pan?
Technically yes, but you won’t get the same level of browning or crispiness. Nonstick pans don’t retain heat as well as cast iron or stainless steel, which means the skin will brown more slowly and may end up soggy. If that’s all you have, crank the heat up just a little and be patient with the searing time.
What’s the best way to reheat leftovers without drying out the chicken?
The stovetop method works best. Place the chicken in a skillet with a splash of water or broth, cover, and warm over medium-low heat for about 5 minutes. If you want the skin crispy again, finish it under the broiler for 2–3 minutes. The microwave will work in a pinch, but the skin will be soft.
Can I double this recipe?
Yes, but don’t crowd the pan. Cook the chicken in two batches if necessary. Overcrowding lowers the pan temperature and causes the chicken to steam instead of sear. If you’re cooking for a crowd, I recommend using two pans simultaneously or finishing the chicken in the oven after searing.
Conclusion
This is the kind of recipe that feels like a secret weapon. It looks impressive enough for company, but it’s simple enough that you’ll find yourself making it on random Wednesdays just because you have chicken in the fridge. The crispy skin, the garlic butter pooling around the edges, the way the lemon cuts through the richness—it all works together in a way that feels both indulgent and totally doable.
I’ve made this for dinner parties and for quiet nights when it was just me and a glass of wine. It never disappoints. If you try it, I’d love to hear how it turned out. Leave a comment below or tag me in your photos—I genuinely get excited when people make my recipes and love them. And if you end up tweaking it (extra garlic, more lemon, a pinch of red pepper flakes), tell me about that too. The best recipes are the ones that become yours.
For another one-pan dinner that delivers big flavor with minimal cleanup, you might also enjoy my Creamy Balsamic Chicken Thighs with Sun-Dried Tomato and Spinach. It’s a different vibe—richer, tangier, with that sweet-savory balsamic thing going on—but just as easy to throw together on a busy night. And if you’re in the mood for something lighter but still packed with protein, my Easy 5-Ingredient Grilled Salmon Bowl is a fresh, no-fuss option that comes together in about 20 minutes.
Now go make some crispy chicken. You’ve got this.
Pin This Recipe!

Crispy One-Pan Garlic Butter Chicken Thighs: The Best Easy Dinner

Shatteringly crisp chicken thighs with a rich garlic butter sauce, all made in one pan in about 35 minutes. A simple yet impressive weeknight dinner that’s naturally low-carb and gluten-free.
- Prep Time: 10 minutes
- Cook Time: 25 minutes
- Total Time: 35 minutes
- Yield: 4 servings 1x
- Category: Main Course
- Cuisine: American
Ingredients
- 2 pounds bone-in, skin-on chicken thighs (4–6 thighs)
- 4 tablespoons unsalted butter (56 grams), divided
- 6 cloves garlic, thinly sliced or minced
- 1½ teaspoons kosher salt (9 grams; reduce to 1 teaspoon if using Morton’s)
- ½ teaspoon freshly ground black pepper
- 1 tablespoon lemon juice (from ½ lemon)
- 2 tablespoons fresh parsley or thyme, chopped
- ¼ cup chicken broth or dry white wine (60 ml)
Instructions
- Pat the chicken thighs completely dry with paper towels. Let sit uncovered for 10 minutes.
- Season generously on both sides with kosher salt and black pepper.
- Preheat a 12-inch cast iron skillet or heavy stainless steel pan over medium heat for 3 minutes. Add 1 tablespoon of butter and let it melt until it sizzles gently.
- Place the chicken skin-side down in the pan without crowding. Press down gently with a spatula for 10 seconds.
- Cook without moving for 10–12 minutes until the skin is deep golden brown and crispy.
- Flip the chicken and cook for another 6–8 minutes until the internal temperature reaches 165°F (74°C). Remove chicken to a plate and tent loosely with foil.
- Pour off all but 1 tablespoon of rendered fat from the pan. Reduce heat to low and add remaining 3 tablespoons of butter. Once melted, add garlic and cook for 30–45 seconds, stirring constantly.
- Pour in chicken broth or white wine, scraping up browned bits. Simmer for 1 minute, then stir in lemon juice.
- Return chicken to the pan skin-side up. Spoon sauce over the top and warm through for 2 minutes.
- Garnish with fresh parsley or thyme and serve immediately.
Notes
For extra crispy skin, let salted chicken sit uncovered in the fridge for 1 hour before cooking. If using a stainless steel pan, wait until the skin releases naturally before flipping. To reheat leftovers, place in a skillet with a splash of water or broth over medium-low heat, covered, for 5 minutes; then broil for 2–3 minutes to recrisp the skin.
Nutrition
- Serving Size: 1 chicken thigh with
- Calories: 425
- Sodium: 680
- Fat: 32
- Saturated Fat: 14
- Carbohydrates: 2
- Protein: 32
Keywords: crispy chicken thighs, garlic butter chicken, one-pan chicken, easy weeknight dinner, low-carb chicken, gluten-free chicken


