It was 11:47 PM on a random Tuesday in early February, and I had this overwhelming, almost ridiculous urge to bake something red. Not because of Valentine’s Day—honestly, I’d completely forgotten it was coming up. No, it was because I’d just finished a bowl of instant ramen and watched a documentary about a pastry chef in Paris, and my brain decided that was the perfect combination to inspire a late-night baking spree. I didn’t have buttermilk, which is basically a crime for red velvet. But I had a lemon, some whole milk, and a stubborn refusal to just go to bed. So I made my own soured milk, pulled out the cocoa powder, and decided to wing it. The result? These ridiculously soft, perfectly tangy red velvet cupcakes. I mean, I was covered in flour, my kitchen looked like a crime scene, and I ate one standing over the sink at 1 AM. And you know what? It was the best decision I made all week. Maybe you’ve been there—that moment when a craving hits and logic goes out the window. That’s exactly how this recipe was born. And now, it’s the only red velvet cupcake recipe I trust for Valentine’s Day, or any day that needs a little bit of cozy, homemade magic.
Why You’ll Love This Recipe
Let me tell you, I’ve tested more red velvet recipes than I care to count. Some were too dry, some tasted like straight-up chocolate cake with red dye, and others were just a hassle. This one? It’s the Goldilocks of red velvet. It’s been tested by my neighbor, Sarah (who is brutally honest about baked goods), and approved by my picky nephew who only eats “white frosting.” Here’s why this recipe stands out:
- Quick & Easy: From start to finish, you’re looking at about 45 minutes. No complicated techniques, no stand mixer required (though it helps). Perfect for a last-minute Valentine’s treat.
- Simple Ingredients: You probably have 90% of these in your pantry right now. The only “special” thing is the red food coloring, and honestly, you can even skip it for a more natural look.
- Perfect for Valentine’s Day: Obviously, the heart-shaped factor is adorable. But it’s also just a damn good cupcake for cozy nights in, Galentine’s parties, or surprising your partner.
- Crowd-Pleaser: I’ve brought these to potlucks and book club meetings. They disappear fast. The combination of the tangy buttermilk cake and the silky cream cheese frosting is unbeatable.
- Unbelievably Delicious: This isn’t just a pretty face. The texture is incredibly moist and tender, with a subtle cocoa flavor that doesn’t overpower the signature red velvet tang. It’s the kind of cupcake that makes you close your eyes after the first bite.
What makes this recipe different from all the others? It’s the method. I use a reverse-creaming technique that guarantees a fine, even crumb. Plus, I add a tiny splash of white vinegar to really amp up that classic red velvet tang—without it tasting like a pickle, I promise. This recipe isn’t just good; it’s the one I keep coming back to, year after year.
What Ingredients You Will Need
This recipe uses simple, wholesome ingredients to deliver that signature red velvet flavor and texture. Most of these are pantry staples, and I’ve included notes on substitutions where I can. Don’t stress about the list—it’s shorter than it looks.
For the Cupcakes
- All-purpose flour, 1 ½ cups (190g): Spoon and level it. Don’t scoop directly from the bag or you’ll end up with dense cupcakes.
- Granulated sugar, 1 cup (200g): Regular white sugar works best here. I’ve tried coconut sugar, and it changes the color and flavor too much.
- Unsweetened cocoa powder, 1 tablespoon (8g): Just one tablespoon! This is enough for that subtle chocolate flavor without making it a chocolate cupcake. I prefer Dutch-processed for a smoother taste, but natural works fine.
- Baking soda, 1 teaspoon: Makes sure they rise nice and tall.
- Salt, ½ teaspoon: Balances the sweetness.
- Vegetable oil, ½ cup (120ml): This is the secret to the moist crumb. You can use canola or melted coconut oil, but vegetable oil is neutral and reliable.
- Buttermilk, ½ cup (120ml), room temperature: Absolutely non-negotiable for the tang. If you don’t have it, make your own: add 1 ½ teaspoons of lemon juice or white vinegar to ½ cup of whole milk, let it sit for 5 minutes.
- Large eggs, 2, room temperature: Cold eggs can seize the batter. Let them sit out for 30 minutes, or place them in a bowl of warm water for 5 minutes.
- Red food coloring, 1 tablespoon (15ml): I use gel food coloring for a vibrant red without thinning the batter. Liquid works too, but you might need a bit more.
- White vinegar, 1 teaspoon: This reacts with the baking soda to give the cupcakes lift and enhances that tangy flavor. Don’t skip it!
- Vanilla extract, 1 teaspoon: Pure vanilla is best, but imitation works in a pinch.
For the Cream Cheese Frosting
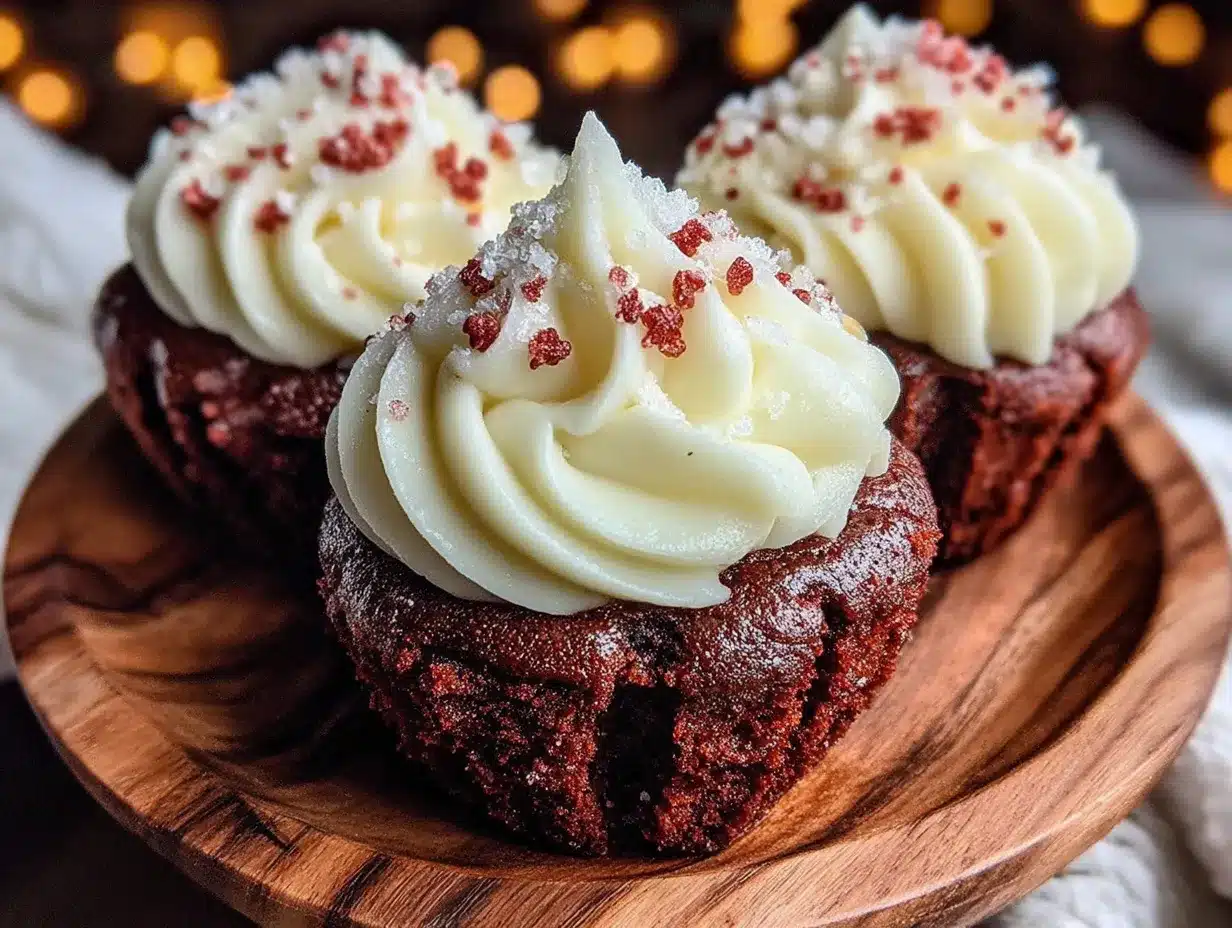
- Cream cheese, 8 oz (226g), softened: Use full-fat block cream cheese, not the spreadable kind in a tub. It makes a world of difference for stability.
- Unsalted butter, ½ cup (113g), softened: Let it come to room temperature naturally. Microwaving it will make the frosting runny.
- Powdered sugar, 3 cups (360g): Sift it if you want a silky-smooth frosting. I’m usually lazy and it still works, but sifting is better.
- Vanilla extract, 1 teaspoon: Again, pure is lovely.
- Pinch of salt: Just a tiny one to cut the sweetness.
Equipment Needed
You don’t need a professional bakery setup for these. Here’s what I use:
- Muffin tin (12-cup): A standard non-stick one works great.
- Paper cupcake liners: I love using red or pink foil liners for Valentine’s Day, but plain white ones are fine too.
- Mixing bowls: A medium and a large one.
- Whisk and rubber spatula: For mixing without overworking the batter.
- Electric hand mixer or stand mixer: For the frosting. You can whisk it by hand, but your arm will get a workout.
- Piping bag with a star tip (like Wilton 1M): This makes the frosting look fancy. No piping bag? A zip-top bag with the corner snipped off works, or just use a knife to spread it.
- Cooling rack: Essential for even cooling so the frosting doesn’t melt.
I’ve made these with a cheap $10 hand mixer from the grocery store, and they turned out just as good. Don’t overthink the equipment.
Preparation Method
Alright, let’s get baking. This method is straightforward, but I’ve added some notes from my late-night experiments to help you nail it.
Step 1: Preheat and Prep
Preheat your oven to 350°F (175°C). Line your muffin tin with 12 cupcake liners. This is a small batch, so you’ll get exactly 12 perfectly domed cupcakes.
Step 2: Mix the Dry Ingredients
In a medium bowl, whisk together the flour, sugar, cocoa powder, baking soda, and salt. Make sure there are no lumps of cocoa—I usually press them against the side of the bowl with the whisk. Set this aside.
Step 3: Combine the Wet Ingredients
In a large bowl (or the bowl of your stand mixer), whisk together the vegetable oil, buttermilk, eggs, red food coloring, vinegar, and vanilla extract. Whisk until it’s all combined and a uniform, slightly scary red color. Don’t worry if it looks a little thin—that’s normal.
Step 4: Bring It Together (The Reverse Creaming)
Now, here’s the trick. Add about half of the dry ingredients to the wet ingredients and gently fold them together with a spatula until just a few streaks of flour remain. Then add the rest of the dry ingredients and fold until you can’t see any more flour. Do not overmix! Overmixing develops gluten and makes tough cupcakes. Stop as soon as the batter is smooth. It will be thick and glossy.
Step 5: Fill and Bake
Divide the batter evenly among the 12 liners. I use a cookie scoop (about 3 tablespoons) for even portions. Fill each liner about ⅔ full. Tap the pan on the counter a couple of times to release any air bubbles. Bake for 18-22 minutes, or until a toothpick inserted into the center comes out clean or with a few moist crumbs. My oven runs hot, so I check at 18 minutes. The tops should spring back when lightly pressed.
Step 6: Cool Completely
Let the cupcakes cool in the pan for 5 minutes, then transfer them to a wire rack to cool completely. This is crucial. If you frost them while they’re even slightly warm, the cream cheese frosting will slide right off into a sad puddle. I’ve learned this the hard way—twice.
Step 7: Make the Frosting
While the cupcakes cool, make the frosting. In a large bowl, beat the softened cream cheese and butter together on medium speed until smooth and creamy, about 2 minutes. Scrape down the sides. Add the powdered sugar one cup at a time, beating on low speed to avoid a sugar cloud. Add the vanilla and salt, then beat on medium-high for 2-3 minutes until light and fluffy. Don’t overbeat, or it can become runny.
Step 8: Pipe and Decorate
Once the cupcakes are completely cool, pipe the frosting on in a swirl. I start from the outside and work my way in, then pull up for a little peak. Add heart sprinkles, a dusting of cocoa powder, or just leave them as is. They’re beautiful either way.
Cooking Tips & Techniques
Here are some things I wish someone had told me before my first red velvet attempt:
- Room temperature ingredients matter. Cold eggs and buttermilk can make the batter curdle. It’s not the end of the world, but room temp ingredients emulsify better for a smoother, more tender crumb.
- Don’t overmix the batter. I know I said it already, but it’s the number one mistake. Mix until just combined. A few tiny lumps are okay—they’ll bake out.
- Use gel food coloring for a true red. Liquid coloring can throw off the liquid balance. I use the Americolor brand, and one tablespoon gives a gorgeous, deep crimson.
- Let the frosting ingredients soften naturally. I once microwaved the cream cheese to soften it quickly. It partially melted, and my frosting was a soupy disaster. Patience is a virtue here.
- Chill the frosting if it’s too soft. If your kitchen is warm, the frosting might be too soft to pipe. Pop it in the fridge for 15-20 minutes, then re-whip it for a few seconds. It’ll firm right up.
Variations & Adaptations
This recipe is a great base for experimentation. Here are a few ways I’ve changed it up:
- Gluten-Free Version: Substitute the all-purpose flour with a 1:1 gluten-free baking flour blend (I like King Arthur Measure for Measure). The texture is slightly more delicate, but still delicious.
- Vegan Adaptation: Use flax eggs (2 tablespoons ground flaxseed + 6 tablespoons water), plant-based milk with lemon juice for buttermilk, and vegan cream cheese and butter for the frosting. The cake will be a bit denser, but the flavor is spot on.
- Chocolate Lover’s Twist: Add ¼ cup of mini chocolate chips to the batter. It makes them taste like a red velvet brownie hybrid. Dangerous.
- Lemon-Velvet Variation: Replace the red food coloring with a few drops of yellow and add 1 teaspoon of lemon zest to the batter and ½ teaspoon to the frosting. It’s a bright, springy take.
- Mini Cupcakes: Use a mini muffin tin and bake for 10-12 minutes. Perfect for parties or snacking without the commitment.
Serving & Storage Suggestions
These cupcakes are best served at room temperature. The cream cheese frosting softens beautifully, and the cake is at its most tender. For a cozy Valentine’s Day, I love serving them with a hot cup of coffee or a glass of cold milk.
To store, place the cupcakes in an airtight container in the refrigerator for up to 4 days. Important: Let them sit out for about 20 minutes before serving to take the chill off. The flavors actually deepen overnight, so day-old cupcakes are often even better.
You can freeze the unfrosted cupcakes for up to 3 months. Wrap them individually in plastic wrap, then place them in a freezer bag. Thaw at room temperature, then frost. I’ve also frozen the frosting in a piping bag, thawed it in the fridge, and re-whipped it—works like a charm.
Nutritional Information & Benefits
Let’s be real: these are a treat, not a health food. But here’s the approximate breakdown per cupcake (with frosting):
- Calories: ~380
- Fat: 22g
- Carbohydrates: 44g
- Protein: 4g
- Sugar: 33g
The cocoa powder does contain antioxidants (flavonoids), and the cream cheese offers a small amount of calcium and protein. But honestly, the biggest benefit here is the joy it brings. A homemade treat made with love is good for the soul. If you’re watching your sugar, you can reduce the frosting sugar to 2 cups, but it won’t pipe as stiffly.
Conclusion
These Cozy Red Velvet Heart Cupcakes are the perfect way to say “I love you” without saying a word. They’re soft, tangy, sweet, and ridiculously easy to make. Whether you’re baking for a partner, your best friend, or just yourself on a quiet Tuesday night (no judgment here), this recipe delivers every single time.
I’d love to hear how yours turn out! Did you add sprinkles? Try a different frosting? Leave a comment below and let me know—I read every single one. And if you share a photo on Pinterest, tag me so I can cheer you on. Happy baking, friend. You’ve got this.
Frequently Asked Questions
Can I make these cupcakes ahead of time?
Absolutely. Bake the cupcakes up to two days in advance and store them in an airtight container at room temperature. Make the frosting the day you plan to serve them for the best texture.
Why did my red velvet cupcakes turn out brown?
This usually happens if the cocoa powder is too dark or if the food coloring is old. Use a high-quality gel food coloring and only one tablespoon of cocoa powder. Also, make sure your baking soda is fresh—it helps maintain the color.
Can I use this recipe to make a cake instead of cupcakes?
Yes! Pour the batter into two greased 8-inch round cake pans. Bake at 350°F (175°C) for 25-30 minutes. The frosting recipe will be enough to fill and frost the layers.
How do I get that signature red velvet tang?
The tang comes from the buttermilk and the white vinegar. Don’t substitute the buttermilk with regular milk unless you add the lemon juice or vinegar to sour it. It’s the acid that gives red velvet its unique flavor.
My frosting turned out runny. What went wrong?
Most likely, your cream cheese or butter was too soft (or partially melted). Make sure they are softened but still cool to the touch. If the frosting is runny, pop it in the fridge for 20 minutes, then beat it again on high speed for a minute.
Pin This Recipe!
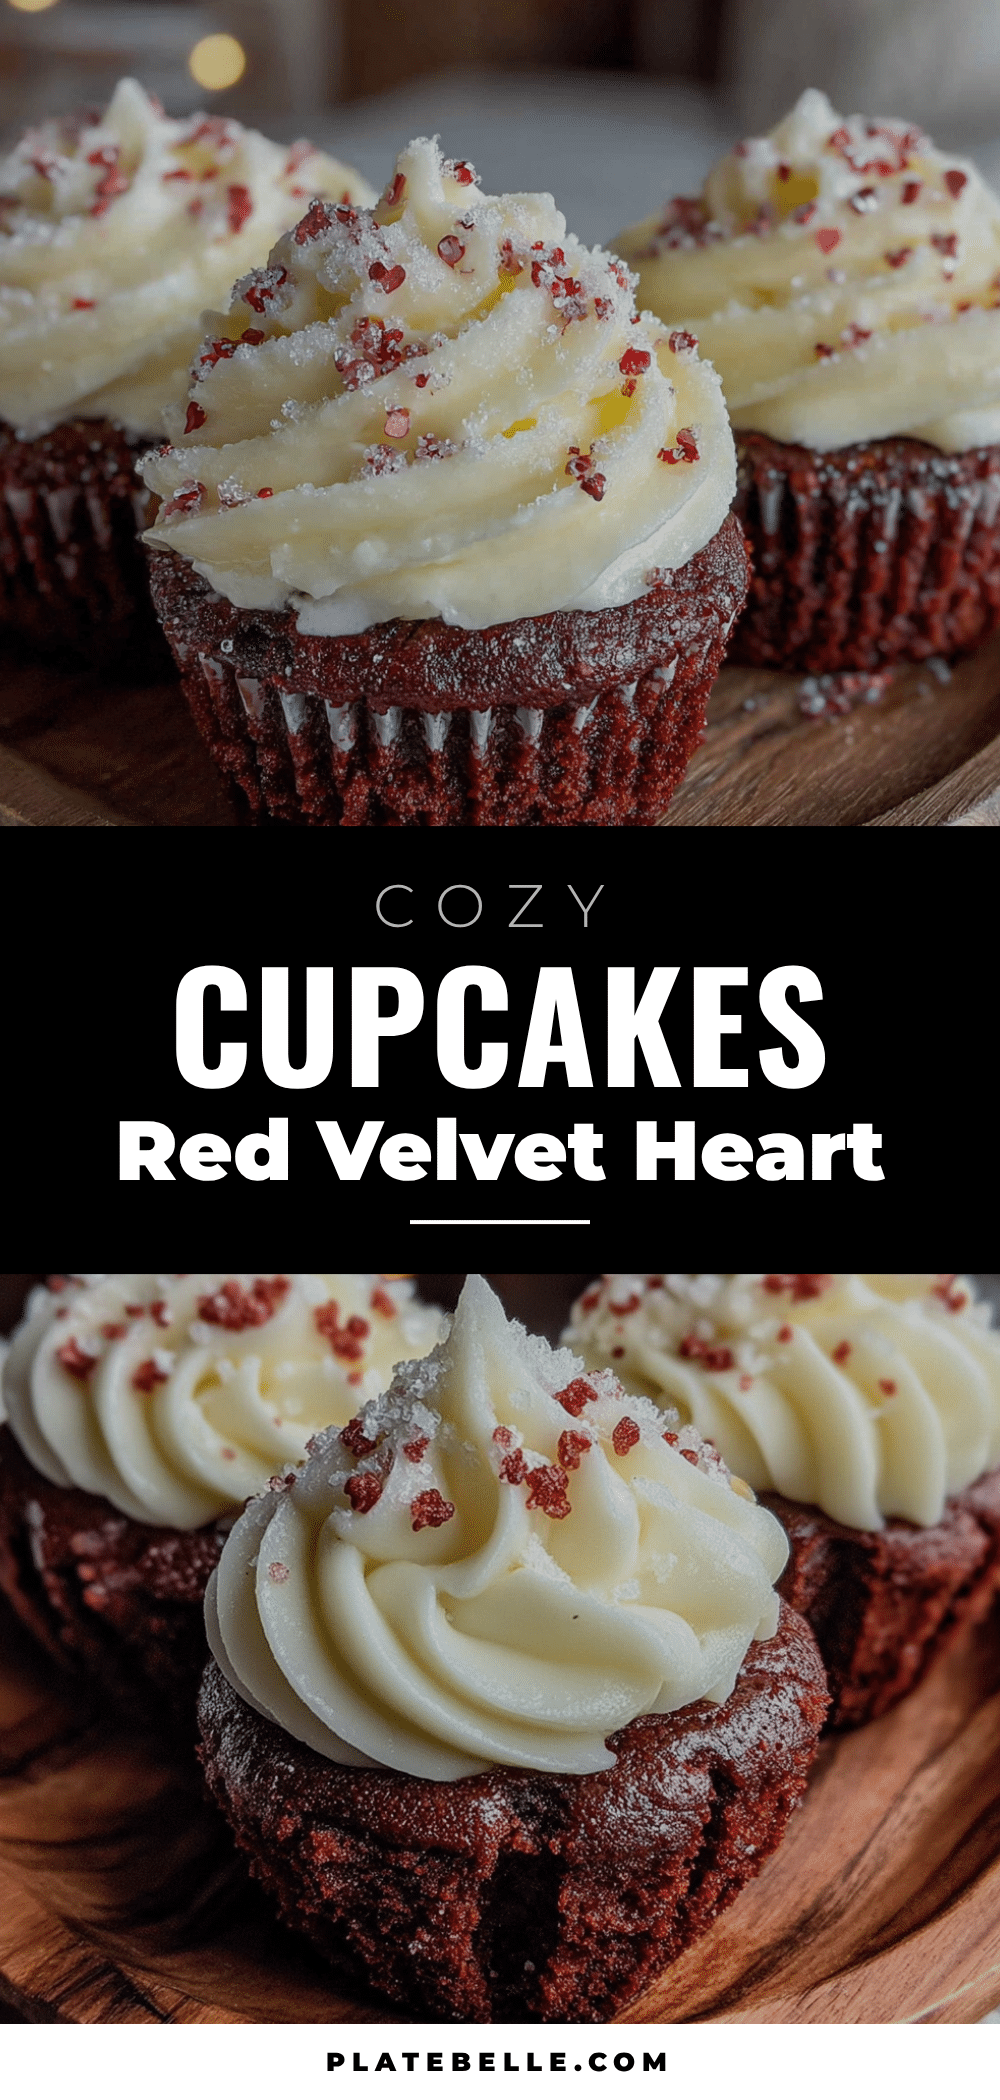
Best Easy Red Velvet Cupcakes for Valentine’s Day
These ridiculously soft, perfectly tangy red velvet cupcakes are the only recipe you need for Valentine’s Day or any day that calls for cozy, homemade magic. Made with a reverse-creaming technique for a fine, even crumb and topped with silky cream cheese frosting.
- Prep Time: 15 minutes
- Cook Time: 20 minutes
- Total Time: 45 minutes
- Yield: 12 cupcakes 1x
- Category: Dessert
- Cuisine: American
Ingredients
- 1 ½ cups (190g) all-purpose flour
- 1 cup (200g) granulated sugar
- 1 tablespoon (8g) unsweetened cocoa powder
- 1 teaspoon baking soda
- ½ teaspoon salt
- ½ cup (120ml) vegetable oil
- ½ cup (120ml) buttermilk, room temperature
- 2 large eggs, room temperature
- 1 tablespoon (15ml) red food coloring
- 1 teaspoon white vinegar
- 1 teaspoon vanilla extract
- 8 oz (226g) cream cheese, softened
- ½ cup (113g) unsalted butter, softened
- 3 cups (360g) powdered sugar
- 1 teaspoon vanilla extract
- Pinch of salt
Instructions
- Preheat oven to 350°F (175°C). Line a 12-cup muffin tin with paper liners.
- In a medium bowl, whisk together flour, sugar, cocoa powder, baking soda, and salt.
- In a large bowl, whisk together vegetable oil, buttermilk, eggs, red food coloring, vinegar, and vanilla extract until combined.
- Add half the dry ingredients to the wet ingredients and fold gently with a spatula until just a few streaks of flour remain. Add remaining dry ingredients and fold until no flour is visible. Do not overmix.
- Divide batter evenly among the 12 liners, filling each about ⅔ full. Tap the pan on the counter to release air bubbles.
- Bake for 18-22 minutes, or until a toothpick inserted into the center comes out clean or with a few moist crumbs. Cool in pan for 5 minutes, then transfer to a wire rack to cool completely.
- For the frosting: In a large bowl, beat cream cheese and butter together on medium speed until smooth and creamy, about 2 minutes. Gradually add powdered sugar, beating on low speed. Add vanilla and salt, then beat on medium-high for 2-3 minutes until light and fluffy.
- Once cupcakes are completely cool, pipe or spread frosting on top. Decorate as desired.
Notes
Room temperature ingredients are key for a smooth batter. Do not overmix. For a true red, use gel food coloring. Let cupcakes cool completely before frosting. If frosting is too soft, chill for 15-20 minutes.
Nutrition
- Serving Size: 1 cupcake
- Calories: 380
- Sugar: 33
- Fat: 22
- Carbohydrates: 44
- Protein: 4
Keywords: red velvet cupcakes, Valentine's Day, cream cheese frosting, easy, homemade


