There used to be a tiny ice cream parlor tucked behind a bookstore on Elm Street that made a salted caramel flavor I still dream about. When they closed without warning three summers ago, I actually stood outside their locked door for a full minute, staring at the handwritten sign. That first summer without it, I bought twelve different pints from the grocery store, trying to find something close. Nothing even came close. So I did what any reasonable person with a freezer and a stubborn streak would do — I decided to make it myself. After seven attempts — including one where I crystallized the caramel so badly it looked like sea glass — I finally got it. And honestly, this easy no-churn version might be even better than the original.
You know that feeling when you take a bite of something and everything else just fades away? That’s this ice cream. It’s creamy, it’s salty, it’s sweet, and it doesn’t require any fancy equipment or a degree in pastry arts. No ice cream maker, no churning, no complicated temperature checks. Just a few simple ingredients and a little bit of patience while it freezes. Let me tell you, the first time I pulled this out of the freezer and scooped it perfectly on the first try, I actually texted a photo to my sister. She didn’t believe it was homemade. That’s the kind of recipe this is — the kind that makes people question everything they thought they knew about making ice cream at home.
Why You’ll Love This Recipe
I’ve tested this recipe more times than I care to admit, and each batch taught me something new. The first time, I used salted butter and ended up with ice cream that made my lips pucker. The third time, I didn’t whip the cream enough, and it came out more like frozen pudding. But by batch number five, I had it dialed in perfectly. This is that version — the one that works every single time.
- No Ice Cream Maker Needed : Seriously, zero special equipment. Just a bowl and a whisk or hand mixer.
- Simple Ingredients : You probably already have heavy cream, sweetened condensed milk, butter, sugar, and salt in your kitchen right now.
- Ready in Under 6 Hours : Active prep time is about 15 minutes. The hardest part is waiting for it to freeze.
- Perfect for Weeknights : When you’re tired and craving something sweet, this comes together faster than a trip to the store.
- Crowd-Pleaser : I’ve brought this to three different gatherings, and every single person asked for the recipe. Even the kids who usually only want store-bought stuff.
- Customizable : Want more salt? Less salt? Add chocolate chunks? Go for it. This recipe is forgiving.
What makes this different from every other no-churn recipe out there is the caramel. Most recipes use store-bought caramel sauce, which is fine, but it’s not great. This one uses a homemade salted caramel that takes about 8 minutes to make and tastes like something from a fancy restaurant. The sweetened condensed milk gives it that ultra-creamy texture that no-churn ice cream is famous for, but the caramel is the star. It’s rich, it’s buttery, and it has just enough salt to balance the sweetness without overpowering it.
This is the kind of dessert that makes you close your eyes after the first bite. It’s comfort food at its finest — creamy, cold, and deeply satisfying. And the best part? You made it yourself, in your own kitchen, with your own two hands. That feeling never gets old.
What Ingredients You Will Need
This recipe uses simple, everyday ingredients to create something that tastes anything but ordinary. Most of these are pantry staples, and the ones that aren’t are easy to find at any grocery store. Here’s what you’ll need and why each one matters.
For the Salted Caramel Sauce
- 1 cup granulated sugar — Regular white sugar works best here. Don’t use brown sugar; it has too much moisture and won’t caramelize the same way.
- 6 tablespoons unsalted butter, cut into small pieces — I use unsalted so I can control the salt level. Let it come to room temperature before you start.
- 1/2 cup heavy cream, at room temperature — Cold cream will seize the caramel and make it lumpy. Trust me on this one.
- 1 1/2 teaspoons flaky sea salt — I prefer Maldon or another flaky salt for the best texture. Regular table salt works in a pinch, but use half the amount.
For the Ice Cream Base
- 2 cups heavy cream, cold — This needs to be straight from the fridge. Warm cream won’t whip properly.
- 1 can (14 ounces) sweetened condensed milk — This is the magic ingredient that makes no-churn ice cream possible. Don’t substitute evaporated milk; it’s not the same.
- 1 teaspoon vanilla extract — Pure vanilla extract is worth it here. Imitation will work, but the flavor won’t be as rich.
- The salted caramel sauce you just made — All of it. Don’t hold back.
A few notes on ingredients. The heavy cream is non-negotiable for texture. Half-and-half or milk won’t whip into stiff peaks, and your ice cream will end up icy instead of creamy. For the sweetened condensed milk, I’ve tried store brands and name brands, and honestly, they all work fine. Just make sure you’re getting sweetened condensed milk, not evaporated milk. They look almost identical in the can, and grabbing the wrong one is a mistake you’ll only make once.
If you’re dairy-free, you can substitute full-fat coconut cream for the heavy cream and use a dairy-free sweetened condensed milk alternative. The texture will be slightly different, but it still works. I’ve tested it with a friend who’s lactose intolerant, and she said it was the best dairy-free ice cream she’d ever had.
One more thing about the salt. Flaky sea salt makes a difference here because it dissolves partially but leaves little bursts of saltiness as you eat. If you only have fine salt, use about 3/4 teaspoon and mix it into the caramel thoroughly. You won’t get the same texture, but the flavor will still be spot on.
Equipment Needed
The beauty of this recipe is that you probably already own everything you need. No ice cream maker, no churn, no fancy gadgets. Here’s the short list:
- Medium saucepan — For making the caramel. A light-colored pan is best so you can see the color of the sugar as it caramelizes.
- Large mixing bowl — For whipping the cream. Make sure it’s clean and completely dry.
- Hand mixer or stand mixer — You can whisk by hand if you’re feeling ambitious, but it’ll take about 10 minutes of vigorous whisking. I’ve done it, and my arm was sore the next day.
- Rubber spatula — For folding everything together without deflating the whipped cream.
- Loaf pan or freezer-safe container — A standard 9×5 inch loaf pan works perfectly. You can also use a wide, shallow container if you want it to freeze faster.
- Plastic wrap or parchment paper — To cover the surface directly so ice crystals don’t form.
If you don’t have a hand mixer, a whisk and some elbow grease will get the job done. Just make sure your cream is very cold, and take breaks if your arm gets tired. I’ve also used a food processor with the whisk attachment in a pinch, though it’s harder to control and you risk over-whipping.
One tip I learned the hard way: use a glass or ceramic loaf pan if you have one. Metal pans conduct cold faster, which can cause the edges to freeze before the center is solid. Glass or ceramic gives you a more even freeze and better texture throughout.
Preparation Method
This recipe has two main parts: the caramel and the ice cream base. I’ll walk you through both step by step, with all the little details I wish someone had told me the first time.
Make the Salted Caramel Sauce
- Heat the sugar — Place the granulated sugar in an even layer in your saucepan over medium heat. Don’t stir it yet. Just let it sit and start melting around the edges. This takes about 3 to 4 minutes.
- Stir gently — Once you see liquid sugar forming around the edges, use a heatproof spatula or wooden spoon to gently stir the unmelted sugar into the melted sugar. Keep stirring slowly until all the sugar is dissolved and the mixture is a deep amber color. This should take another 2 to 3 minutes. Watch it carefully; caramel can go from perfect to burnt in about 30 seconds.
- Add the butter — Remove the pan from heat and add the butter pieces one at a time, stirring constantly. The mixture will bubble up aggressively — don’t panic, that’s normal. Keep stirring until the butter is completely melted and incorporated.
- Add the cream — Slowly pour in the room-temperature heavy cream while stirring. Again, it will bubble up. Keep stirring until the sauce is smooth and uniform. If you see any lumps, keep stirring; they’ll dissolve.
- Add the salt — Stir in the flaky sea salt. Taste the caramel and add more salt if you like. Remember that the flavor will mellow slightly when frozen.
- Cool completely — Let the caramel cool to room temperature, then transfer it to a jar or bowl and refrigerate until completely cold. This takes about 1 hour. Don’t use warm caramel in the ice cream base, or it will melt the whipped cream.
Make the Ice Cream Base
- Whip the cream — Pour the cold heavy cream into a large mixing bowl. Using a hand mixer or stand mixer with the whisk attachment, beat on medium-high speed until stiff peaks form. This takes about 3 to 5 minutes. You’re looking for peaks that stand straight up when you lift the beaters. Be careful not to over-whip, or you’ll end up with butter.
- Mix the base — In a separate bowl, whisk together the sweetened condensed milk and vanilla extract until smooth. This doesn’t take more than 30 seconds.
- Fold it together — Pour the condensed milk mixture over the whipped cream. Use a rubber spatula to fold gently, cutting through the center and bringing the bottom up over the top. Rotate the bowl as you go. Fold just until no white streaks remain. Over-mixing will deflate the cream and make your ice cream dense.
- Add the caramel — Drizzle about two-thirds of the cold caramel sauce over the ice cream base. Use the spatula to gently fold it in, creating swirls. You want ribbons of caramel running through the ice cream, not a uniform color. Leave some streaks.
- Transfer to container — Spoon the mixture into your loaf pan or freezer container. Smooth the top with the spatula. Drizzle the remaining caramel over the top and use a knife or skewer to swirl it in gently.
- Cover and freeze — Press a piece of plastic wrap directly onto the surface of the ice cream. This prevents ice crystals from forming. Place the lid on the container or cover with foil. Freeze for at least 6 hours, preferably overnight.
The texture will be soft and scoopable after about 4 hours, but it firms up beautifully after a full overnight freeze. If you freeze it for longer than 24 hours, let it sit at room temperature for 5 to 10 minutes before scooping.
Cooking Tips & Techniques
I’ve made this recipe more times than I can count, and I’ve made just about every mistake possible. Here are the things I wish I’d known from the start.
Don’t rush the caramel. The first time I made this, I cranked the heat up high to speed things along, and the sugar burned before it even fully melted. Low and slow is the way to go. Medium heat, patience, and constant attention. The caramel should smell nutty and rich, not bitter or burnt.
Room temperature ingredients matter. I know, I know, it’s annoying to wait for butter and cream to come to room temperature. But cold cream hitting hot caramel will seize it into a lumpy mess. I’ve done it twice, and both times I had to start over. Set your butter and cream out 30 minutes before you start cooking, and you’ll be fine.
Stiff peaks are your friend. Under-whipped cream will make your ice cream dense and icy. Over-whipped cream will turn into butter. The sweet spot is stiff peaks — the cream should hold its shape when you lift the beaters, but still look smooth and glossy. If it starts to look grainy, you’ve gone too far.
Fold, don’t stir. When you combine the whipped cream with the condensed milk, use a gentle folding motion. Stirring vigorously will deflate all the air you just whipped into the cream, and that air is what gives no-churn ice cream its light, creamy texture. Be patient and gentle.
Let it warm up before scooping. Straight from the freezer, this ice cream is rock hard. Let it sit on the counter for 5 to 10 minutes before you try to scoop it. A warm ice cream scoop also helps — run it under hot water for a few seconds before each scoop.
Variations & Adaptations
This recipe is incredibly versatile, and I’ve tried several variations over the years. Here are some of my favorites.
Chocolate Salted Caramel — Add 1/4 cup of unsweetened cocoa powder to the sweetened condensed milk before mixing. Whisk until smooth, then proceed with the recipe. The chocolate and caramel combination is absolutely divine. I made this for a friend’s birthday, and she said it was the best ice cream she’d ever eaten.
Vegan Version — Substitute full-fat coconut cream for the heavy cream and use a dairy-free sweetened condensed coconut milk. The coconut flavor is subtle and actually pairs beautifully with the salted caramel. Let the coconut cream chill overnight before whipping for best results.
Add-Ins — Fold in 1/2 cup of crushed pretzels or graham cracker pieces right before freezing for a salty crunch. I’ve also added chocolate chunks, toffee bits, and even crumbled bacon (don’t knock it until you try it).
Keto-Friendly — Use a sugar-free sweetened condensed milk alternative and a sugar substitute like allulose or monk fruit for the caramel. The texture won’t be quite as creamy, but the flavor is still fantastic. I tested this for a friend on keto, and she gave it a 9 out of 10.
Spiced Caramel — Add 1/2 teaspoon of cinnamon and a pinch of cayenne pepper to the caramel while it’s cooking. The warmth of the spices cuts through the sweetness and adds a whole new dimension. This is my go-to version during fall and winter.
Serving & Storage Suggestions
This ice cream is best served straight from the freezer with a slight warm-up. Let it sit at room temperature for 5 to 10 minutes before scooping. The texture should be creamy and smooth, not rock hard.
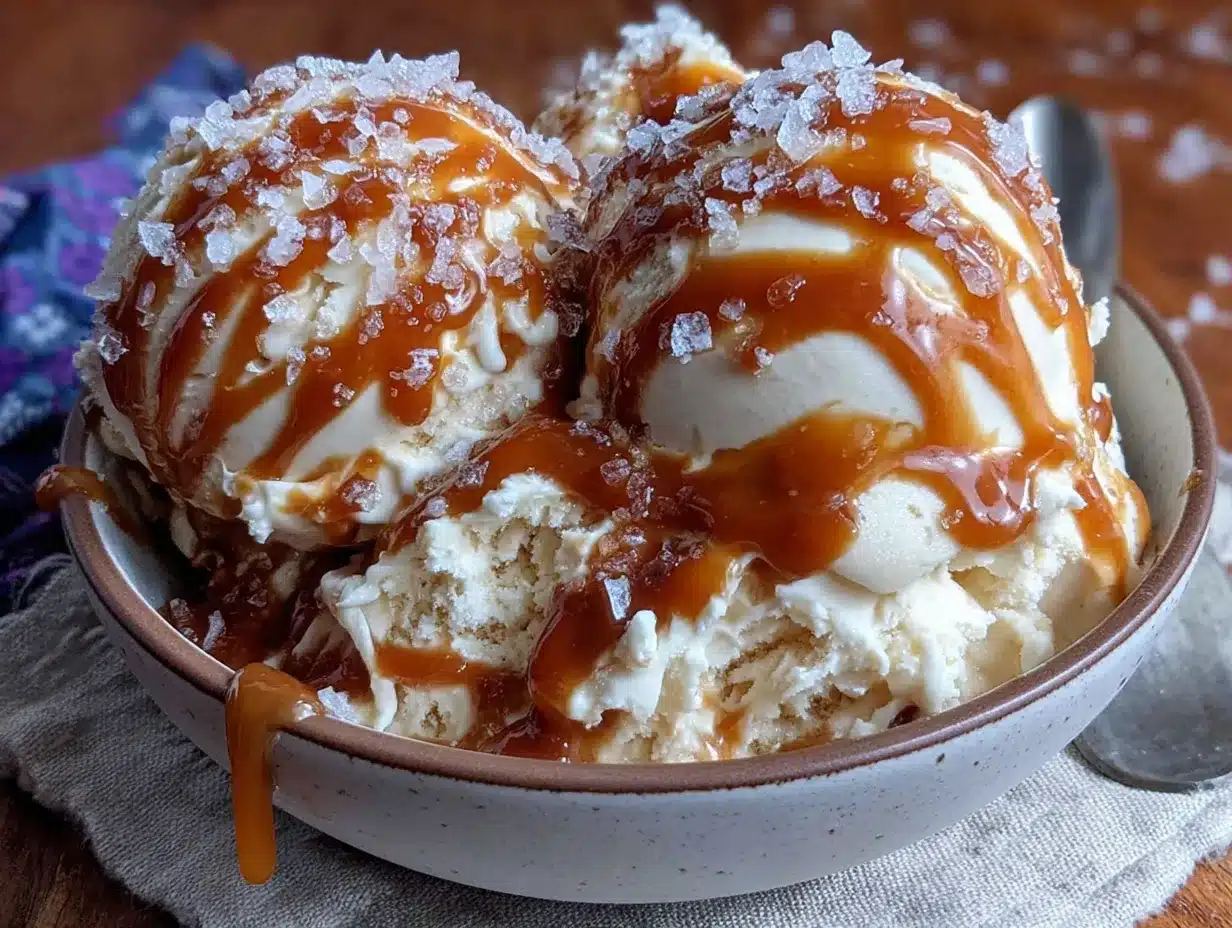
For a beautiful presentation, drizzle a little extra salted caramel sauce over the scoops and sprinkle with a pinch of flaky sea salt. A few chocolate shavings or a dusting of cocoa powder also look lovely. Serve in chilled bowls or cones for the full ice cream parlor experience.
This pairs beautifully with warm desserts like brownies, apple pie, or a simple chocolate chip cookie. The contrast between hot and cold is absolutely perfect. I’ve also served it alongside a slice of pound cake for a simple but elegant dessert.
Storage: Keep the ice cream in an airtight container with plastic wrap pressed directly onto the surface. It will stay good for up to 2 weeks in the freezer, though I doubt it’ll last that long. After about a week, the texture may start to get slightly icy, but it’s still delicious.
Reheating the caramel: If you have leftover caramel sauce, store it in a jar in the refrigerator for up to 2 weeks. To reheat, microwave in 10-second intervals, stirring between each, until it’s pourable. You can also warm it gently on the stovetop over low heat.
One thing I’ve noticed is that the flavors actually deepen after a day or two in the freezer. The salt mellows slightly, and the caramel flavor becomes more pronounced. So if you can resist eating it all on day one, it’ll be even better on day three.
Nutritional Information & Benefits
Let’s be real — this is a treat, not a health food. But knowing what’s in it helps you enjoy it mindfully. Here’s the approximate nutritional breakdown per 1/2 cup serving:
- Calories: 380
- Fat: 26g
- Saturated Fat: 16g
- Carbohydrates: 34g
- Sugar: 32g
- Protein: 4g
- Sodium: 280mg
The heavy cream provides a good dose of calcium and vitamin A, while the butter adds a small amount of vitamin D. The salt in the caramel provides electrolytes, though you’re not exactly eating this for the nutritional benefits.
For those with dietary restrictions, this recipe contains dairy and gluten (if you add mix-ins like pretzels). It’s not suitable for vegans unless you use the substitutions mentioned above. The sugar content is significant, so if you’re watching your sugar intake, consider the keto-friendly version or enjoy this in small portions.
I personally believe that dessert should be enjoyed without guilt. A scoop of this ice cream after a long week is good for the soul, and that counts for something. Just be mindful of portions and savor every bite.
Conclusion
This easy no-churn salted caramel ice cream is proof that you don’t need fancy equipment or complicated techniques to make something truly special. With just a handful of ingredients and about 15 minutes of active work, you can create a dessert that rivals anything from a gourmet ice cream shop. It’s creamy, it’s salty, it’s sweet, and it’s yours.
I love this recipe because it reminds me that good things don’t have to be complicated. The first time I made a successful batch, I sat on my couch with a bowl of it and just smiled. It tasted exactly like the ice cream from that little parlor on Elm Street — maybe even better. And knowing I made it myself made it taste even sweeter.
Now it’s your turn. Give this recipe a try, and don’t be afraid to make it your own. Add chocolate, swap in coconut cream, or pile on the pretzels. Whatever you do, I’d love to hear about it. Drop a comment below and let me know how it turned out. Did you make any changes? What did your family think? Share your creations on social media and tag me — I can’t wait to see what you come up with.
Happy scooping, friend. You’ve got this.
Frequently Asked Questions
Can I use store-bought caramel sauce instead of making my own?
You can, but the flavor won’t be as rich. Homemade caramel has a deeper, more complex flavor that really makes this ice cream special. If you’re short on time, look for a high-quality jarred caramel sauce without artificial flavors.
Why did my ice cream turn out icy instead of creamy?
This usually happens when the cream isn’t whipped enough or when ice crystals form on the surface. Make sure you whip the cream to stiff peaks, and always press plastic wrap directly onto the surface of the ice cream before freezing. Air exposure is the enemy of creamy texture.
How long does this ice cream keep in the freezer?
It stays fresh for up to 2 weeks if stored properly. After that, the texture may start to get icy, but it’s still safe to eat. I recommend making smaller batches so you’re always eating it at its best.
Can I make this without a hand mixer?
Absolutely. You can whisk the cream by hand, but it’ll take about 10 minutes of steady whisking. Make sure the cream is very cold, and take breaks if your arm gets tired. A whisk and some determination will get the job done.
Can I double this recipe?
Yes, but you’ll need to whip the cream in batches if your mixer bowl isn’t large enough. Overcrowding the bowl makes it harder to incorporate air, and the texture won’t be as light. I recommend making two separate batches if you need a larger quantity.
Pin This Recipe!
Easy No-Churn Salted Caramel Ice Cream: Best Homemade Dessert Recipe
This easy no-churn salted caramel ice cream is creamy, salty, and sweet, made without an ice cream maker. With a homemade salted caramel sauce and simple ingredients, it’s a crowd-pleasing dessert that rivals any gourmet ice cream shop.
- Prep Time: 15 minutes
- Cook Time: 8 minutes
- Total Time: 6 hours 23 minutes (includes freezing time)
- Yield: 8 servings 1x
- Category: Dessert
- Cuisine: American
Ingredients
- 1 cup granulated sugar
- 6 tablespoons unsalted butter, cut into small pieces, at room temperature
- 1/2 cup heavy cream, at room temperature
- 1 1/2 teaspoons flaky sea salt (e.g., Maldon)
- 2 cups heavy cream, cold
- 1 can (14 ounces) sweetened condensed milk
- 1 teaspoon vanilla extract
- All of the salted caramel sauce you just made
Instructions
- Make the Salted Caramel Sauce: Place the granulated sugar in an even layer in a medium saucepan over medium heat. Let it sit and start melting around the edges, about 3 to 4 minutes.
- Once liquid sugar forms around the edges, gently stir the unmelted sugar into the melted sugar with a heatproof spatula or wooden spoon. Continue stirring slowly until all sugar is dissolved and the mixture is a deep amber color, about 2 to 3 minutes.
- Remove the pan from heat and add the butter pieces one at a time, stirring constantly. The mixture will bubble up; keep stirring until the butter is completely melted and incorporated.
- Slowly pour in the room-temperature heavy cream while stirring. The mixture will bubble again; keep stirring until the sauce is smooth and uniform.
- Stir in the flaky sea salt. Taste and add more salt if desired. Let the caramel cool to room temperature, then refrigerate until completely cold (about 1 hour).
- Make the Ice Cream Base: In a large mixing bowl, beat the cold heavy cream with a hand mixer or stand mixer on medium-high speed until stiff peaks form, about 3 to 5 minutes.
- In a separate bowl, whisk together the sweetened condensed milk and vanilla extract until smooth.
- Pour the condensed milk mixture over the whipped cream. Use a rubber spatula to fold gently until no white streaks remain.
- Drizzle about two-thirds of the cold caramel sauce over the ice cream base. Fold gently to create swirls, leaving some streaks.
- Spoon the mixture into a loaf pan or freezer-safe container. Smooth the top with the spatula. Drizzle the remaining caramel over the top and swirl gently with a knife or skewer.
- Press a piece of plastic wrap directly onto the surface of the ice cream. Cover with lid or foil. Freeze for at least 6 hours, preferably overnight.
- Before serving, let the ice cream sit at room temperature for 5 to 10 minutes to soften slightly for easier scooping.
Notes
Don’t rush the caramel; use medium heat and watch carefully to avoid burning. Ensure butter and cream are at room temperature before adding to caramel to prevent seizing. Whip cream to stiff peaks but avoid over-whipping. Fold gently to keep the mixture light and airy. Let ice cream warm up for 5-10 minutes before scooping. For best texture, press plastic wrap directly onto the surface to prevent ice crystals.
Nutrition
- Serving Size: 1/2 cup
- Calories: 380
- Sugar: 32
- Sodium: 280
- Fat: 26
- Saturated Fat: 16
- Carbohydrates: 34
- Protein: 4
Keywords: no-churn ice cream, salted caramel ice cream, homemade ice cream, easy ice cream, no ice cream maker


