My niece asked why I couldn’t just use pretzel rods instead of making cookies from scratch for our Halloween baking session. I started to explain why that wouldn’t work—then stopped. Honestly, I had no good reason. She was eight, holding a bag of pretzel rods like she’d just discovered fire, and I was the one overcomplicating things. So I shrugged and said, “Alright, let’s try it.”
That moment of giving up control—of letting a kid’s logic win—changed how I approach holiday treats. I’d spent years crafting elaborate cookie shapes that always ended up as blobs. Meanwhile, this simple idea turned into something genuinely fun. We dipped those pretzel rods in white chocolate, added almond slivers for fingernails, and suddenly had the creepiest, most delicious snack on the table. My niece screamed with delight. I learned a good lesson about letting go.
These spooky white chocolate witch finger pretzel rods are now my go-to Halloween recipe. They come together in under twenty minutes, look impressively creepy, and taste like a candy bar and a salty snack had a perfect little baby. The contrast between the crunchy pretzel and the sweet white chocolate is honestly addictive. Maybe you’ve been there—staring at a Pinterest board full of complicated desserts, feeling that knot of stress tighten in your stomach. These are the opposite of that. They’re the recipe you make when you want to have fun, not stress out.
The best part? They’re impossible to mess up. Even if your almond fingernails are crooked or your chocolate is a little lumpy, they somehow look even spookier. That’s the magic of this recipe. It doesn’t need perfection. It just needs a little imagination and a kid’s perspective to remind you that cooking is supposed to be fun.
Why You’ll Love This Recipe
Let me tell you why these spooky white chocolate witch finger pretzel rods have become my most-requested Halloween treat. I’ve made them for three different parties now, and every single time, someone asks for the recipe before they’ve even finished eating one.
Here’s what makes them stand out:
- Quick & Easy: Comes together in under 20 minutes, perfect for last-minute Halloween prep or when you realize the party is tomorrow and you have nothing to bring.
- Simple Ingredients: No fancy grocery trips needed. You likely already have pretzel rods, white chocolate chips, and almonds in your pantry.
- Perfect for Halloween Parties: Great for potlucks, classroom treats, or spooky movie nights. They’re the kind of snack that makes people do a double-take before laughing and grabbing three.
- Crowd-Pleaser: Always gets rave reviews from kids and adults alike. The salty-sweet combo is universally loved, and the creepy factor adds to the fun.
- Unbelievably Delicious: The texture and flavor combo is next-level comfort food. Crunchy, creamy, salty, sweet—it hits every note.
What makes this recipe different from the rest? It’s the simplicity, honestly. Most Halloween treats require shaped cookie cutters, multiple colors of icing, and hours of patience. These just need a steady hand and a sense of humor. The almond sliver fingernail trick is pure genius—it adds that realistic witch finger look without any artistic skill required.
This recipe isn’t just good—it’s the kind that makes you close your eyes after the first bite. That moment when the white chocolate melts against the saltiness of the pretzel, and you realize you’ve created something that tastes way more expensive than it actually is. It’s comfort food reimagined—perfect for impressing guests without stress, or turning a simple snack into something memorable.
What Ingredients You Will Need
This recipe uses simple, wholesome ingredients to deliver that perfect salty-sweet combination and creepy aesthetic without any fuss. Most of these are pantry staples, which makes this recipe perfect for spontaneous Halloween baking sessions.
For the Witch Fingers
- Pretzel rods, 1 package (about 12-16 rods) – Look for thick, sturdy rods that won’t break easily during dipping. I prefer Snyder’s of Hanover for their consistent shape and crunch.
- White chocolate chips or melting wafers, 2 cups (340g) – Use good quality white chocolate for the smoothest melt. Ghirardelli or Guittard work beautifully. Avoid white candy melts if you want that authentic white chocolate flavor.
- Coconut oil or vegetable shortening, 1 tablespoon (15ml) – This helps thin the white chocolate for smoother dipping and gives it that glossy finish. Don’t skip it unless you want clumpy fingers.
- Sliced almonds, 24-32 pieces – These become the fingernails. Look for whole slices that are roughly the same size for consistency. I like Blue Diamond brand for their uniform slices.
- Green food coloring, gel or liquid – Optional but highly recommended for that witchy green tint. Gel coloring gives a more vibrant result without thinning the chocolate.
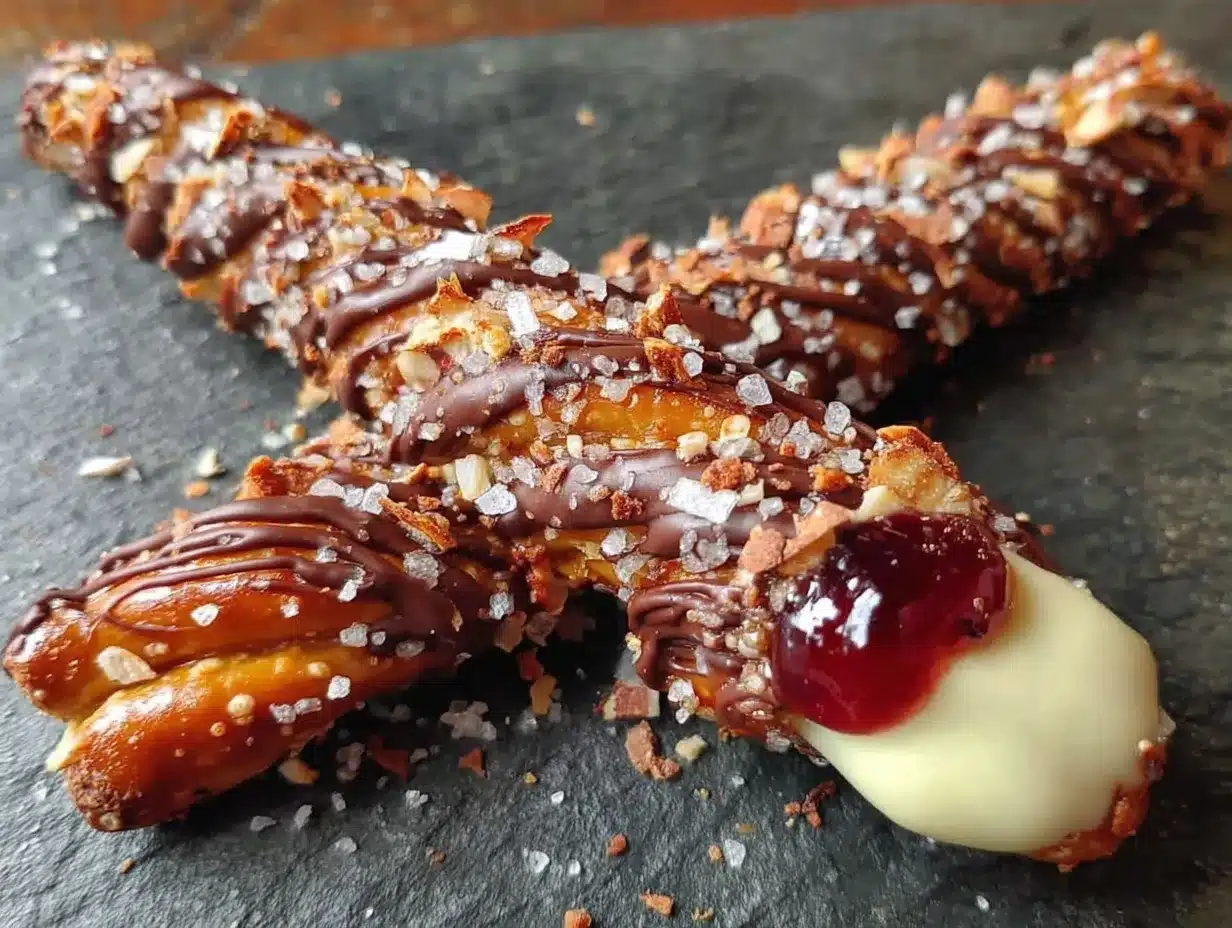
- Red jam or gel icing, 1 tablespoon – For the “blood” effect at the cuticle area. Strawberry jam works great, or use red decorating gel for a more dramatic look.
For Decoration (Optional but Fun)
- Edible glitter or luster dust – Adds a magical sparkle that makes these look like enchanted witch fingers.
- Black sanding sugar – For creating a “dirt” effect at the base of the fingers.
- Pretzel crumbs – Crush a few extra pretzels to sprinkle over the chocolate for texture.
Ingredient Selection Tips: When choosing pretzel rods, avoid the thin, fragile ones that snap easily. You want rods that feel substantial. For the white chocolate, check the ingredients list—real white chocolate contains cocoa butter, not just palm oil. This makes a difference in both taste and melting behavior.
Substitution Guidance: If you’re dairy-free, use dairy-free white chocolate chips and coconut oil. For a nut-free version, skip the almond fingernails and use small candy eyes or sprinkles instead. You can also use dark chocolate for a less sweet version, though the green tint won’t show as well.
Equipment Needed
You don’t need a fancy kitchen to make these spooky treats. Here’s what you’ll need:
- Baking sheet, lined with parchment paper or a silicone baking mat – This prevents sticking and makes cleanup a breeze.
- Microwave-safe bowl or double boiler – For melting the white chocolate. I prefer microwave for speed, but a double boiler gives you more control.
- Spatula or spoon – For stirring the chocolate. A silicone spatula works best for scraping every last bit.
- Small knife or toothpick – For spreading chocolate and positioning almond fingernails.
- Piping bag or small zip-top bag – For adding decorative details like “blood” or veins.
- Cooling rack – Optional but helpful for letting the chocolate set evenly.
Budget-Friendly Alternatives: No piping bag? Use a small zip-top bag with the corner snipped off. No cooling rack? The parchment-lined baking sheet works perfectly fine. No microwave? Melt the chocolate in a heatproof bowl set over a pot of simmering water.
Personal Experience: I’ve made these with both a double boiler and a microwave, and honestly, the microwave is faster and less fussy. Just remember to melt in 30-second bursts and stir between each. My first batch seized up because I got impatient and blasted it for a full minute. Learn from my mistakes, friends.
Preparation Method
Follow these steps carefully, and you’ll have a tray of spooky witch fingers that would make any Halloween party proud.
Step 1: Prepare Your Workspace
Line a baking sheet with parchment paper. Arrange your pretzel rods, sliced almonds, and any decorations within easy reach. This recipe moves fast once the chocolate is melted, so having everything ready is key.
Step 2: Melt the White Chocolate
Place 2 cups (340g) of white chocolate chips in a microwave-safe bowl. Add 1 tablespoon (15ml) of coconut oil. Microwave in 30-second bursts at 50% power, stirring thoroughly after each interval. Stop when the chocolate is about 75% melted—the residual heat will finish the job. Stir until completely smooth.
Pro Tip: If you want green witch fingers, add a few drops of green gel food coloring after the chocolate is melted. Stir until the color is evenly distributed. Start with less than you think you need—you can always add more.
Step 3: Dip the Pretzel Rods
Hold a pretzel rod by one end and dip it into the melted white chocolate, leaving about 1-2 inches undipped at the top (this will be the “wrist” area). Gently rotate the pretzel to coat it evenly. Let any excess chocolate drip back into the bowl for a few seconds.
Sensory Cue: You should hear a soft tap as the excess chocolate falls back into the bowl. If the chocolate is too thick, add another teaspoon of coconut oil and stir.
Step 4: Add the Fingernail
Immediately after dipping, place the coated pretzel on the parchment-lined baking sheet. While the chocolate is still wet, press a sliced almond firmly onto the tip of the pretzel, positioning it so the pointed end extends slightly beyond the pretzel’s end. This creates the fingernail effect.
Personal Tip: I’ve found that pressing the almond at a slight angle makes it look more like a real nail. Straight on looks too perfect and less creepy. Don’t be afraid to get a little messy here.
Step 5: Create the Finger Details
While the chocolate is still soft, use a toothpick or small knife to create knuckle lines. Gently press horizontal lines across the pretzel at regular intervals—about three lines per finger. Don’t press too hard; you just want to create subtle indentations in the chocolate.
For extra creepiness, add a tiny dot of red jam or gel icing at the base of the almond nail. This creates a “bloody cuticle” effect that really sells the witch finger look.
Step 6: Add Decorative Touches
If using edible glitter or luster dust, sprinkle it over the wet chocolate. For a “dirt” effect, roll the undipped end of the pretzel in black sanding sugar or crushed pretzel crumbs. This creates a transition from the witch finger to the “hand.”
Step 7: Let Them Set
Allow the chocolate to set completely at room temperature, about 15-20 minutes. If you’re in a hurry, place the baking sheet in the refrigerator for 5-10 minutes. Don’t rush this step—moving the pretzels before the chocolate is fully set will mess up your hard work.
Testing for Readiness: Gently touch the chocolate with your fingertip. If it feels firm and doesn’t leave a fingerprint, they’re ready. If the chocolate feels tacky, give them more time.
Step 8: Final Assembly and Presentation
Once set, arrange the witch finger pretzel rods on a serving platter. For maximum spooky effect, arrange them in a fan pattern like a hand reaching out of the ground. You can also stand them upright in a jar filled with black beans or crushed Oreos for a “dirt” effect.
Cooking Tips & Techniques
After making these spooky white chocolate witch finger pretzel rods more times than I care to admit, I’ve collected some hard-earned wisdom. Let me share what works and what doesn’t.
The Chocolate Melting Game
White chocolate is temperamental. It seizes up if it gets too hot or if even a drop of water gets in. Always use a completely dry bowl and utensils. If your chocolate does seize, don’t panic—add a tablespoon of warm coconut oil and stir vigorously. It should smooth right out.
My Biggest Failure: I once tried to melt white chocolate in a metal bowl over boiling water without a thermometer. The chocolate got too hot, turned grainy, and I had to throw the whole batch away. Now I use the microwave method exclusively, and I never walk away while it’s melting.
The Almond Nail Trick
The position of the almond matters more than you’d think. If you place it too far forward, it looks like a weird hat on the pretzel. Too far back, and you lose the fingernail effect. Aim for about 1/8 inch of the almond extending past the pretzel tip. Practice on a few pretzels before committing to the whole batch.
Timing and Multitasking
This recipe moves fast once you start dipping. I recommend having a helper if you’re making a large batch. One person dips, the other adds the almonds and creates the knuckle lines. If you’re working alone, dip 3-4 pretzels at a time, then add the details before moving on to the next batch.
Consistency Tips
For uniform witch fingers, use pretzel rods that are roughly the same length and thickness. This ensures they all set at the same rate and look cohesive on the platter. Also, keep your melted chocolate warm but not hot—if it starts to thicken, give it a quick 10-second zap in the microwave.
Variations & Adaptations
One of the best things about this recipe is how easily it adapts to different tastes and dietary needs. Here are some variations I’ve tried and loved.
Dark Chocolate Witch Fingers
Swap the white chocolate for dark chocolate (70% cacao or higher). The bitterness of the dark chocolate pairs beautifully with the salty pretzel. For the fingernails, use white chocolate chips or white candy melts to create a contrast. The green food coloring won’t show on dark chocolate, so skip it and let the dark color add to the spooky vibe.
Gluten-Free Version
Use gluten-free pretzel rods. Many brands now offer gluten-free options that work perfectly. Just check the label to ensure they’re certified gluten-free if that’s important for your guests. The rest of the ingredients are naturally gluten-free.
Vegan Witch Fingers
Use dairy-free white chocolate chips and coconut oil. Most sliced almonds are vegan, but double-check the label. For the “blood” effect, use a vegan red jam or pomegranate molasses. These taste just as good as the original and are perfect for plant-based Halloween parties.
Spicy Witch Fingers
Add a pinch of cayenne pepper or chili powder to the melted white chocolate before dipping. The heat sneaks up on you after the sweetness, creating a surprising kick. This is my personal favorite variation—it keeps people guessing.
Mini Witch Fingers
Use mini pretzel twists instead of rods. Skip the almond fingernails and use small candy eyes or sprinkles instead. These are perfect for kids’ lunchboxes or as a less messy party snack. They’re also great for portion control when you’re trying not to eat an entire tray of witch fingers.
Serving & Storage Suggestions
These spooky white chocolate witch finger pretzel rods are best served at room temperature, which keeps the chocolate firm but not brittle. Arrange them on a black or dark-colored platter for maximum visual impact. I like to scatter a few loose almonds and pretzel crumbs around the base to look like “grave dirt.”
What to Serve Alongside
These pair beautifully with other Halloween treats. Serve them alongside pumpkin-shaped cookies, ghost meringues, or a bowl of candy corn. For drinks, try a warm apple cider or a spooky punch made with ginger ale and dry ice (for the adults, a dark beer or a blackberry cocktail works wonderfully).
Storage Instructions
Store the witch finger pretzel rods in an airtight container at room temperature for up to 5 days. Do not refrigerate them unless absolutely necessary—the condensation can cause the chocolate to bloom (develop white streaks) and lose its glossy finish.
Freezer Instructions: You can freeze these for up to 2 months. Place them in a single layer on a baking sheet and freeze until solid, then transfer to a freezer-safe container with parchment paper between layers. Thaw at room temperature for about 30 minutes before serving.
How Flavors Develop Over Time
These are actually best within the first 24 hours, when the pretzel is still crunchy and the chocolate is perfectly set. After a day or two, the pretzel may start to soften slightly from the moisture in the chocolate. If you’re making these ahead for a party, I recommend making them no more than 2 days in advance.
Nutritional Information & Benefits
While these spooky white chocolate witch finger pretzel rods are definitely a treat, here’s what you should know about their nutritional profile.
Per serving (1 pretzel rod):
- Calories: 180-220
- Fat: 10-12g
- Carbohydrates: 22-26g
- Sugar: 14-18g
- Protein: 3-4g
- Sodium: 280-350mg
Health Benefits: Pretzels provide quick energy from carbohydrates, and almonds offer healthy fats, vitamin E, and magnesium. White chocolate contains calcium from milk solids. That said, these are an occasional treat, not a health food—and that’s okay.
Dietary Considerations: This recipe contains dairy (white chocolate), gluten (pretzels), and tree nuts (almonds). For allergen-friendly versions, see the variations section above.
Personal Wellness Perspective: I believe in balance. These witch fingers are part of the fun of Halloween—a holiday that comes once a year. Enjoy them without guilt, share them with friends, and maybe take an extra walk the next day. Food is about joy, not just fuel.
Conclusion
These spooky white chocolate witch finger pretzel rods are everything a Halloween treat should be—fun, creepy, delicious, and surprisingly easy to make. They prove that you don’t need complicated techniques or fancy equipment to create something that impresses everyone at the party.
What I love most about this recipe is how it brings people together. My niece still talks about the day she “invented” witch finger pretzels, and every Halloween since, she’s in the kitchen with me, dipping and decorating and laughing. That’s the kind of memory you can’t buy.
I encourage you to make these your own. Add extra sprinkles, try different chocolate colors, or experiment with the spooky details. The best recipes are the ones that evolve with the people who make them.
So go ahead—dip those pretzels, press on those almond nails, and get ready to watch your guests’ faces light up when they see your creation. And when someone asks for the recipe, just smile and say, “It’s a family secret.”
Happy Halloween, friends! Now go make some magic.
Frequently Asked Questions
Can I use candy melts instead of white chocolate?
Yes, you can use white candy melts, but the flavor won’t be as rich. Candy melts are designed for coating and set up harder than real white chocolate. If using candy melts, skip the coconut oil—they’re already formulated to melt smoothly.
How do I keep the chocolate from cracking when I bite into it?
Let the pretzel rods come to room temperature before eating. Cold chocolate is more brittle and prone to cracking. If you’ve stored them in the fridge, let them sit out for 15-20 minutes first.
Can I make these ahead of time for a party?
Absolutely. Make them up to 2 days in advance and store in an airtight container at room temperature. Don’t refrigerate them, as condensation can ruin the chocolate’s appearance.
What if my white chocolate seizes up while melting?
Don’t panic. Add 1 tablespoon of warm coconut oil or vegetable shortening and stir vigorously. The fat will help smooth out the chocolate. If it’s still grainy, you may have overheated it—start over with fresh chocolate.
Can I use pretzel sticks instead of rods?
You can, but they’re much thinner and more fragile. The witch finger effect works best with thicker pretzel rods that can hold more chocolate and look more like actual fingers. If using sticks, reduce dipping time and handle them gently.
Pin This Recipe!

Spooky White Chocolate Witch Finger Pretzels

These spooky white chocolate witch finger pretzel rods are a quick and easy Halloween treat that combines crunchy pretzels, creamy white chocolate, and almond fingernails for a delightfully creepy snack. Perfect for parties, they come together in under 20 minutes and are impossible to mess up.
- Prep Time: 10 minutes
- Cook Time: 5 minutes
- Total Time: 20 minutes
- Yield: 12-16 servings 1x
- Category: Dessert
- Cuisine: American
Ingredients
- 1 package (about 12–16) pretzel rods
- 2 cups (340g) white chocolate chips or melting wafers
- 1 tablespoon (15ml) coconut oil or vegetable shortening
- 24–32 sliced almonds
- Green food coloring (gel or liquid), optional
- 1 tablespoon red jam or gel icing
- Edible glitter or luster dust (optional)
- Black sanding sugar (optional)
- Pretzel crumbs (optional)
Instructions
- Line a baking sheet with parchment paper. Arrange pretzel rods, sliced almonds, and decorations within easy reach.
- Place 2 cups (340g) white chocolate chips and 1 tablespoon (15ml) coconut oil in a microwave-safe bowl. Microwave in 30-second bursts at 50% power, stirring after each interval, until about 75% melted. Stir until completely smooth. Add green food coloring if desired.
- Hold a pretzel rod by one end and dip it into the melted white chocolate, leaving about 1-2 inches undipped at the top (the ‘wrist’ area). Gently rotate to coat evenly. Let excess chocolate drip back into the bowl.
- Immediately place the coated pretzel on the parchment-lined baking sheet. While the chocolate is still wet, press a sliced almond firmly onto the tip of the pretzel, with the pointed end extending slightly beyond the pretzel’s end to create a fingernail effect.
- While the chocolate is still soft, use a toothpick or small knife to create knuckle lines by gently pressing horizontal lines across the pretzel at regular intervals (about three lines per finger). Add a tiny dot of red jam or gel icing at the base of the almond nail for a ‘bloody cuticle’ effect.
- If using edible glitter, luster dust, or other decorations, sprinkle them over the wet chocolate. For a ‘dirt’ effect, roll the undipped end of the pretzel in black sanding sugar or crushed pretzel crumbs.
- Allow the chocolate to set completely at room temperature, about 15-20 minutes, or refrigerate for 5-10 minutes. The chocolate should feel firm and not leave a fingerprint when touched.
- Once set, arrange the witch finger pretzel rods on a serving platter. For maximum spooky effect, arrange them in a fan pattern like a hand reaching out of the ground, or stand them upright in a jar filled with black beans or crushed Oreos.
Notes
White chocolate is temperamental; always use a completely dry bowl and utensils. If chocolate seizes, add 1 tablespoon warm coconut oil and stir vigorously. For uniform witch fingers, use pretzel rods of similar length and thickness. These are best within the first 24 hours when the pretzel is still crunchy.
Nutrition
- Serving Size: 1 pretzel rod
- Calories: 200
- Sugar: 16
- Sodium: 315
- Fat: 11
- Saturated Fat: 6
- Carbohydrates: 24
- Fiber: 1
- Protein: 3.5
Keywords: Halloween, witch fingers, pretzel rods, white chocolate, spooky treats, easy dessert, party snack


