I wasn’t supposed to be in the kitchen that afternoon. I’d stopped by my sister-in-law’s house to drop off a slow cooker I’d borrowed, and the plan was simple—hand it over, chat for five minutes, leave. But the second I walked through the door, something was different. The air smelled sweet and buttery, like vanilla and warm sugar, but there was this other note too, something almost savory. I followed the smell into the kitchen, and there she was, my sister-in-law, covered in a fine dusting of flour, laughing at something on her phone while her three-year-old sat on the counter next to her, both of them elbow-deep in a pile of sugar cookie dough.
She barely looked up. “Oh good, you’re here. Grab a cookie sheet.” No explanation. No big deal. Just another Tuesday afternoon, apparently. But what I saw next stopped me cold. She wasn’t just making cookies. She was pressing her own hand into the dough—her actual hand—and arranging little candy corn feathers around each palm print. The kid was giggling so hard she could barely hold still. And my sister-in-law? She was acting like this was the most normal thing in the world. Like she hadn’t just invented the cutest thing I’d ever seen in my life.
I stood there for a solid minute, just watching. Honestly, I felt a little jealous. Not of the cookies themselves, but of the ease of it all. The way she wasn’t trying to impress anyone. The way the mess didn’t matter. The way she turned a regular Tuesday into something her daughter would probably remember forever, using nothing more than a batch of sugar cookie dough and her own two hands. Maybe you’ve had that moment, where you see someone do something so simple and brilliant that you wonder why you never thought of it yourself. That was me, standing in her flour-dusted kitchen, holding a cookie sheet I’d never asked for. And that’s how these adorable turkey hand sugar cookies became a tradition in my house too.
Why You’ll Love This Recipe
Let me tell you, these aren’t just cookies. These are a whole activity, a memory, and a dessert all rolled into one. And honestly? They’re almost too cute to eat. Almost.
- Incredibly Easy for Little Hands: The whole recipe revolves around pressing your hand into dough. If your kid can make a handprint in play-doh, they can make these cookies. No cookie cutters needed, no complicated shaping. It’s foolproof, even for toddlers.
- Simple Pantry Ingredients: You probably already have everything in your kitchen. Butter, sugar, flour, eggs, vanilla. The decorations are just candy corn and a few chocolate chips. No specialty baking trips required.
- Perfect for Thanksgiving Fun: Whether you need a classroom treat, a pre-dinner activity to keep the kids busy, or just a way to get into the holiday spirit, these are it. They’re the definition of a crowd-pleaser.
- Unbelievably Adorable Results: I’m not exaggerating when I say every single person who sees these cookies smiles. The little candy corn feathers, the chocolate chip eyes, the way the thumbprint makes the perfect turkey head—it’s genius-level cute.
- Builds Kitchen Confidence in Kids: There’s something about making a cookie that looks exactly like your own hand that makes a child beam with pride. My niece still talks about “her” turkey cookies from two years ago.
What makes this recipe different from every other sugar cookie out there? It’s the experience. It’s not just about the taste (though they are delicious, buttery, and perfectly soft). It’s about the moment you press your hand into the dough and pull it away to reveal your very own turkey shape. It’s personal. It’s unique. And it’s the kind of recipe that makes you close your eyes after that first bite, not just because it tastes good, but because of who you made it with.
What Ingredients You Will Need
This recipe keeps things wonderfully simple. We’re using a classic sugar cookie base that’s sturdy enough to hold its shape but soft enough to be utterly satisfying. The ingredients are wholesome, familiar, and easy to find—no fancy baking science required.
For the Sugar Cookie Dough
- 1 cup (226g) unsalted butter, softened — Make sure it’s truly at room temperature. Cold butter won’t cream properly, and melted butter will make the cookies spread too much. I personally prefer using Land O’Lakes for consistent results.
- 1 cup (200g) granulated sugar — Regular white sugar gives these cookies the perfect sweetness and a slightly crisp edge.
- 1 large egg, room temperature — A room-temperature egg incorporates into the creamed butter much more smoothly, creating a better emulsion.
- 1 teaspoon pure vanilla extract — Please use pure vanilla, not imitation. It makes a real difference in the final flavor. (Adds warmth and depth to the sweet cookie base.)
- 2 ½ cups (312g) all-purpose flour — Spoon and level your flour. Scooping directly from the bag can pack in too much flour, making the dough dry and crumbly.
- ½ teaspoon baking powder — This gives the cookies just a little lift without making them puff up and lose their handprint shape.
- ¼ teaspoon salt — Don’t skip this. Salt balances the sweetness and enhances all the other flavors.
For the Decoration & Assembly
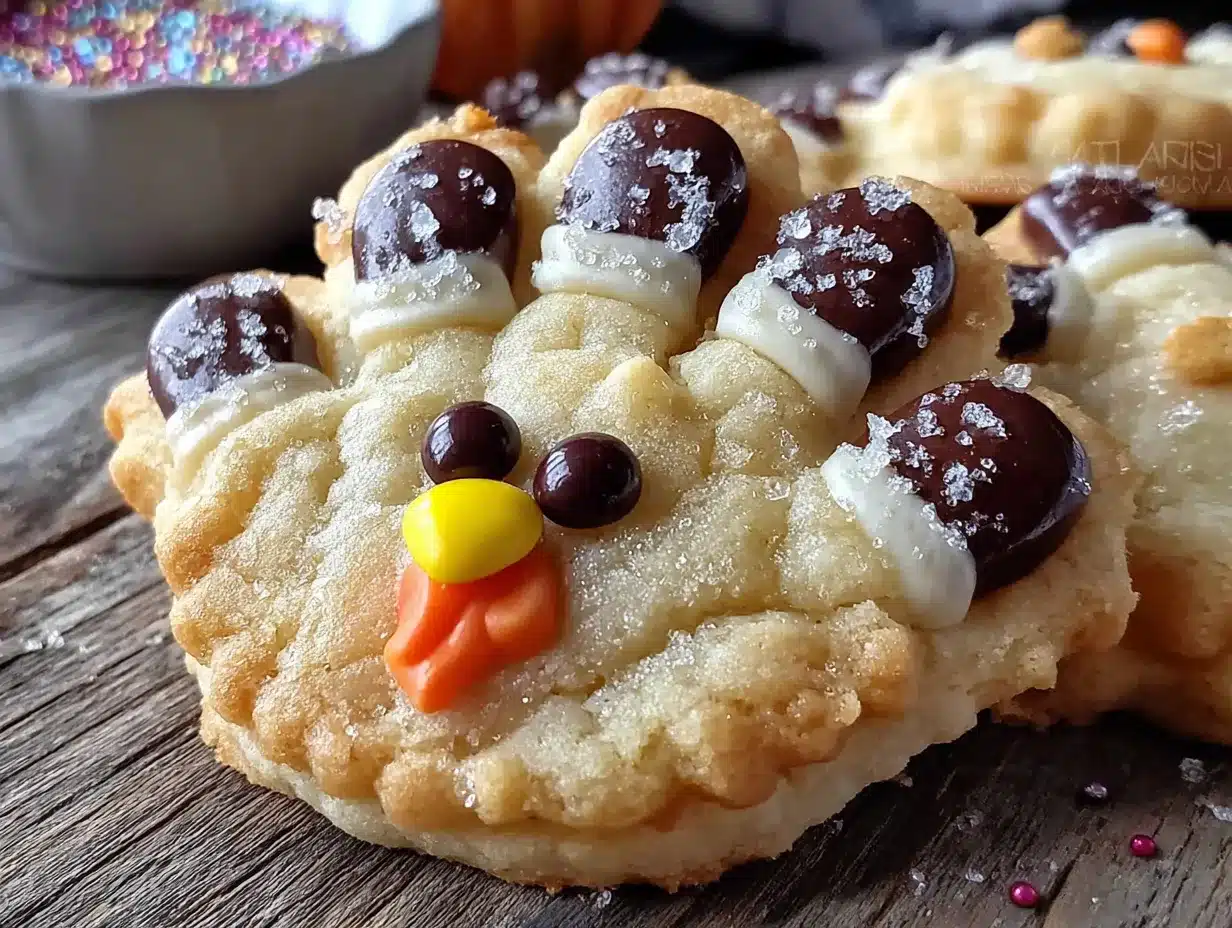
- Candy corn (about 3-4 pieces per cookie) — These become the turkey feathers. Look for fresh, soft candy corn. Stale ones can be hard and difficult to press into the dough.
- Mini chocolate chips (2 per cookie) — For the turkey’s eyes. You can also use regular chocolate chips cut in half if that’s what you have on hand.
- Orange or red M&M’s (or a small orange candy) — This becomes the turkey’s wattle (that little red dangly bit under the beak). A small red jelly bean or even a tiny piece of dried fruit works too.
- 1 tablespoon milk (for the egg wash) — Helps the candy corn stick to the dough and gives the cookies a beautiful golden sheen.
Ingredient Selection Tip: For the best texture, make sure your butter is softened but not melted. You should be able to press your finger into it easily, but it should still hold its shape. If you’re in a hurry, cut the butter into small cubes and let it sit on the counter for about 15 minutes.
Substitution Guidance: Need a dairy-free option? Use vegan butter sticks (like Earth Balance) and a plant-based milk for the egg wash. The texture will be slightly different, but the handprint concept works beautifully. For a gluten-free version, I’ve had good luck using a 1:1 gluten-free baking flour blend, but add an extra tablespoon of flour if the dough feels too sticky.
Equipment Needed
You don’t need a fancy bakery setup for these. The beauty of this recipe is how low-stakes the equipment is. Here’s what you’ll want to have on hand:
- Electric mixer (hand or stand) — You can cream the butter and sugar by hand with a wooden spoon, but an electric mixer makes it much easier and faster. I’ve done it both ways, and honestly, the mixer is worth the cleanup.
- Large mixing bowls — One for the wet ingredients, one for the dry.
- Baking sheets (2-3) — Standard half-sheet pans work perfectly. Line them with parchment paper for easy cleanup and to prevent sticking.
- Parchment paper or silicone baking mats — Silicone mats are a game-changer for even baking. Parchment paper is a close second.
- Rolling pin — A standard rolling pin is fine. If you don’t have one, a clean wine bottle works in a pinch. I’ve been there.
- Sharp knife or pizza cutter — For cutting around the handprint shapes after baking.
- Cooling rack — Essential for letting the cookies cool completely before decorating. If you decorate them while they’re warm, the candy corn will slide right off.
- Small offset spatula (optional) — Helpful for transferring the delicate baked handprints from the baking sheet to the cooling rack without breaking them.
Budget-Friendly Tip: Don’t have a rolling pin with thickness guides? Use two wooden spoons or two chopsticks placed on either side of the dough as a guide. It’s not fancy, but it works perfectly to ensure even thickness.
Preparation Method
Alright, let’s get to the fun part. This method is broken down into clear steps, and I’ve included all the little cues I wish someone had told me the first time I made these.
- Cream the butter and sugar. In a large mixing bowl, beat the softened butter and granulated sugar together on medium speed until light, fluffy, and pale in color. This should take about 3-4 minutes. Scrape down the sides of the bowl halfway through. The mixture should look like a thick, airy paste. (Sensory cue: It should smell sweet and buttery, and when you rub a tiny bit between your fingers, you shouldn’t feel any graininess from the sugar.)
- Add the egg and vanilla. Crack the room-temperature egg into the butter mixture and add the vanilla extract. Beat on low speed until just combined. Don’t overmix here—you just want everything to come together. The mixture might look a little curdled at this point, and that’s totally fine. (Personal tip: I once added a cold egg straight from the fridge, and the mixture seized up. Room temperature really matters here.)
- Combine the dry ingredients. In a separate bowl, whisk together the all-purpose flour, baking powder, and salt. Whisking aerates the flour and ensures the baking powder is evenly distributed. You don’t want one cookie to get all the leavening.
- Mix the dry into the wet. Gradually add the flour mixture to the butter mixture, about a third at a time, mixing on low speed after each addition. Stop mixing as soon as the flour disappears. The dough should be soft but not sticky. If it feels too sticky to handle, add an extra tablespoon of flour. (Troubleshooting tip: If the dough is too crumbly, you may have added too much flour. Drizzle in a teaspoon of milk and mix again.)
- Chill the dough. Divide the dough in half, flatten each half into a disc, wrap tightly in plastic wrap, and refrigerate for at least 30 minutes. This step is non-negotiable. Chilled dough is much easier to roll out, and it helps the cookies hold their handprint shape during baking. (Time estimate: 30 minutes minimum, but an hour is even better.)
- Preheat and prepare. Preheat your oven to 350°F (175°C). Line two baking sheets with parchment paper or silicone mats.
- Roll out the dough. On a lightly floured surface, roll one disc of dough to about ¼-inch (6mm) thickness. Keep the surface and rolling pin lightly dusted with flour to prevent sticking. (Sensory cue: The dough should feel cool and firm, but pliable. If it cracks at the edges, let it sit at room temperature for 2-3 minutes.)
- Make the handprints. Here’s the magic part. Gently press your child’s (or your own) clean, dry hand into the dough. Press firmly enough to leave a clear imprint, but don’t push all the way through. You want a deep indentation, not a hole. For smaller kids, you might need to gently press their fingers down individually to get a clear print. (Personal anecdote: My niece has tiny hands, and the first time we did this, she pressed so hard her whole hand went through the dough. We laughed, rolled it back up, and tried again. The second one was perfect.)
- Cut around the handprints. Using a sharp knife or pizza cutter, carefully cut around each handprint, leaving about a ½-inch border around the outline of the hand. Don’t worry about making it perfect—a little rustic charm is part of the appeal. Transfer the cut-out handprints to the prepared baking sheets, spacing them about 2 inches apart.
- Add the turkey features. This is where they become turkeys. For each handprint cookie, arrange 3-4 candy corn pieces along the top edge of the palm (the “wrist” area), with the white tips pointing inward. These are the feathers. Then, gently press two mini chocolate chips into the thumbprint area for the eyes. Finally, place a small orange or red M&M just below the eyes for the wattle. (Warning: Don’t press the decorations too deep into the dough, or they’ll sink and disappear during baking.)
- Bake. Bake the cookies for 8-10 minutes, or until the edges are just barely starting to turn golden. The centers will still look soft and slightly underdone. That’s exactly what you want. (Sensory cue: Your kitchen should smell like a bakery. The cookies will look puffy and pale in the center.)
- Cool completely. Let the cookies cool on the baking sheet for 5 minutes. This allows them to set up. Then, carefully transfer them to a wire cooling rack to cool completely. Do not attempt to decorate further or move them while they’re warm—they are fragile. (Time estimate: About 20-30 minutes for full cooling.)
Cooking Tips & Techniques
I’ve made these cookies about a dozen times now, and I’ve learned a few things the hard way. Let me save you some trouble.
The Handprint Depth is Everything. If you press too lightly, the handprint will bake away and disappear. If you press too hard, you’ll cut through the dough. The sweet spot is a firm, even press where you can clearly see every finger and the palm line. I like to press the hand in, then gently wiggle the fingers before lifting up. This helps release the dough without distorting the print.
Chill the Shaped Cookies. After you’ve cut out the handprints and placed them on the baking sheet, pop the whole sheet in the fridge for another 10 minutes before baking. This is a pro-level tip that ensures the cookies hold their shape perfectly. I forgot to do this once, and the handprints spread into blobby ovals. They still tasted good, but they didn’t look like turkeys anymore.
Don’t Overbake. I cannot stress this enough. Sugar cookies continue to bake on the hot baking sheet even after you pull them out of the oven. If you wait until they look fully golden, they’ll be too hard. Pull them out when the edges are just barely colored and the centers still look soft and slightly puffy. They’ll set up perfectly as they cool.
Work in Batches. Only roll out one disc of dough at a time. Keep the other disc in the fridge. Warm dough is sticky dough, and sticky dough is impossible to work with. If your dough starts getting tacky while you’re rolling, just pop it back in the fridge for 10 minutes.
Multitasking Strategy: While the first batch is baking, use that time to press handprints into the next batch of rolled dough. This keeps the assembly line moving and prevents you from waiting around. I usually have two baking sheets going at once—one in the oven, one being prepped.
A Personal Failure: The first time I made these, I used a dark non-stick baking sheet, and the bottoms burned before the tops were done. Use light-colored, shiny baking sheets for the most even baking. If all you have is dark pans, reduce the oven temperature by 25°F.
Variations & Adaptations
One of the best things about this recipe is how endlessly adaptable it is. Once you’ve mastered the basic handprint technique, the possibilities are wide open.
Dietary Adaptations: Need these to be egg-free? Use a flax egg (1 tablespoon ground flaxseed mixed with 3 tablespoons water, let sit for 5 minutes). The texture will be slightly denser, but the handprint still holds beautifully. For a dairy-free version, vegan butter works wonderfully. I’ve tested this with both, and my family couldn’t tell the difference.
Seasonal Variations: These aren’t just for Thanksgiving! For Christmas, turn the handprints into reindeer by using brown candy for the nose and pretzel sticks for antlers. For Easter, make them into bunnies by adding pink candy for the ears and a tiny white candy for the tail. For a Halloween version, make the handprints green and add candy eyes for little monsters. The handprint is the canvas—you just change the decorations.
Flavor Twists: Add a teaspoon of cinnamon or pumpkin pie spice to the dough for a fall-flavored version. For a chocolate base, replace ¼ cup of the flour with unsweetened cocoa powder. I made a chocolate version last year, and the kids went absolutely wild for it. You can also add a teaspoon of almond extract instead of vanilla for a slightly nutty, marzipan-like flavor.
Candy Substitutions: Not a fan of candy corn? No problem. Use sliced almonds or sunflower seeds for the feathers for a less sugary option. For the eyes, you can use small sprinkles or even a dot of black gel icing. The wattle can be a dried cranberry or a small piece of red licorice. Don’t be afraid to get creative with what you have in your pantry.
Personal Variation: My favorite twist is the “Turkey Family” version. I make handprints from everyone in the family—mom, dad, and all the kids—and arrange them on a platter in size order. It makes the most adorable centerpiece for the kids’ table at Thanksgiving dinner, and everyone fights over which hand is theirs.
Serving & Storage Suggestions
These cookies are best served at room temperature, and honestly, they’re at their peak the day they’re made. The candy corn stays soft, the cookie is perfectly tender, and everything just feels right in the world.
How to Serve: Arrange the turkey cookies on a large platter or cake stand. They make a fantastic centerpiece for a kids’ Thanksgiving table. Pair them with a glass of cold milk for the little ones or a warm cup of spiced apple cider for the adults. They’re also perfect for classroom parties, playdates, or as a fun after-school snack during the holiday season.
Complementary Dishes: If you’re serving these as part of a larger dessert spread, they pair beautifully with pumpkin pie, apple crisp, or even a simple vanilla ice cream. But honestly, they’re so cute and satisfying on their own that they don’t really need anything else.
Storage Instructions: Store the cookies in an airtight container at room temperature for up to 3 days. Place a sheet of parchment paper between layers to prevent the candy corn from sticking to the cookies above them. Do not refrigerate them—the fridge will make the cookies dry and the candy corn hard.
Freezer Instructions: You can freeze the undecorated, baked cookies for up to 2 months. Wrap them tightly in plastic wrap and then place them in a freezer-safe bag. When you’re ready to serve, thaw them at room temperature, then add the candy corn and chocolate chip decorations. The candy corn doesn’t freeze well, so always add it fresh after thawing.
Reheating Tips: These cookies are meant to be eaten at room temperature, but if you want a slightly warm cookie, pop one in the microwave for about 5-8 seconds. Just be careful—the candy corn can get very hot very quickly.
Flavor Development: Interestingly, the cookies actually taste a little better on day two. The flavors meld together, and the texture softens just slightly. The candy corn will harden a bit, but the cookie itself becomes wonderfully tender. So if you can resist eating them all on day one, you’re in for a treat.
Nutritional Information & Benefits
Let’s be real—these are cookies, not health food. But there are a few bright spots worth mentioning, especially if you’re making them for a holiday treat.
| Nutrient | Per Cookie (approx.) |
|---|---|
| Calories | 185 |
| Total Fat | 9g |
| Saturated Fat | 5g |
| Carbohydrates | 25g |
| Sugar | 14g |
| Protein | 2g |
Health Benefits of Key Ingredients: Butter, in moderation, contains fat-soluble vitamins like A, D, E, and K. Eggs provide high-quality protein and choline, which is important for brain health. And honestly, the biggest benefit here isn’t nutritional—it’s emotional. The act of making these cookies with your kids creates connection, builds memories, and encourages creativity in the kitchen. That has value too.
Dietary Considerations: This recipe contains gluten, dairy, and eggs. For allergen-friendly versions, see the variations section above. These cookies are not low-carb or keto-friendly, but they are a wonderful occasional treat that feels special without being overly complicated.
Personal Wellness Perspective: I believe in balance. We eat salads and roasted vegetables most nights, but when Thanksgiving rolls around, I want my kids to have the full experience—including the sugar cookies. These handprint turkeys are part of our family’s holiday tradition, and the joy they bring is worth every calorie. It’s about the memories, not just the macros.
Conclusion
These adorable turkey hand sugar cookies are more than just a recipe. They’re a moment. They’re the flour on your counter, the giggles from your kids, the pride in their eyes when they see their own handprint turned into a turkey. They’re the cookie that makes everyone at the Thanksgiving table smile, the one that gets photographed and shared and talked about long after the last crumb is gone.
I love this recipe because it’s forgiving. It doesn’t demand perfection. Your handprint doesn’t have to be flawless. Your candy corn doesn’t have to be perfectly aligned. The mess is part of the charm. And honestly, the slightly imperfect ones are always the most memorable.
So go ahead. Make a mess. Press your hand into the dough. Let your kids decorate their own turkeys. And when someone asks you where you got the recipe, just smile and say, “Oh, it’s nothing. Just something I figured out one afternoon.” Because that’s exactly how the best recipes happen.
I’d love to see your turkey creations! Leave a comment below and tell me how many handprints you ended up making, or tag me in your photos if you share them online. Did your kids come up with their own variations? I’m always looking for new ideas. Happy baking, friends!
Frequently Asked Questions
Can I use store-bought sugar cookie dough for this recipe?
Absolutely! If you’re short on time, a tube of refrigerated sugar cookie dough works perfectly. Just make sure it’s the kind that rolls out, not the drop-cookie kind. Follow the package instructions for baking time, and the handprint technique works exactly the same way.
My child’s handprint disappeared after baking. What went wrong?
This usually happens for one of two reasons: either you didn’t press firmly enough into the dough, or the dough was too warm when it went into the oven. Make sure you’re pressing deeply enough to leave a clear indent, and always chill the shaped cookies for at least 10 minutes before baking. The cold dough helps the handprint stay defined.
Can I make the dough ahead of time?
Yes! The dough can be made up to 3 days in advance and kept tightly wrapped in the refrigerator. You can also freeze the dough discs for up to 2 months. Just thaw them in the fridge overnight before rolling out. This makes these cookies perfect for holiday prep.
The candy corn fell off after baking. How do I fix this?
If the candy corn isn’t sticking, you can use a tiny dab of royal icing or even a small dot of corn syrup as “glue” to attach it after the cookies have cooled. Alternatively, press the candy corn into the dough more firmly before baking, but be careful not to push all the way through.
Can I use this handprint technique for other holidays?
Absolutely! This is one of the most versatile cookie techniques I know. For Christmas, make reindeer with pretzel antlers and a red candy nose. For Easter, turn the handprints into bunnies with pink candy ears. For Halloween, make green monster hands with candy eyes. The possibilities are endless, and the technique is always the same.
Pin This Recipe!

Adorable Turkey Hand Sugar Cookies: Easy Recipe for Kids

These adorable turkey hand sugar cookies are a fun and easy Thanksgiving activity for kids. Made with a simple sugar cookie dough and decorated with candy corn and chocolate chips, they create a memorable and delicious treat.
- Prep Time: 30 minutes
- Cook Time: 10 minutes
- Total Time: 1 hour 10 minutes
- Yield: 24 servings 1x
- Category: Dessert
- Cuisine: American
Ingredients
- 1 cup (226g) unsalted butter, softened
- 1 cup (200g) granulated sugar
- 1 large egg, room temperature
- 1 teaspoon pure vanilla extract
- 2 ½ cups (312g) all-purpose flour
- ½ teaspoon baking powder
- ¼ teaspoon salt
- Candy corn (about 3-4 pieces per cookie)
- Mini chocolate chips (2 per cookie)
- Orange or red M&M’s (or a small orange candy)
- 1 tablespoon milk (for the egg wash)
Instructions
- Cream the butter and sugar. In a large mixing bowl, beat the softened butter and granulated sugar together on medium speed until light, fluffy, and pale in color, about 3-4 minutes. Scrape down the sides of the bowl halfway through.
- Add the egg and vanilla. Crack the room-temperature egg into the butter mixture and add the vanilla extract. Beat on low speed until just combined.
- Combine the dry ingredients. In a separate bowl, whisk together the all-purpose flour, baking powder, and salt.
- Mix the dry into the wet. Gradually add the flour mixture to the butter mixture, about a third at a time, mixing on low speed after each addition. Stop mixing as soon as the flour disappears. The dough should be soft but not sticky.
- Chill the dough. Divide the dough in half, flatten each half into a disc, wrap tightly in plastic wrap, and refrigerate for at least 30 minutes.
- Preheat and prepare. Preheat your oven to 350°F (175°C). Line two baking sheets with parchment paper or silicone mats.
- Roll out the dough. On a lightly floured surface, roll one disc of dough to about ¼-inch (6mm) thickness.
- Make the handprints. Gently press a clean, dry hand into the dough firmly enough to leave a clear imprint, but don’t push all the way through.
- Cut around the handprints. Using a sharp knife or pizza cutter, carefully cut around each handprint, leaving about a ½-inch border around the outline of the hand. Transfer to the prepared baking sheets, spacing them about 2 inches apart.
- Add the turkey features. For each handprint cookie, arrange 3-4 candy corn pieces along the top edge of the palm (the ‘wrist’ area), with the white tips pointing inward. Press two mini chocolate chips into the thumbprint area for the eyes. Place a small orange or red M&M just below the eyes for the wattle.
- Bake. Bake the cookies for 8-10 minutes, or until the edges are just barely starting to turn golden. The centers will still look soft and slightly underdone.
- Cool completely. Let the cookies cool on the baking sheet for 5 minutes, then carefully transfer them to a wire cooling rack to cool completely.
Notes
Chill the shaped cookies for 10 minutes before baking to help them hold their shape. Do not overbake; cookies continue to bake on the hot sheet. Use light-colored baking sheets for even baking. For best results, use room temperature butter and egg.
Nutrition
- Serving Size: 1 cookie
- Calories: 185
- Sugar: 14
- Fat: 9
- Saturated Fat: 5
- Carbohydrates: 25
- Protein: 2
Keywords: turkey cookies, handprint cookies, sugar cookies, Thanksgiving cookies, kids baking, easy cookie recipe


