The neighborhood pie contest was in forty-eight hours and I’d completely forgotten. My friend Sarah texted a reminder, and I stared at my calendar in horror. Everyone else would be bringing their grandmother’s heirloom recipes, the kind that take three days and involve rolling out pastry while reciting a family incantation. I had a can of pumpkin puree, some basic baking staples, and a distinct lack of confidence. Honestly, I thought about just buying one from the store and pretending.
But something stopped me. Maybe it was pride, or maybe it was the memory of my own grandmother’s kitchen, where the smell of cinnamon and nutmeg meant something special was happening. I decided to go for it. I grabbed the biggest mixing bowl I owned, which was chipped on the edge from a move two years ago, and started pulling things together. I won’t lie, there was a moment where I accidentally used salt instead of sugar in the first attempt. Let me tell you, that was a sad, sad little pie shell that went straight in the trash.
But the second attempt? That was different. The filling came together like a dream—smooth, fragrant, the color of a perfect autumn sunset. The crust, which I’d always been nervous about, actually flaked the way it was supposed to. I brought it to the contest feeling like an imposter. I mean, I’d only made it because I had no other choice. When they announced the winner and called my name, I nearly dropped the pie plate. The classic homemade pumpkin pie from scratch, born from panic and a pantry raid, took the ribbon. And honestly, I’ve been making it ever since, because sometimes the best things happen when you’re not trying so hard. Maybe you’ve been there—that moment when a rushed, simple recipe turns out to be the one everyone asks for again and again.
Why You’ll Love This Recipe
This isn’t just another pumpkin pie recipe. This is the one that makes you look like you spent all day in the kitchen when you really didn’t. Let me break down why this particular version has become a family favorite around here.
- Simple Ingredients : No fancy grocery trips needed. You likely have flour, butter, sugar, and spices in your pantry right now. The pumpkin puree is the only special item, and it’s available year-round.
- Budget-Friendly : This pie costs a fraction of what you’d pay at a bakery. For a family feeding a crowd, that matters. You can make two pies for the price of one store-bought.
- Perfect for Holidays : Thanksgiving, Christmas, or just a cozy Sunday dinner—this pie fits right in. It’s the kind of dessert that makes people close their eyes after the first bite.
- Crowd-Pleaser : Kids love it, adults love it, and even the picky eaters I know ask for seconds. The texture is silky, not too dense, with just the right amount of spice.
- Unbelievably Delicious : The secret is in the balance. Not too sweet, not too spicy, with a crust that’s buttery and crisp. It’s comfort food reimagined—simple, honest, and soul-soothing.
What makes this recipe different from the rest? It’s the technique I learned after a few failed attempts. Pre-baking the crust just enough, whisking the filling until it’s perfectly smooth, and letting the pie rest overnight in the fridge. These small steps turn a good pie into a great one. This isn’t just another version—it’s my best version, tested and tweaked until it was just right. Perfect for impressing guests without stress, or turning a simple meal into something memorable.
What Ingredients You Will Need
This recipe uses simple, wholesome ingredients to deliver that classic pumpkin pie flavor and silky texture. Most of these are pantry staples, which makes this an easy last-minute dessert to pull together.
For the Pie Crust
- 1 ¼ cups all-purpose flour (spooned and leveled, not scooped)
- ½ teaspoon salt
- ½ cup cold unsalted butter, cut into small cubes (I prefer Kerrygold for its rich flavor)
- 3-4 tablespoons ice water (add one tablespoon at a time)
For the Pumpkin Filling
- 1 can (15 oz) pumpkin puree (not pumpkin pie filling—look for 100% pure pumpkin, like Libby’s)
- 1 can (12 oz) evaporated milk (adds richness without being too heavy)
- ¾ cup granulated sugar
- 2 large eggs, at room temperature
- 2 teaspoons pumpkin pie spice (or make your own: 1 tsp cinnamon, ½ tsp ginger, ¼ tsp nutmeg, ¼ tsp cloves)
- 1 teaspoon vanilla extract
- ¼ teaspoon salt
For the pumpkin puree, I’ve tried both store-brand and name-brand, and honestly, Libby’s gives the most consistent texture. If you’re feeling ambitious, you can roast your own sugar pumpkin, but the canned version works beautifully and saves time. For the evaporated milk, don’t substitute with regular milk—it won’t give you that same creamy, luscious texture. If you need a dairy-free option, full-fat coconut milk works surprisingly well, though it adds a slight coconut flavor that I personally love.
The spice blend is where you can get creative. I always use a little extra cinnamon because my family loves it, but you can dial it back if you prefer a milder pie. Some people add a pinch of black pepper to their pumpkin pie spice for a subtle warmth, and I’ve tried it—it’s actually quite good, though I leave it out for the kids.
Equipment Needed
You don’t need a fancy kitchen to make this pie. Here’s what you’ll need:
- 9-inch pie dish (glass or ceramic works best for even baking)
- Rolling pin (a wine bottle works in a pinch—I’ve done it)
- Large mixing bowl
- Medium mixing bowl
- Whisk
- Pastry cutter or two forks (for cutting butter into flour)
- Plastic wrap
- Measuring cups and spoons
- Parchment paper and pie weights (or dried beans) for blind baking
If you don’t have a pastry cutter, don’t worry. I’ve used two butter knives to cut the butter into the flour more times than I can count. It takes a little longer, but it works just fine. For the pie weights, I keep a bag of dried black beans in my baking drawer specifically for blind baking—they’re cheap and reusable. Just let them cool completely before storing.
Preparation Method
Let’s get to the fun part. Follow these steps, and you’ll have a pie that tastes like you spent all day in the kitchen—even if you didn’t.
Step 1: Make the Pie Crust
In a large bowl, whisk together the flour and salt. Add the cold butter cubes. Use a pastry cutter or two forks to cut the butter into the flour until the mixture looks like coarse meal with pea-sized butter pieces. This is important—those little butter bits are what make the crust flaky. Drizzle in the ice water, one tablespoon at a time, and mix with a fork until the dough just comes together. You should be able to squeeze it and have it hold its shape. If it’s too dry, add another tablespoon of water. Form the dough into a disk, wrap it in plastic wrap, and refrigerate for at least 30 minutes. This rest time is non-negotiable—it relaxes the gluten and keeps the crust tender.
Step 2: Blind Bake the Crust
Preheat your oven to 375°F (190°C). On a lightly floured surface, roll the chilled dough into a 12-inch circle, about ⅛-inch thick. Carefully transfer it to your 9-inch pie dish. Gently press the dough into the bottom and up the sides, then trim the excess, leaving about a ½-inch overhang. Fold the overhang under itself and crimp the edges however you like—I use my fingers for a simple scalloped edge. Prick the bottom of the crust with a fork to prevent bubbles. Line the crust with parchment paper and fill with pie weights or dried beans. Bake for 15 minutes, then remove the parchment and weights and bake for another 5-7 minutes, until the crust is lightly golden. Set aside to cool slightly.
Step 3: Make the Filling
Reduce the oven temperature to 350°F (175°C). In a large bowl, whisk together the pumpkin puree, evaporated milk, sugar, eggs, pumpkin pie spice, vanilla extract, and salt. Whisk until everything is smooth and well combined. Don’t overmix—you just want it to be uniform. The mixture should be thick but pourable, like a very smooth custard. Taste a tiny bit (it’s safe with the eggs, though I know it sounds weird) to check the sweetness and spice level. Adjust if needed.
Step 4: Assemble and Bake
Pour the filling into the pre-baked crust. Be careful not to overfill—leave about ¼ inch of space at the top. Place the pie on the middle rack of the oven and bake for 50-60 minutes. The edges should be set, but the center should still jiggle slightly when you gently shake the pan. This is the sweet spot—overbaking will make the filling crack. If the crust edges are browning too quickly, tent them with strips of aluminum foil about halfway through.
Step 5: Cool and Serve
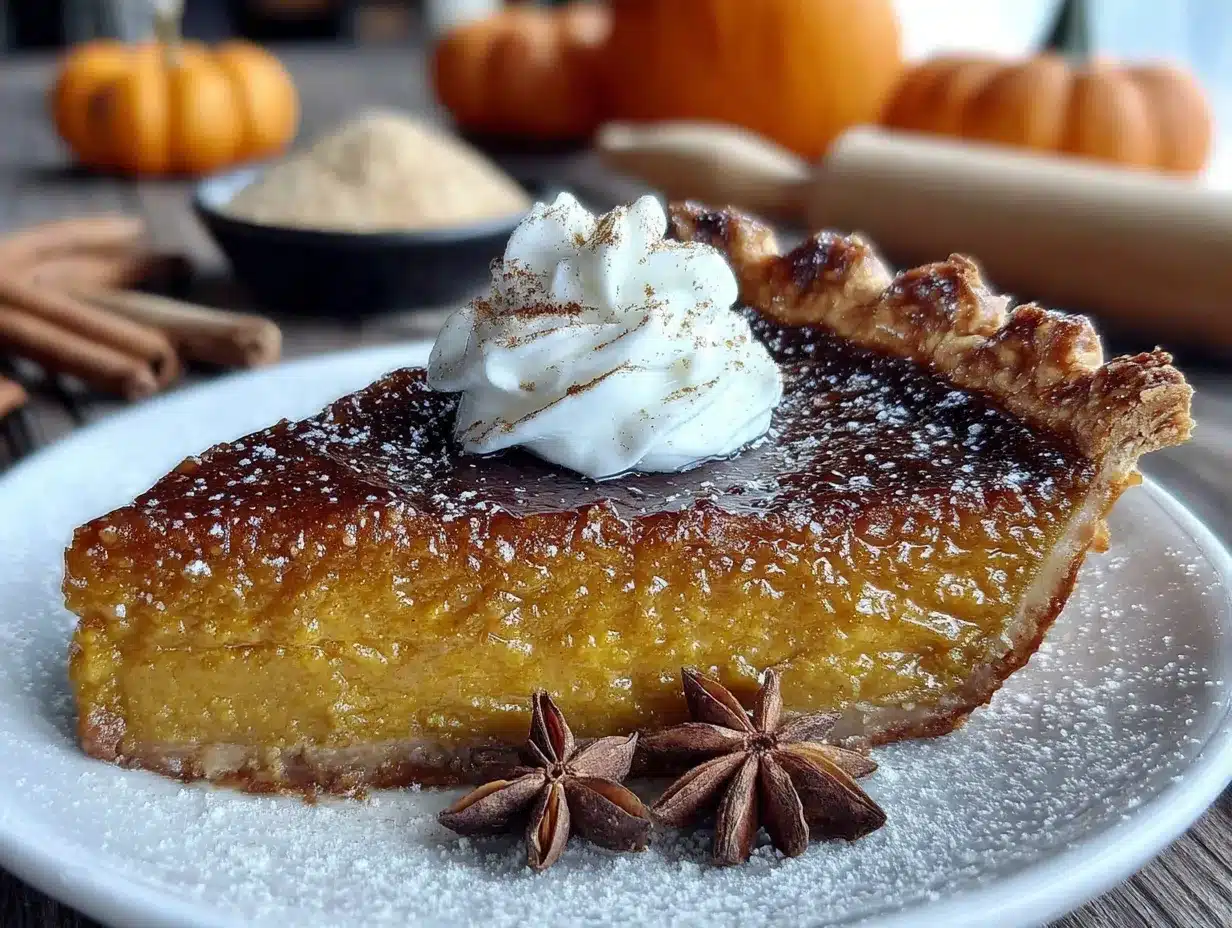
Place the pie on a wire rack and let it cool completely at room temperature. This takes about 2 hours. Then refrigerate for at least 4 hours, or overnight. This chilling step is crucial—it sets the filling perfectly and makes slicing much easier. Serve cold or at room temperature, with a dollop of whipped cream if you’re feeling fancy.
Cooking Tips & Techniques
Here are some things I’ve learned the hard way so you don’t have to.
Don’t skip the blind bake. I once tried to pour the filling into a raw crust, thinking it would all bake together. The bottom came out soggy, and the edges were undercooked. Pre-baking ensures a crisp, flaky crust that can hold up to the moist filling.
Temperature matters. Your eggs and evaporated milk should be at room temperature before you start mixing. Cold ingredients can cause the filling to separate or take longer to bake evenly. Just take them out of the fridge 30 minutes before you start.
Watch the jiggle. The center of the pie should wobble like Jell-O when you shake the pan. If it’s completely firm, it’s overbaked. If it’s liquidy, it needs more time. That jiggle is your best indicator.
Let it rest. I know it’s hard to wait, but cutting into a warm pumpkin pie is a disaster waiting to happen. The filling will be runny and the slices won’t hold their shape. Patience is your friend here. I usually make my pie the day before I need it, which also allows the flavors to meld beautifully.
One mistake I made: I once used pumpkin pie filling instead of pure pumpkin puree. The result was overly sweet, gloopy, and frankly, inedible. Always double-check that label. Pure pumpkin puree is the only way to go.
Variations & Adaptations
This recipe is forgiving and adaptable. Here are some ways to make it your own.
Gluten-Free Crust: Substitute the all-purpose flour with a 1:1 gluten-free baking flour blend. I’ve used Bob’s Red Mill with great success. The texture is slightly more crumbly, but the flavor is still fantastic.
Dairy-Free Version: Swap the butter in the crust with cold coconut oil or vegan butter. Use full-fat coconut milk instead of evaporated milk. The coconut flavor is subtle and pairs surprisingly well with the pumpkin and spices.
Spice It Up: Add a pinch of cayenne pepper or black pepper to the filling for a warm, unexpected kick. This is a trick I picked up from a Southern cookbook, and it adds a lovely depth without making the pie spicy.
Maple Pumpkin Pie: Replace half the granulated sugar with pure maple syrup. Reduce the evaporated milk by a couple of tablespoons to compensate for the extra liquid. The maple flavor is divine with the pumpkin.
Mini Pies: Use a muffin tin to make individual servings. Roll the crust, cut circles, and press them into greased muffin cups. Fill and bake for about 20-25 minutes. Perfect for parties or portion control.
Serving & Storage Suggestions
This pie is best served cold or at room temperature. I prefer it straight from the fridge with a generous swirl of lightly sweetened whipped cream. The contrast between the cold, creamy filling and the crisp crust is just perfect.
For a more decadent presentation, serve slices with a drizzle of caramel sauce and a sprinkle of toasted pecans. It also pairs beautifully with a scoop of vanilla bean ice cream or a warm cup of spiced cider.
Storage: Cover the pie loosely with plastic wrap or aluminum foil and store in the refrigerator for up to 5 days. The flavors actually improve after a day or two, so don’t be afraid to make it ahead. I’ve heard people say their pumpkin pie tastes even better on day three, and I have to agree.
Freezing: You can freeze the fully baked and cooled pie for up to 3 months. Wrap it tightly in plastic wrap, then a layer of foil. To serve, thaw it overnight in the refrigerator. Do not freeze an unbaked pie—the texture will suffer.
Reheating: If you prefer your pie warm, pop individual slices in a 300°F (150°C) oven for about 10 minutes, or microwave for 15-20 seconds. Just don’t overdo it, or the crust will get soggy.
Nutritional Information & Benefits
Here’s an approximate nutritional breakdown per slice (based on 8 servings):
- Calories: 320
- Fat: 15g
- Carbohydrates: 42g
- Protein: 6g
- Fiber: 3g
- Sugar: 24g
Pumpkin is packed with vitamin A, which is great for eye health and immune function. It’s also a good source of fiber, which helps keep you feeling full. The eggs add protein, and the spices like cinnamon and ginger have anti-inflammatory properties. This isn’t a health food, but it’s a dessert that brings some good stuff to the table. I feel good about serving it to my family because it’s made from real, whole ingredients—no preservatives, no artificial flavors.
For those watching their sugar intake, you can reduce the sugar to ½ cup without sacrificing too much sweetness. The pie will be a little less sweet, but the pumpkin and spice flavors will shine through more clearly.
Conclusion
This classic homemade pumpkin pie from scratch has become a staple in my kitchen, and I think it deserves a spot in yours too. It’s simple enough for a beginner baker, forgiving enough for a busy week, and impressive enough for a holiday table. The filling is silky, the crust is buttery, and the whole thing tastes like comfort in every bite.
I encourage you to make this recipe your own. Play with the spices, try a different crust, or serve it with your favorite topping. The best recipes are the ones that evolve with the cook. And if you’re feeling nervous about making pie from scratch—don’t be. I promise, if I can pull this off in a panic with a chipped bowl and a trash can full of salty dough, you can absolutely do this.
I’d love to hear how it turns out. Leave a comment below and let me know if you tried any variations, or share a photo of your pie on social media and tag me. Happy baking, friends!
Frequently Asked Questions
Can I use a store-bought crust instead of making my own?
Absolutely. If you’re short on time, a good-quality refrigerated pie crust works perfectly. Just follow the blind baking instructions for the best results.
How do I know when the pie is done?
The edges should be set, and the center should jiggle slightly when you shake the pan. It will continue to set as it cools. A knife inserted near the center should come out mostly clean.
Can I make this pie ahead of time?
Yes! This pie is actually better when made a day in advance. The flavors meld and the texture sets perfectly. Just store it covered in the refrigerator.
Why did my pie crust shrink?
Crust shrinkage usually happens when the dough is overworked or not chilled enough. Make sure to refrigerate the dough for at least 30 minutes before rolling, and handle it gently.
Can I use fresh pumpkin instead of canned?
Yes, but you’ll need to roast and puree a sugar pumpkin first. Fresh pumpkin has more water content, so you may need to drain the puree in a cheesecloth-lined strainer for an hour to remove excess moisture.
Pin This Recipe!

Classic Homemade Pumpkin Pie from Scratch – Best Ever

This classic homemade pumpkin pie features a silky, perfectly spiced filling and a buttery, flaky crust. It’s simple enough for beginners, forgiving for busy bakers, and impressive enough for any holiday table.
- Prep Time: 30 minutes
- Cook Time: 1 hour 15 minutes
- Total Time: 6 hours 45 minutes (includes chilling)
- Yield: 8 servings 1x
- Category: Dessert
- Cuisine: American
Ingredients
- 1 ¼ cups all-purpose flour (spooned and leveled)
- ½ teaspoon salt
- ½ cup cold unsalted butter, cut into small cubes
- 3–4 tablespoons ice water
- 1 can (15 oz) pumpkin puree (100% pure pumpkin)
- 1 can (12 oz) evaporated milk
- ¾ cup granulated sugar
- 2 large eggs, at room temperature
- 2 teaspoons pumpkin pie spice (or 1 tsp cinnamon, ½ tsp ginger, ¼ tsp nutmeg, ¼ tsp cloves)
- 1 teaspoon vanilla extract
- ¼ teaspoon salt
Instructions
- Make the pie crust: In a large bowl, whisk together flour and salt. Add cold butter cubes. Use a pastry cutter or two forks to cut the butter into the flour until the mixture looks like coarse meal with pea-sized butter pieces. Drizzle in ice water, one tablespoon at a time, and mix with a fork until the dough just comes together. Form into a disk, wrap in plastic wrap, and refrigerate for at least 30 minutes.
- Blind bake the crust: Preheat oven to 375°F (190°C). On a lightly floured surface, roll the chilled dough into a 12-inch circle, about ⅛-inch thick. Transfer to a 9-inch pie dish. Press into bottom and up sides, trim excess, fold overhang under, and crimp edges. Prick bottom with a fork. Line with parchment paper and fill with pie weights or dried beans. Bake for 15 minutes, then remove parchment and weights and bake for another 5-7 minutes until lightly golden. Set aside to cool slightly.
- Make the filling: Reduce oven temperature to 350°F (175°C). In a large bowl, whisk together pumpkin puree, evaporated milk, sugar, eggs, pumpkin pie spice, vanilla extract, and salt until smooth and well combined. Do not overmix.
- Assemble and bake: Pour the filling into the pre-baked crust, leaving about ¼ inch of space at the top. Bake for 50-60 minutes. The edges should be set, but the center should jiggle slightly when shaken. If crust edges brown too quickly, tent with foil halfway through.
- Cool and serve: Place pie on a wire rack and cool completely at room temperature (about 2 hours). Then refrigerate for at least 4 hours or overnight. Serve cold or at room temperature with whipped cream if desired.
Notes
Don’t skip the blind bake—it ensures a crisp crust. Use room temperature eggs and evaporated milk for even baking. The center should jiggle like Jell-O when done; overbaking causes cracks. Chill the pie overnight for best flavor and texture. If using fresh pumpkin, drain the puree to remove excess moisture.
Nutrition
- Serving Size: 1 slice
- Calories: 320
- Sugar: 24
- Sodium: 320
- Fat: 15
- Saturated Fat: 9
- Carbohydrates: 42
- Fiber: 3
- Protein: 6
Keywords: pumpkin pie, homemade pumpkin pie, classic pumpkin pie, Thanksgiving dessert, fall dessert, pumpkin pie from scratch


