I was at the community garden swap table last October, trying to decide between a lumpy butternut squash and some knobby ginger root, when the woman next to me—I think her name is Clara, she always wears those bright yellow gardening gloves—watched me eyeing the mint plant she’d just set down. She didn’t say anything at first. Then she picked up a handful of leaves, crushed them gently, and held her palm out for me to smell. “That,” she said, “is what your Halloween cookies have been missing.” I laughed, because I hadn’t mentioned cookies, but honestly, she was right. I’d been wrestling with a chocolate cookie recipe all week, trying to make it feel more like fall and less like a sugar bomb. The mint was the answer I didn’t know I was looking for.
That conversation lasted maybe ten minutes. She told me her grandmother used to tuck mint leaves into the dough before baking, a trick from the old country, and that the trick was to pair it with dark chocolate—not milk—to get that cozy, almost woodsy flavor. I went home with a bag of mint, a story, and a mission. The first batch I made was a disaster, honestly. I used too much mint, the cookies spread into one giant sheet, and I burned the chocolate filling because I got distracted by a phone call. But the second batch? That was the one. The cookies came out thick and tender, the mint was subtle but present, and the filling was silky and dark. I brought a few to the next garden swap, and Clara just nodded and said, “Told you.”
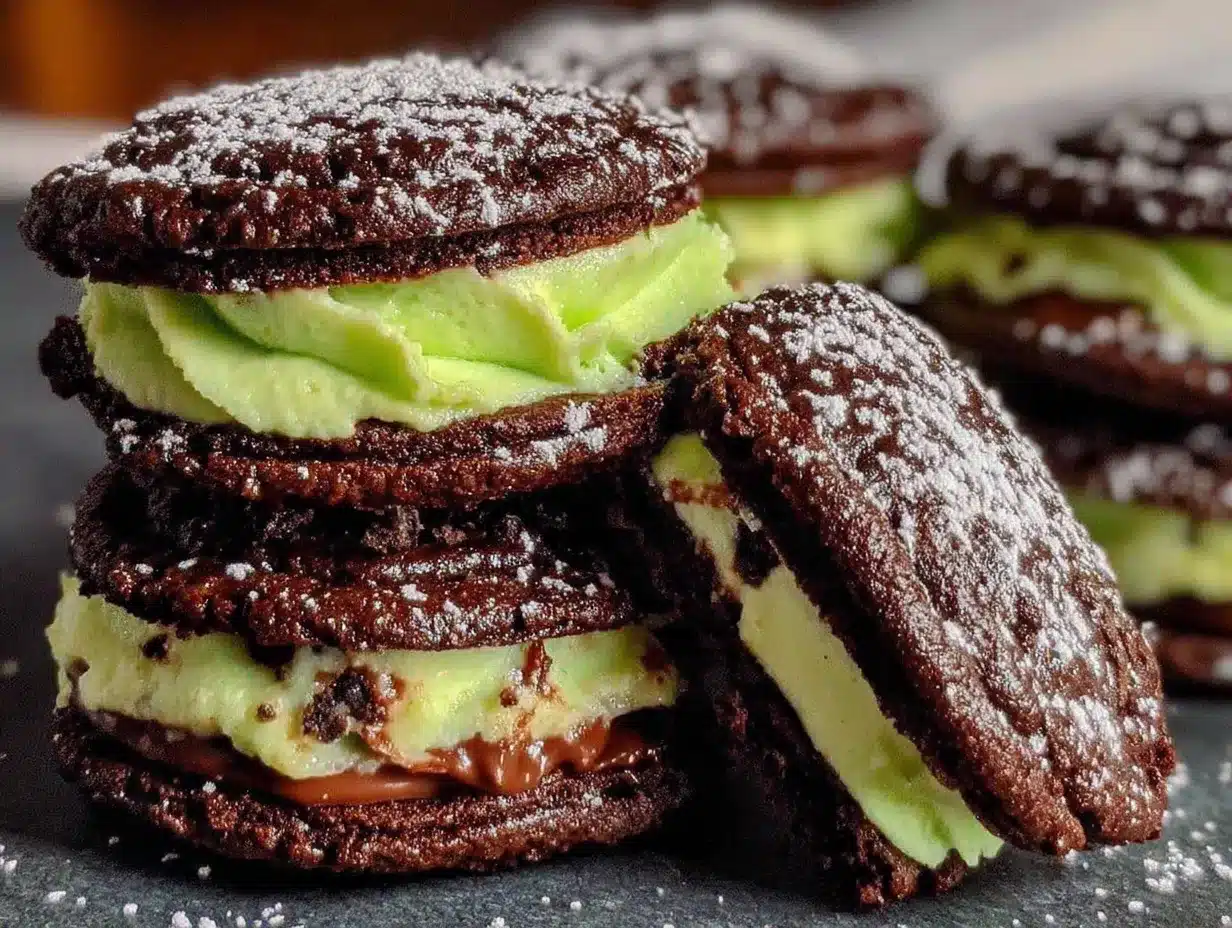
These Cozy Chocolate Mint Halloween Sandwich Cookies are the result of that afternoon. They’re not just another chocolate cookie—they’re the kind that makes you slow down, maybe pour a cup of tea, and actually enjoy the process. The mint isn’t here to scream “holiday” at you; it’s here to whisper something warm and familiar. Maybe you’ve been there, staring at a recipe that looks good on paper but feels flat in practice. That’s how I felt before Clara handed me those mint leaves. Now I make these cookies every October, and every time I roll out the dough, I think of her yellow gloves and that moment of unexpected generosity. It’s a good reminder that the best recipes don’t come from a screen—they come from people who just want to share something good.
Why You’ll Love This Recipe
Let’s be real for a second—there are a million chocolate cookie recipes out there. But these sandwich cookies? They’re different. They’re the kind of cookie you make when you want to impress without stressing, when you want something festive but not fussy, when you want a treat that feels both nostalgic and new. I’ve tested this recipe six times (yes, six—my family is very tired of cookies), and I can say with confidence that this is the version worth keeping.
- Quick & Easy : From start to finish, you’re looking at about 45 minutes, plus chilling time. The dough comes together in one bowl, and the filling is a simple stovetop melt.
- Simple Ingredients : You probably already have butter, sugar, eggs, and flour in your pantry. The only “special” ingredient is a bit of peppermint extract and some dark chocolate chips.
- Perfect for Halloween : These cookies are naturally spooky-adjacent with their dark color and minty kick, but they’re not covered in neon frosting or artificial candy. They’re classy enough for a grown-up party but still fun for kids.
- Crowd-Pleaser : I brought a batch to my book club last week, and they were gone in ten minutes. One friend texted me later asking for the recipe, which, honestly, is the highest compliment.
- Unbelievably Delicious : The texture is what gets me—crispy on the edges, soft in the middle, with a creamy chocolate-mint filling that’s rich but not heavy. It’s the kind of cookie that makes you close your eyes after the first bite.
What makes this recipe different from the rest? It’s the balance. Most chocolate mint cookies either taste like toothpaste or like nothing at all. This one uses a specific ratio of cocoa to mint that lets both flavors shine. Plus, the filling is made with a touch of heavy cream, which gives it a melt-in-your-mouth quality that store-bought frosting just can’t match. It’s comfort food reimagined—familiar enough to feel safe, but surprising enough to feel special.
What Ingredients You Will Need
This recipe uses simple, wholesome ingredients to deliver bold flavor and satisfying texture without the fuss. Most of these are pantry staples, which means you can whip up a batch on a whim without a special trip to the store. Here’s what you’ll need:
For the Cookies
- Unsalted butter, softened (1 cup / 226g) — I always use unsalted so I can control the salt level. Let it sit out for about 30 minutes before you start.
- Granulated sugar (1 cup / 200g) — Regular white sugar works best here. Brown sugar would make the cookies too soft and chewy.
- Large egg (1, room temperature) — Cold eggs can seize the butter, so let yours sit out for a bit.
- Vanilla extract (1 teaspoon) — Pure vanilla if you have it, but imitation works fine too.
- Peppermint extract (1/2 teaspoon) — Be careful with this one. Peppermint extract is strong, and a little goes a long way. I use McCormick brand because it’s consistent.
- All-purpose flour (2 cups / 250g) — Spoon and level your flour for the best results. Scooping directly from the bag can pack in too much.
- Unsweetened cocoa powder (1/2 cup / 50g) — I recommend Ghirardelli or Hershey’s Special Dark for a deeper chocolate flavor.
- Baking soda (1 teaspoon)
- Salt (1/2 teaspoon) — Don’t skip this. Salt makes the chocolate taste more chocolatey.
For the Mint Chocolate Filling
- Dark chocolate chips (1 cup / 175g) — Use good-quality chips. I like Guittard or Ghirardelli 60% cacao.
- Heavy cream (1/2 cup / 120ml) — This creates a silky, rich ganache. You can use half-and-half in a pinch, but the filling won’t be as creamy.
- Unsalted butter (2 tablespoons / 28g) — Softened, not melted.
- Peppermint extract (1/4 teaspoon) — Just a tiny bit to reinforce the mint flavor.
- Powdered sugar (1/4 cup / 30g) — This helps thicken the filling and gives it a slight sweetness.
Optional Decorations
- Orange or black sprinkles (for a festive touch)
- Crushed candy canes (if you want extra crunch and mint)
Ingredient Selection Tips : Look for cocoa powder that’s dark and rich—natural cocoa works best here, not Dutch-processed. For the peppermint extract, avoid “mint extract” blends that include spearmint; you want pure peppermint for that classic holiday flavor. If you’re dairy-free, you can substitute the butter in the filling with a good vegan butter stick, but the cookies themselves rely on real butter for their texture.
Equipment Needed
You don’t need a fancy kitchen to make these cookies, which is part of why I love this recipe. Here’s what you’ll need:
- Mixing bowls (one large, one medium) — I use glass or stainless steel. Plastic bowls can hold onto grease.
- Hand mixer or stand mixer — You can cream the butter and sugar by hand with a wooden spoon, but it’ll take some elbow grease. A mixer makes it much easier.
- Baking sheets (2) — Light-colored metal sheets work best. Dark sheets can cause the bottoms to burn.
- Parchment paper — Non-negotiable for easy cleanup and even baking.
- Cooling rack — Wire racks let air circulate so the cookies cool evenly without getting soggy.
- Small saucepan — For making the filling. A heavy-bottomed pan prevents scorching.
- Cookie scoop (1.5-tablespoon size) — This ensures all your cookies are the same size, which is important for sandwiching. If you don’t have one, use a tablespoon measure.
- Spatula — A thin metal spatula is best for lifting cookies off the sheet.
I’ve made these cookies with a $10 hand mixer from the grocery store and a fancy stand mixer, and honestly, they turn out great either way. The only thing I’d recommend splurging on is parchment paper—it’s cheap and saves you from scrubbing burnt sugar off your pans.
Preparation Method
Alright, let’s get to the good part. This recipe is straightforward, but I’ll walk you through every step so you don’t end up with flat, sad cookies like my first attempt. Here we go:
Step 1: Make the Cookie Dough
In a large mixing bowl, cream together the softened butter and granulated sugar until light and fluffy—about 3 minutes with a hand mixer on medium speed. Scrape down the sides of the bowl with a spatula. Add the egg, vanilla extract, and peppermint extract, and beat until combined. The mixture might look a little curdled at this point, but that’s fine. Don’t panic.
In a separate medium bowl, whisk together the flour, cocoa powder, baking soda, and salt. Gradually add the dry ingredients to the wet mixture, mixing on low speed until just combined. You don’t want to overmix here, or the cookies will be tough. The dough will be soft and slightly sticky—that’s normal.
Step 2: Chill the Dough
Cover the bowl with plastic wrap and refrigerate for at least 30 minutes. This step is crucial. Chilling the dough prevents the cookies from spreading too much in the oven and gives them that perfect chewy texture. I’ve skipped this step before (because I was impatient), and I ended up with cookies that looked like dark puddles. Learn from my mistakes.
Step 3: Preheat and Prepare
While the dough chills, preheat your oven to 350°F (175°C). Line two baking sheets with parchment paper. This is also a good time to make the filling (see Step 6), but you can do that later if you prefer.
Step 4: Scoop and Bake
Using your cookie scoop or a tablespoon, portion the dough into 1.5-tablespoon balls (about the size of a walnut). Place them on the prepared baking sheets, spacing them about 2 inches apart. You should get about 24 cookies total—enough for 12 sandwich cookies.
Bake for 10-12 minutes, rotating the pans halfway through. The cookies are done when the edges look set and the tops are slightly crackled. They will look soft in the middle, but they’ll continue to set as they cool. Let them rest on the baking sheet for 5 minutes, then transfer to a wire rack to cool completely.
Step 5: Make the Filling
While the cookies are cooling, make the filling. In a small saucepan, heat the heavy cream over medium heat until it just begins to simmer—small bubbles will form around the edges. Remove from heat and add the dark chocolate chips. Let it sit for 2 minutes, then stir until smooth and glossy. Add the softened butter, peppermint extract, and powdered sugar, and stir until fully combined. The filling should be thick but spreadable. If it’s too thin, let it cool for a few minutes; it will thicken as it cools.
Step 6: Assemble the Sandwiches
Once the cookies are completely cool, pair them up by size. Using a small offset spatula or a butter knife, spread about 1 tablespoon of filling onto the flat side of one cookie. Top with the second cookie, flat side down, and gently press until the filling reaches the edges. Repeat with the remaining cookies.
If you want to add sprinkles, roll the edges of the filled cookies in orange or black sprinkles while the filling is still soft. For crushed candy canes, wait until the filling has set slightly, then press the pieces into the sides.
Step 7: Let Them Set
Place the assembled cookies on a baking sheet or plate and refrigerate for about 15 minutes. This helps the filling firm up so the cookies are easier to handle. After that, they’re ready to serve—or to hide in the back of the fridge so you don’t eat them all at once.
Cooking Tips & Techniques
I’ve made these cookies enough times to know where things can go wrong. Here are some tips I wish someone had told me before my first attempt:
- Don’t overwork the dough. When you add the flour mixture, mix just until you don’t see any more white streaks. Overmixing develops gluten, which makes cookies tough and dense. I’ve done it, and the result is cookies that are more like hockey pucks than tender treats.
- Use a light hand with the peppermint extract. I know I said this before, but it bears repeating. Peppermint extract is potent. Start with the amount listed, and if you want a stronger mint flavor, add an extra 1/8 teaspoon—but no more. Too much, and your cookies will taste like mouthwash.
- Check your oven temperature. Ovens run hot or cold, and it’s easy to overbake these cookies because the dark color makes it hard to tell when they’re done. I use an oven thermometer to make sure my oven is actually at 350°F. Worth the $10 investment.
- Let the cookies cool completely before filling. I know it’s tempting to rush this step, but warm cookies will melt the filling into a puddle. Trust me, I’ve had to scrape filling off my counter more times than I care to admit.
- Work in batches if needed. If you only have one baking sheet, let it cool completely between batches. Putting dough on a hot sheet will cause the butter to melt too fast, leading to flat cookies.
One more thing: if your cookies spread too much, it’s usually because the dough wasn’t chilled enough or the butter was too soft. Pop the dough back in the fridge for 10 minutes and try again. It’s a simple fix that makes a huge difference.
Variations & Adaptations
This recipe is pretty forgiving, which means you can tweak it to fit your mood or dietary needs. Here are some variations I’ve tried and loved:
- Gluten-Free Version : Substitute the all-purpose flour with a 1:1 gluten-free baking flour blend (I like King Arthur Measure for Measure). The texture will be slightly more delicate, but the flavor is spot-on. Just make sure your blend contains xanthan gum for structure.
- Vegan Option : Use vegan butter sticks (like Earth Balance) in both the cookies and the filling. Replace the egg with a flax egg (1 tablespoon ground flaxseed + 3 tablespoons water, let sit for 5 minutes). Use canned coconut cream instead of heavy cream for the filling. The cookies will be a bit more crumbly, but still delicious.
- Double Chocolate Mint : Add 1/2 cup of mini chocolate chips to the cookie dough before chilling. It gives the cookies extra pockets of melted chocolate and makes them even richer.
- Spooky Swirl : Divide the cookie dough in half. Leave one half plain, and mix 1 tablespoon of orange food coloring into the other half. Roll a small ball of each color together to create a marbled effect. It looks amazing for Halloween parties.
- Mint-Free Version : If you’re not a mint fan (no judgment), swap the peppermint extract for orange extract in both the cookies and the filling. You’ll get a chocolate-orange combo that’s equally cozy and festive.
I once made a batch with crushed freeze-dried raspberries mixed into the filling, and it was incredible—like a chocolate-covered raspberry in cookie form. Don’t be afraid to experiment. That’s half the fun.
Serving & Storage Suggestions
These cookies are best served at room temperature, when the filling is soft but not runny. I like to arrange them on a platter with a few sprigs of fresh mint (just for looks) and maybe some dark chocolate shavings on top. They’re perfect for Halloween parties, cozy movie nights, or even as a homemade gift for friends and neighbors.
For storage, place the assembled cookies in an airtight container, layered with parchment paper between each row. They’ll keep at room temperature for up to 3 days, but I highly recommend refrigerating them if your kitchen is warm. The filling can get a little soft otherwise. In the fridge, they’ll last about a week—though I doubt they’ll make it that long.
You can also freeze the unbaked cookie dough. Scoop the dough into balls, place them on a baking sheet, and freeze until solid. Transfer the frozen dough balls to a freezer bag and store for up to 3 months. When you’re ready to bake, just add 2-3 minutes to the baking time—no need to thaw. The filling can be frozen separately in a small container, but it’s best made fresh.
One thing I’ve noticed: the cookies actually taste better the next day. The flavors meld together overnight, and the mint becomes more integrated. So if you can resist eating them right away, you’re in for a treat.
Nutritional Information & Benefits
Let’s be honest—these are cookies, not health food. But that doesn’t mean they’re completely devoid of redeeming qualities. Here’s the estimated nutritional breakdown per sandwich cookie (based on 12 servings):
| Nutrient | Amount |
|---|---|
| Calories | 285 |
| Total Fat | 16g |
| Saturated Fat | 10g |
| Cholesterol | 45mg |
| Sodium | 145mg |
| Total Carbohydrates | 34g |
| Dietary Fiber | 2g |
| Sugars | 22g |
| Protein | 3g |
Dark chocolate is actually a decent source of antioxidants and can help improve mood (which is probably why these cookies make me so happy). The peppermint extract has natural digestive benefits and can help soothe an upset stomach—though I’m not sure that counts when it’s sandwiched between butter and sugar. If you’re watching your sugar intake, you can reduce the sugar in the cookies by 1/4 cup, but the texture will be slightly less tender.
These cookies are not gluten-free, vegan, or low-carb in their standard form, but as I mentioned in the variations section, you can adapt them. They do contain dairy and eggs, so keep that in mind if you’re baking for someone with allergies.
Conclusion
These Cozy Chocolate Mint Halloween Sandwich Cookies are more than just a treat—they’re a little moment of warmth in a busy season. They remind me of that afternoon at the garden swap, of Clara’s generosity, and of how sometimes the best ideas come from the most unexpected places. I hope they bring you the same kind of comfort and joy they’ve brought me.
If you make these cookies (and I really hope you do), I’d love to hear about it. Leave a comment below and tell me how they turned out—did you add sprinkles? Did you try the orange extract version? Did you hide them from your family like I did? Sharing is caring, but I won’t judge if you keep a few for yourself. Happy baking, and happy Halloween!
Frequently Asked Questions
Can I use mint extract instead of peppermint extract?
You can, but mint extract is usually a blend of spearmint and peppermint, which gives a slightly different flavor—more like gum than candy cane. For that classic chocolate-mint combo, stick with pure peppermint extract.
Why did my cookies spread too much?
This usually happens when the dough isn’t chilled enough or the butter was too soft. Make sure you chill the dough for at least 30 minutes, and if your kitchen is warm, pop the baking sheet in the fridge for 10 minutes before baking.
Can I make these cookies ahead of time?
Absolutely! You can make the cookie dough up to 3 days in advance and keep it in the fridge. You can also bake the cookies and store them unfilled for up to 5 days, then make the filling and assemble when you’re ready to serve.
How do I get the filling to be perfectly smooth?
The key is using good-quality chocolate and letting the cream sit with the chocolate for a full 2 minutes before stirring. If you stir too early, the chocolate won’t melt evenly, and you’ll end up with lumps. Also, make sure your butter is softened, not cold.
Can I double this recipe?
Yes! This recipe doubles beautifully. Just make sure you have enough baking sheets and space in your fridge for the dough. If you’re doubling the filling, use a larger saucepan so you have room to stir.
Pin This Recipe!

Cozy Chocolate Mint Halloween Sandwich Cookies: Easy & Best Recipe

These Cozy Chocolate Mint Halloween Sandwich Cookies are thick, tender chocolate cookies with a silky dark chocolate-mint filling. They’re the perfect festive treat that’s both nostalgic and new, ideal for Halloween parties or cozy fall evenings.
- Prep Time: 15 minutes
- Cook Time: 12 minutes
- Total Time: 45 minutes (plus 30 minutes chilling and 15 minutes setting)
- Yield: 12 sandwich cookies 1x
- Category: Dessert
- Cuisine: American
Ingredients
- 1 cup (226g) unsalted butter, softened
- 1 cup (200g) granulated sugar
- 1 large egg, room temperature
- 1 teaspoon vanilla extract
- 1/2 teaspoon peppermint extract
- 2 cups (250g) all-purpose flour
- 1/2 cup (50g) unsweetened cocoa powder
- 1 teaspoon baking soda
- 1/2 teaspoon salt
- 1 cup (175g) dark chocolate chips
- 1/2 cup (120ml) heavy cream
- 2 tablespoons (28g) unsalted butter, softened
- 1/4 teaspoon peppermint extract
- 1/4 cup (30g) powdered sugar
- Orange or black sprinkles (optional)
- Crushed candy canes (optional)
Instructions
- In a large mixing bowl, cream together the softened butter and granulated sugar until light and fluffy, about 3 minutes with a hand mixer on medium speed. Scrape down the sides. Add the egg, vanilla extract, and peppermint extract, and beat until combined.
- In a separate medium bowl, whisk together the flour, cocoa powder, baking soda, and salt. Gradually add the dry ingredients to the wet mixture, mixing on low speed until just combined. The dough will be soft and slightly sticky.
- Cover the bowl with plastic wrap and refrigerate for at least 30 minutes.
- Preheat the oven to 350°F (175°C). Line two baking sheets with parchment paper.
- Using a cookie scoop or tablespoon, portion the dough into 1.5-tablespoon balls (about the size of a walnut). Place them on the prepared baking sheets, spacing them about 2 inches apart. You should get about 24 cookies total.
- Bake for 10-12 minutes, rotating the pans halfway through. The cookies are done when the edges look set and the tops are slightly crackled. Let them rest on the baking sheet for 5 minutes, then transfer to a wire rack to cool completely.
- While the cookies are cooling, make the filling. In a small saucepan, heat the heavy cream over medium heat until it just begins to simmer. Remove from heat and add the dark chocolate chips. Let it sit for 2 minutes, then stir until smooth and glossy. Add the softened butter, peppermint extract, and powdered sugar, and stir until fully combined.
- Once the cookies are completely cool, pair them up by size. Using a small offset spatula or a butter knife, spread about 1 tablespoon of filling onto the flat side of one cookie. Top with the second cookie, flat side down, and gently press until the filling reaches the edges. Repeat with the remaining cookies.
- If desired, roll the edges of the filled cookies in orange or black sprinkles while the filling is still soft, or press crushed candy canes into the sides after the filling has set slightly.
- Place the assembled cookies on a baking sheet or plate and refrigerate for about 15 minutes to firm up the filling. Serve at room temperature.
Notes
Chill the dough for at least 30 minutes to prevent spreading. Use pure peppermint extract, not mint extract. Let cookies cool completely before filling. For best flavor, let assembled cookies sit overnight.
Nutrition
- Serving Size: 1 sandwich cookie
- Calories: 285
- Sugar: 22
- Sodium: 145
- Fat: 16
- Saturated Fat: 10
- Carbohydrates: 34
- Fiber: 2
- Protein: 3
Keywords: chocolate mint cookies, Halloween cookies, sandwich cookies, chocolate peppermint, easy cookie recipe, fall baking


