It was 11:47 PM on a rainy Tuesday, and I had that specific craving—the one that demands a flaky, buttery crust covering a creamy, savory filling. I didn’t have a pie dish clean, or the energy to roll out pastry dough properly, but I had a cast iron skillet, a bag of frozen mixed vegetables, and the wild idea that maybe, just maybe, I could make the whole thing in one pan. Honestly, it felt a little reckless at that hour. I was tired, my kitchen was a mess from the day’s chaos, and I almost talked myself out of it. But that craving? It wasn’t going anywhere.
So I grabbed a chicken breast from the fridge, chopped it up right there in the skillet (no extra cutting board to wash—midnight efficiency, you know), and started building my pot pie from the bottom up. The gravy came together in the same pan, the vegetables went in, and then I faced the big question: how to get that top crust without a separate pastry operation. I ended up dropping spoonfuls of a simple biscuit dough right on top of the simmering filling—a weird, impulsive move I’d never try during daylight hours. I slid the whole skillet into the oven, set a timer, and leaned against the counter, half-expecting a disaster.
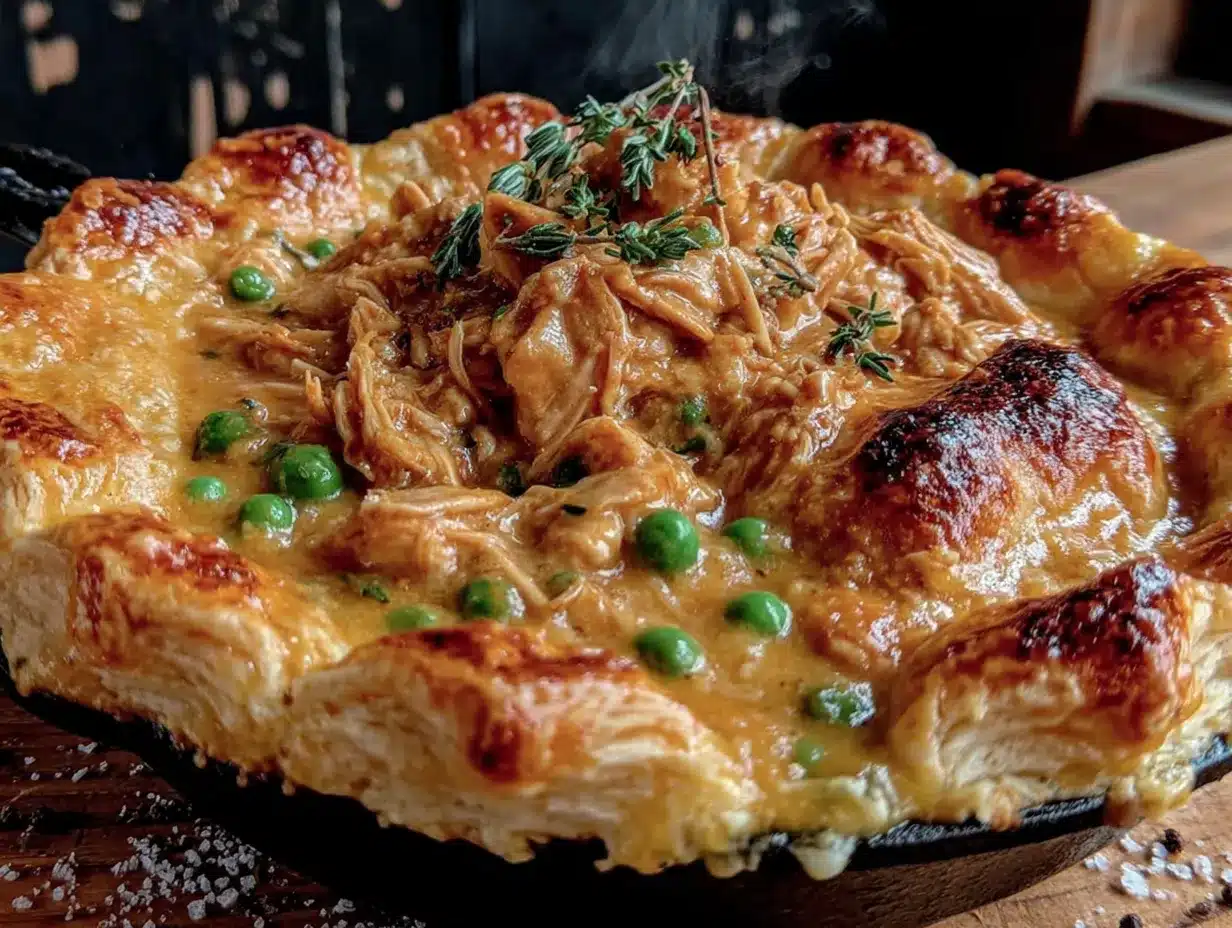
What came out of the oven twenty minutes later was pure magic. The biscuits had puffed up golden and craggy, soaking up the gravy at the edges while staying light on top. The filling was bubbling and thick, and the whole kitchen smelled like comfort. I ate it straight from the skillet with a big spoon, standing at the counter in my pajamas. It was messy, it was improvised, and it was honestly the best chicken pot pie I’d ever made. That late-night experiment turned into my go-to recipe—the one I make when I need a hug in a bowl but don’t want a sink full of dishes. Maybe you’ve been there, staring into your fridge at an hour when good decisions go to sleep, and you just need something warm and satisfying. This one-pan chicken pot pie skillet is for those nights.
Why You’ll Love This Recipe
Let’s be real—traditional chicken pot pie is delicious, but it’s also a project. You’ve got a separate crust, a filling that needs stirring and thickening, and then assembly and baking. This one-pan version cuts out all the fuss without cutting out any of the comfort. As someone who has tested this recipe at least a dozen times (and eaten the evidence every single time), I can tell you it delivers on every level.
- Quick & Easy: From start to table in about 45 minutes. No rolling dough, no separate pots, no complicated steps.
- Simple Ingredients: Chicken, frozen vegetables, pantry staples like flour and broth—you probably have most of this already.
- Perfect for Cozy Nights: Rainy evenings, chilly weekends, or any time you need a warm, satisfying meal without the cleanup hassle.
- Crowd-Pleaser: My picky-eater nephew asked for seconds, and my dad—who claims he doesn’t like “healthy-ish” food—went back for thirds.
- Unbelievably Delicious: The biscuit topping soaks up the creamy gravy at the edges while staying fluffy on top. The filling is rich, savory, and packed with tender chicken and veggies.
What makes this recipe different from other skillet pot pies? It’s the technique of building the gravy right in the pan with the chicken and vegetables, creating layers of flavor that a traditional casserole-style pot pie just can’t match. Plus, that drop-biscuit topping is genius—no cutting in butter, no chilling, no rolling. Just a quick stir and drop. It’s comfort food reimagined: faster, easier, but with the same soul-soothing satisfaction that makes you close your eyes after that first bite.
What Ingredients You Will Need
This recipe uses simple, wholesome ingredients that come together to create something truly special. Most of these are pantry and fridge staples, which is exactly what you want on a night when cooking feels like a chore but you still deserve something amazing.
For the Filling
- 1 ½ pounds boneless, skinless chicken breasts or thighs, cut into bite-sized pieces (thighs stay juicier, but breasts work great too)
- 3 tablespoons unsalted butter (I use Kerrygold for the rich flavor, but any good butter works)
- 1 medium yellow onion, diced (about 1 cup)
- 3 cloves garlic, minced
- 1/3 cup all-purpose flour (this thickens the gravy—don’t skip it)
- 2 cups low-sodium chicken broth (I prefer Swanson or Kitchen Basics for consistent flavor)
- 1 cup whole milk or half-and-half (whole milk gives a lighter gravy; half-and-half makes it extra luxurious)
- 2 cups frozen mixed vegetables (peas, carrots, corn, green beans—the classic blend)
- 1 teaspoon dried thyme (or 1 tablespoon fresh thyme leaves)
- ½ teaspoon dried rosemary, crushed
- Salt and freshly ground black pepper, to taste
- 1 tablespoon fresh parsley, chopped (optional, for garnish)
For the Drop Biscuit Topping
- 1 ½ cups all-purpose flour
- 2 teaspoons baking powder (make sure it’s fresh—test by dropping a bit in water; it should fizz)
- ½ teaspoon baking soda
- ½ teaspoon salt
- ¼ cup cold unsalted butter, cut into small cubes
- ¾ cup buttermilk (or ¾ cup milk mixed with 1 tablespoon lemon juice, let sit 5 minutes)
- ½ cup shredded sharp cheddar cheese (optional, but highly recommended for extra flavor)
A note on ingredient selection: When choosing frozen vegetables, look for a bag that doesn’t have added sauces or seasonings—you want plain veggies here so you can control the flavor. For the chicken, if you’re using thighs, trim any excess fat but leave a little for flavor. And that buttermilk in the biscuits? It’s the secret to tenderness. I’ve tried regular milk in a pinch, and the biscuits are definitely denser. If you can, grab a carton of real buttermilk.
Equipment Needed
The beauty of this recipe is that it’s truly a one-pan affair. Here’s what you’ll need:
- 12-inch cast iron skillet (this is ideal—it holds heat beautifully and goes from stovetop to oven. If you don’t have one, a 12-inch oven-safe stainless steel or nonstick skillet works too)
- Cutting board and sharp knife (for prepping the chicken and onion)
- Measuring cups and spoons
- Small mixing bowl (for the biscuit dough)
- Pastry cutter or two forks (for cutting butter into the flour—or just use your fingers if you’re like me and don’t mind getting messy)
- Wooden spoon or silicone spatula (for stirring the filling)
- Oven mitts (that skillet handle gets HOT)
If you don’t own a cast iron skillet, don’t run out and buy one just for this recipe. Any oven-safe skillet with deep sides (at least 2 inches) will work. I’ve made this in a stainless steel All-Clad pan with great results. Just make sure the handle is oven-safe—no plastic or silicone handles above 400°F. And honestly? If all you have is a regular skillet, you can transfer the filling to a baking dish before adding the biscuits. It’s not strictly one-pan, but it still tastes amazing.
Preparation Method
Let’s walk through this step by step. I’ve tested this method more times than I can count, and these details make the difference between good and unforgettable.
- Preheat your oven to 400°F (200°C). Position a rack in the upper third of the oven so the biscuits get nice and golden on top.
- Season the chicken. Pat the chicken pieces dry with paper towels (this helps them brown instead of steam). Season generously with salt and pepper on all sides. Don’t be shy—this is where the flavor starts.
- Brown the chicken. Heat 1 tablespoon of the butter in your 12-inch cast iron skillet over medium-high heat. Once it’s shimmering and bubbly, add the chicken pieces in a single layer (work in batches if needed—crowding the pan steams the meat). Cook for 3-4 minutes per side until golden brown. The chicken won’t be cooked through yet, and that’s fine. Transfer the browned chicken to a plate and set aside. Don’t wipe out the pan—those browned bits are flavor gold.
- Sauté the aromatics. Reduce the heat to medium and add the remaining 2 tablespoons of butter to the skillet. Once melted, add the diced onion and cook for 4-5 minutes, stirring occasionally, until soft and translucent. Add the minced garlic and cook for 30 seconds until fragrant. Your kitchen should smell amazing right about now.
- Make the roux. Sprinkle the ⅓ cup of flour over the onions and garlic. Stir constantly with a wooden spoon for 1-2 minutes. The mixture will look thick and pasty—that’s exactly what you want. This roux is the foundation of your creamy gravy.
- Build the gravy. Slowly pour in the chicken broth while whisking or stirring vigorously to prevent lumps. Then add the milk or half-and-half. Keep stirring until the mixture is smooth. Bring it to a gentle simmer—you’ll see it start to thicken after about 2-3 minutes. It should coat the back of a spoon.
- Add the vegetables and herbs. Stir in the frozen mixed vegetables (no need to thaw them first), the dried thyme, and crushed rosemary. Return the browned chicken (and any juices from the plate) to the skillet. Stir everything together, then taste the gravy and adjust salt and pepper. This is where you make it yours.
- Simmer and thicken. Let the filling simmer gently for 5 minutes, stirring occasionally. It will continue to thicken. If it seems too thick, add a splash more broth or milk. If it’s too thin, let it simmer another minute or two. The perfect consistency is like a thick stew—it should hold its shape slightly when you stir it.
- Make the biscuit dough. While the filling simmers, prepare the topping. In a small mixing bowl, whisk together the flour, baking powder, baking soda, and salt. Add the cold butter cubes and use a pastry cutter or your fingers to work the butter into the flour until the mixture looks like coarse crumbs with some pea-sized butter pieces remaining. This takes about 1 minute. If you’re using the cheddar cheese, stir it in now. Pour in the buttermilk and stir with a fork just until combined—a few streaks of flour are okay. Overmixing makes tough biscuits.
- Top the filling. Remove the skillet from the heat. Using a spoon or cookie scoop, drop rounded spoonfuls of the biscuit dough over the surface of the filling. You should have about 8-10 dollops. They don’t need to be perfect—rustic is the look we’re going for. Leave a little space between them so they can spread and puff up.
- Bake. Transfer the skillet to the preheated oven and bake for 18-22 minutes, until the biscuits are golden brown and the filling is bubbly around the edges. The biscuits should be cooked through—test one by inserting a toothpick into the center; it should come out clean or with a few moist crumbs.
- Rest and serve. Let the skillet cool on a wire rack for 5-10 minutes. This allows the filling to set slightly so it doesn’t run all over your plate. Sprinkle with fresh parsley if desired, then serve directly from the skillet. Watch out—that handle is screaming hot!
A quick note on timing: The whole process takes about 45 minutes start to finish. The filling comes together in about 20 minutes on the stovetop, and the biscuits bake in about 20 minutes. It’s a perfect weeknight timeline.
Cooking Tips & Techniques
After making this recipe more times than I care to admit (and a few spectacular failures along the way), I’ve gathered some wisdom that will save you from my mistakes.
The roux is everything. Don’t rush the flour-butter mixture. Let it cook for a full minute or two until it smells slightly nutty and has turned a pale golden color. This cooks out the raw flour taste and ensures a smooth, rich gravy. I once got distracted and only cooked it for 30 seconds—the gravy had a distinct “raw flour” flavor that ruined the whole dish. Learn from my impatience.
Cold butter for the biscuits. This is non-negotiable. The cold butter creates steam pockets as it melts in the oven, giving you those flaky, tender layers. If the butter softens while you’re cutting it in, pop the bowl in the fridge for 5 minutes before adding the buttermilk.
Don’t overmix the biscuit dough. Stir just until the flour is incorporated. A few lumps are fine—they’ll bake out. Overmixing develops the gluten and gives you tough, hockey-puck biscuits instead of light, fluffy ones. I speak from experience: my first attempt was edible but dense enough to use as a doorstop.
Let the filling simmer before baking. This step concentrates the flavors and ensures the vegetables are heated through. It also allows the gravy to thicken to the right consistency. If you skip this, the biscuits might end up sitting in a thin, watery sauce.
Watch your oven. All ovens run differently. Mine runs hot, so I start checking at 18 minutes. If the biscuits are browning too quickly but the filling isn’t bubbling, tent the skillet loosely with foil for the last 5 minutes.
Variations & Adaptations
This recipe is wonderfully flexible. Here are some ways to make it your own:
Dietary Variations:
- Gluten-Free: Use a gluten-free all-purpose flour blend (like Bob’s Red Mill 1-to-1) for both the roux and the biscuits. The biscuits will be slightly more crumbly but still delicious. Add an extra tablespoon of buttermilk to the dough if it seems dry.
- Dairy-Free: Substitute the butter with a plant-based butter (like Miyoko’s or Earth Balance), use unsweetened oat milk or almond milk in place of whole milk, and use a dairy-free buttermilk (oat milk + lemon juice). The biscuits won’t be quite as fluffy, but they’ll still be tasty.
- Lower-Carb: Skip the biscuit topping entirely and serve the filling over cauliflower rice or mashed cauliflower. Or top with a low-carb biscuit made from almond flour and cheese.
Flavor Twists:
- Herb Garden: Add 1 tablespoon each of fresh chopped sage and fresh thyme to the filling along with the vegetables. It gives the dish an earthy, almost Thanksgiving-like flavor.
- Spicy Kick: Add ½ teaspoon of red pepper flakes with the garlic, and use pepper jack cheese in the biscuits instead of cheddar. The heat cuts through the creamy gravy beautifully.
- Mushroom & Leek: Swap the chicken for 8 ounces of sliced cremini mushrooms and use leeks instead of onion. This vegetarian version is incredibly savory and satisfying.
Seasonal Adaptations:
- Spring: Use fresh asparagus (cut into 1-inch pieces) and peas instead of the frozen mixed vegetables. Add a squeeze of lemon juice at the end.
- Fall: Add 1 cup of cubed butternut squash along with the vegetables, and use fresh sage in the biscuits. It’s like autumn in a skillet.
I personally love the mushroom and leek variation—I made it last spring when I had a bunch of leeks from the farmer’s market, and it was so good I almost forgot it was vegetarian. Almost.
Serving & Storage Suggestions
This dish is best served hot, straight from the skillet. I like to set the skillet on a trivet in the middle of the table and let everyone dig in family-style. It feels cozy and communal, like something you’d share on a chilly Sunday evening.
Serving Suggestions: A simple green salad with a tangy vinaigrette cuts through the richness of the pot pie beautifully. I also love serving it with roasted green beans or steamed broccoli on the side. If you’re feeling indulgent, a glass of crisp white wine like Sauvignon Blanc or a light Chardonnay pairs perfectly. For a non-alcoholic option, sparkling water with a squeeze of lemon is refreshing.
Storage: Leftovers keep well in an airtight container in the refrigerator for up to 4 days. The biscuits will soften slightly as they absorb the gravy, but the flavor only gets better. I actually think this dish tastes even better the next day—the flavors have time to meld and deepen.
Reheating: The best way to reheat is in a 350°F oven for 10-15 minutes, until bubbly. You can also reheat individual portions in the microwave for 1-2 minutes, but the biscuits will be softer. If you’re reheating on the stovetop, add a splash of broth or milk to loosen the gravy, cover, and warm over low heat.
Freezing: Assemble the entire dish (filling and biscuit topping) in a freezer-safe baking dish, but don’t bake it. Cover tightly with foil and freeze for up to 3 months. To bake from frozen, add about 15-20 minutes to the baking time, covering with foil if the biscuits brown too quickly. Alternatively, freeze the filling separately and make fresh biscuit dough when you’re ready to bake.
Nutritional Information & Benefits
Here’s an estimated nutritional breakdown per serving (based on 6 servings):
| Nutrient | Amount per Serving |
|---|---|
| Calories | 485 |
| Total Fat | 22g |
| Saturated Fat | 12g |
| Cholesterol | 115mg |
| Sodium | 720mg |
| Total Carbohydrates | 38g |
| Dietary Fiber | 4g |
| Sugars | 6g |
| Protein | 35g |
This dish is a good source of lean protein from the chicken, which helps keep you full and satisfied. The frozen mixed vegetables add fiber, vitamins A and C, and antioxidants. The buttermilk biscuits provide calcium and a bit of indulgence. If you’re watching your sodium, use low-sodium broth and go easy on the added salt—the cheese and baking powder also contribute sodium. For a lighter version, use half-and-half instead of heavy cream, or swap the butter for olive oil in the filling (though the flavor will change slightly).
I personally love that this meal feels indulgent but is actually fairly balanced. It’s comfort food that doesn’t leave you feeling weighed down—just warm and happy.
Conclusion
This one-pan chicken pot pie skillet is the kind of recipe that earns a permanent spot in your dinner rotation. It’s easy enough for a busy Tuesday, impressive enough for guests, and comforting enough to cure a bad day. The creamy filling, tender chicken, and fluffy biscuit topping come together in a single skillet—which means less cleanup and more time doing what you love.
I hope you give this recipe a try and make it your own. Maybe you’ll add extra cheese, swap in your favorite vegetables, or top it with a different kind of biscuit. That’s the beauty of cooking—you get to play and experiment. I’d love to hear how it turns out for you. Drop a comment below and let me know if you made any fun variations, or tag me in your photos on social media. Happy cooking, friend—go make something cozy tonight!
Frequently Asked Questions
Can I use leftover or rotisserie chicken?
Absolutely! This is a great way to use up leftover chicken. Skip the browning step and add about 3 cups of cooked, shredded chicken to the filling after you’ve made the gravy. Just heat it through for a few minutes before adding the biscuit topping.
Can I make this ahead of time?
Yes! You can prepare the filling completely (steps 1-8) and let it cool. Store it in the refrigerator for up to 2 days. When you’re ready to bake, reheat the filling gently on the stovetop, then make the biscuit dough, top, and bake as directed. You may need to add 5 minutes to the baking time since the filling starts cold.
My gravy is too thin/too thick. How do I fix it?
If the gravy is too thin, let it simmer for a few more minutes—it will thicken as it reduces. You can also mix 1 tablespoon of cornstarch with 2 tablespoons of cold water and stir it in. If the gravy is too thick, add a splash of broth or milk and stir until it reaches your desired consistency. Remember, it will thicken slightly more as it bakes.
Can I use a different protein?
For sure! Cubed turkey breast works wonderfully, especially around the holidays. You can also use boneless pork chops, cut into small pieces. For a vegetarian version, use extra mushrooms and a can of drained chickpeas for protein. Just adjust the cooking time for the protein you choose.
Why are my biscuits dense and heavy?
This usually happens for one of three reasons: overmixing the dough, using warm butter, or expired baking powder. Make sure your baking powder is fresh, keep the butter cold, and stir the dough just until the flour disappears. A few lumps are totally fine—they’ll bake into tender pockets.
Pin This Recipe!

Easy One-Pan Chicken Pot Pie Skillet Recipe

A quick and easy one-pan chicken pot pie with a creamy filling and fluffy drop-biscuit topping, all made in a single skillet for minimal cleanup and maximum comfort.
- Prep Time: 15 minutes
- Cook Time: 30 minutes
- Total Time: 45 minutes
- Yield: 6 servings 1x
- Category: Main Course
- Cuisine: American
Ingredients
- 1 ½ pounds boneless, skinless chicken breasts or thighs, cut into bite-sized pieces
- 3 tablespoons unsalted butter
- 1 medium yellow onion, diced (about 1 cup)
- 3 cloves garlic, minced
- 1/3 cup all-purpose flour
- 2 cups low-sodium chicken broth
- 1 cup whole milk or half-and-half
- 2 cups frozen mixed vegetables (peas, carrots, corn, green beans)
- 1 teaspoon dried thyme
- ½ teaspoon dried rosemary, crushed
- Salt and freshly ground black pepper, to taste
- 1 tablespoon fresh parsley, chopped (optional, for garnish)
- 1 ½ cups all-purpose flour (for biscuit topping)
- 2 teaspoons baking powder
- ½ teaspoon baking soda
- ½ teaspoon salt
- ¼ cup cold unsalted butter, cut into small cubes
- ¾ cup buttermilk
- ½ cup shredded sharp cheddar cheese (optional)
Instructions
- Preheat your oven to 400°F (200°C). Position a rack in the upper third of the oven.
- Pat the chicken pieces dry with paper towels. Season generously with salt and pepper on all sides.
- Heat 1 tablespoon of the butter in a 12-inch cast iron skillet over medium-high heat. Add the chicken pieces in a single layer (work in batches if needed) and cook for 3-4 minutes per side until golden brown. Transfer the browned chicken to a plate and set aside. Do not wipe out the pan.
- Reduce the heat to medium and add the remaining 2 tablespoons of butter to the skillet. Once melted, add the diced onion and cook for 4-5 minutes, stirring occasionally, until soft and translucent. Add the minced garlic and cook for 30 seconds until fragrant.
- Sprinkle the ⅓ cup of flour over the onions and garlic. Stir constantly for 1-2 minutes until the mixture is thick and pasty.
- Slowly pour in the chicken broth while whisking or stirring vigorously to prevent lumps. Then add the milk or half-and-half. Keep stirring until the mixture is smooth. Bring to a gentle simmer and cook for 2-3 minutes until thickened.
- Stir in the frozen mixed vegetables, dried thyme, and crushed rosemary. Return the browned chicken (and any juices from the plate) to the skillet. Stir everything together, then taste and adjust salt and pepper.
- Let the filling simmer gently for 5 minutes, stirring occasionally. If it seems too thick, add a splash more broth or milk. If too thin, let it simmer another minute or two.
- While the filling simmers, prepare the biscuit dough. In a small mixing bowl, whisk together the flour, baking powder, baking soda, and salt. Add the cold butter cubes and use a pastry cutter or your fingers to work the butter into the flour until the mixture looks like coarse crumbs with some pea-sized butter pieces remaining. If using cheddar cheese, stir it in now. Pour in the buttermilk and stir with a fork just until combined—a few streaks of flour are okay.
- Remove the skillet from the heat. Using a spoon or cookie scoop, drop rounded spoonfuls of the biscuit dough over the surface of the filling. You should have about 8-10 dollops.
- Transfer the skillet to the preheated oven and bake for 18-22 minutes, until the biscuits are golden brown and the filling is bubbly around the edges. The biscuits should be cooked through—test one by inserting a toothpick into the center; it should come out clean or with a few moist crumbs.
- Let the skillet cool on a wire rack for 5-10 minutes. Sprinkle with fresh parsley if desired, then serve directly from the skillet.
Notes
For the best biscuits, keep the butter cold and do not overmix the dough. Let the filling simmer before baking to concentrate flavors. If the biscuits brown too quickly, tent the skillet loosely with foil.
Nutrition
- Serving Size: 1 serving
- Calories: 485
- Sugar: 6
- Sodium: 720
- Fat: 22
- Saturated Fat: 12
- Carbohydrates: 38
- Fiber: 4
- Protein: 35
Keywords: chicken pot pie, one-pan, skillet, comfort food, easy dinner, drop biscuits, creamy chicken


