There used to be a tiny café tucked behind a used bookstore on the corner of Elm and 3rd that made the most ridiculous pumpkin cheesecake bars. When they closed—suddenly, with a handwritten sign taped to the door that just said “Thank you, friends”—I honestly felt a little lost. Those bars were my October ritual. The gingersnap crust had this bold, peppery crunch that held up against a layer of creamy pumpkin cheesecake so smooth it almost felt wrong to call it a bar. After twelve tries—twelve, I’m not exaggerating, including one batch that collapsed into a buttery mess that I ate straight from the pan with a spoon—I finally got it. And let me tell you, this version might even be a little better than the original. Maybe you’ve been there, chasing a dessert memory that just won’t let go. That’s exactly what this recipe is for.
I remember walking into that café on a rainy Tuesday, the bell above the door jingling, and the smell of ginger and nutmeg hitting me before I even saw the display case. The woman behind the counter, whose name I never learned, would always slide one of these bars onto a napkin without me asking. “You look like you need this today,” she’d say. When the café disappeared, I tried everything to recreate that moment. I tested different ratios of cream cheese to pumpkin puree. I burned through three bags of gingersnaps trying to get the crust just right. I even called a former employee I tracked down on social media—she gave me a vague tip about using brown butter, which sent me down a whole other rabbit hole. But persistence pays off, and now I’ve got a recipe that captures that exact feeling of comfort and celebration in every single bite.
These pumpkin cheesecake bars are the kind of dessert that makes people close their eyes and go quiet for a second. They’re rich without being heavy, spiced without being overwhelming, and that gingersnap crust adds a texture that a regular graham cracker crust just can’t touch. I keep making them because they remind me that some things are worth the effort to recreate—and sometimes, what you end up with is even better than what you lost. Whether you’re making these for a fall gathering, a Thanksgiving table, or just because it’s Wednesday and you deserve something amazing, these bars deliver every single time.
Why You’ll Love This Recipe
These aren’t just another pumpkin dessert to add to your collection. After testing this recipe more times than I care to admit, here’s why I keep coming back to it—and why you will too.
- That Gingersnap Crust : Most pumpkin cheesecake bars use graham crackers, but the bold, spicy snap of ginger cookies takes the whole thing to another level. It’s not just a base—it’s a flavor partner.
- Perfect for Hosting : These bars are a dream for dinner parties. You can make them a day ahead, they slice cleanly, and they look impressive on a platter without any fussy decorating.
- No Water Bath Needed : Traditional cheesecake can be intimidating with that whole water bath situation. These bars bake up perfectly without one—no cracked tops, no stress.
- Balanced Sweetness : The filling isn’t cloying. The tang of cream cheese balances the pumpkin and spice, so every bite feels just right.
- Crowd-Pleaser Guaranteed : I’ve brought these to potlucks, Friendsgiving dinners, and casual get-togethers. They disappear fast, and someone always asks for the recipe.
What makes this version different from every other pumpkin cheesecake bar recipe out there? It’s the attention to texture. The crust stays crunchy even after a day in the fridge. The filling is silky but firm enough to hold its shape when you cut it. And the spice blend—I spent weeks tweaking the ratio of ginger, cinnamon, and nutmeg until it tasted like that café memory. This isn’t just another recipe you’ll bookmark and forget. It’s the one you’ll actually make, over and over, because it works every time.
What Ingredients You Will Need
This recipe uses simple, pantry-friendly ingredients to create something that tastes anything but ordinary. Most of these are probably already in your kitchen, especially if you do any fall baking.
For the Gingersnap Crust
- 2 cups (about 200g) gingersnap cookie crumbs — I use Nabisco brand for consistent texture, but any crunchy gingersnap works. You can crush them in a food processor or by hand in a sealed bag with a rolling pin.
- 5 tablespoons (70g) unsalted butter, melted — Salted butter works in a pinch, just reduce any added salt elsewhere.
- 2 tablespoons (25g) granulated sugar — This helps the crust hold together and adds a touch of sweetness.
- Pinch of salt — Balances the sweetness and enhances the ginger flavor.
For the Pumpkin Cheesecake Filling
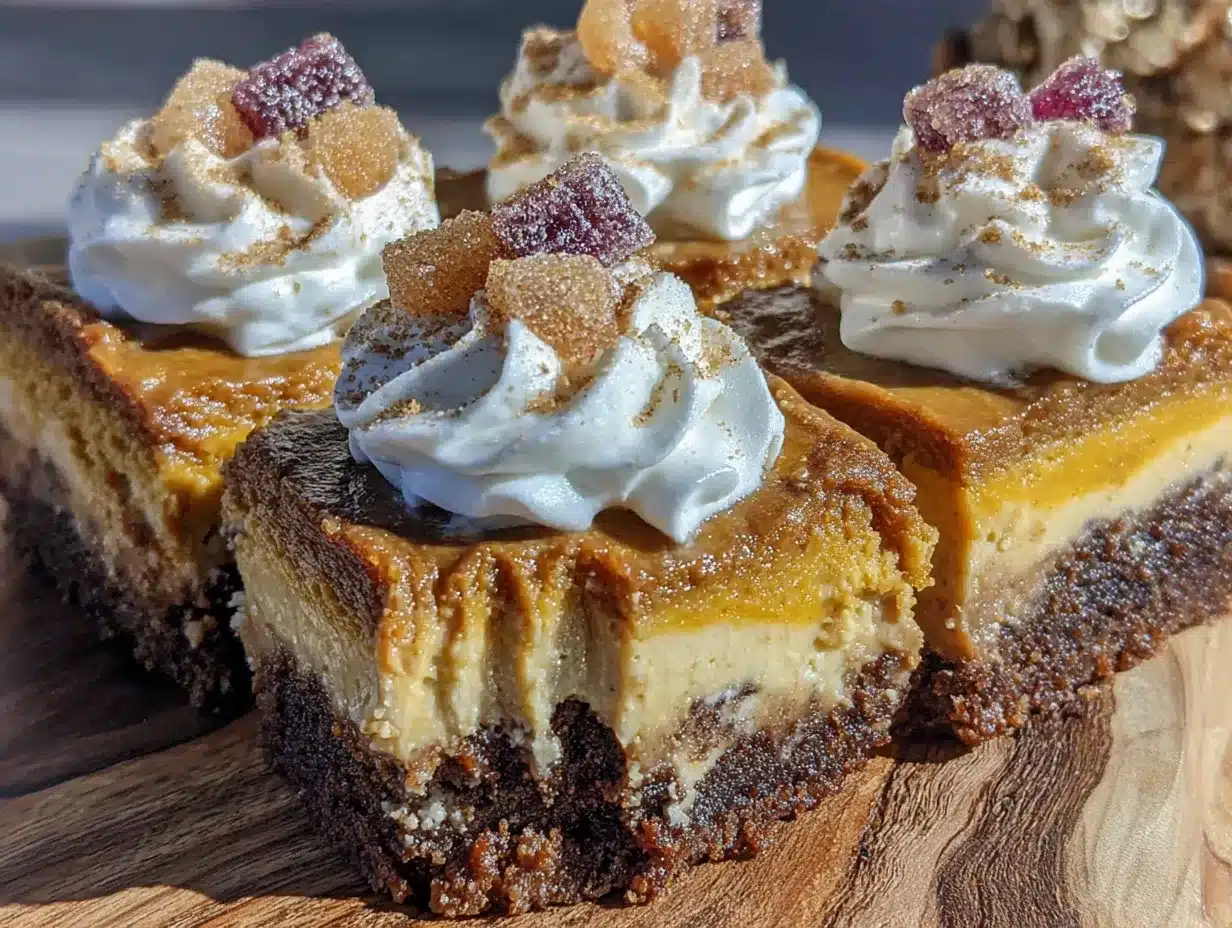
- 16 ounces (450g) cream cheese, softened to room temperature — Full-fat is best for that rich, creamy texture. Low-fat will work but the filling won’t be as luscious.
- ¾ cup (150g) granulated sugar — Just enough to sweeten without overpowering the pumpkin.
- ¼ cup (50g) packed light brown sugar — Adds a subtle molasses note that pairs beautifully with the spices.
- 3 large eggs, room temperature — Cold eggs can seize the batter. Let them sit on the counter for 30 minutes before starting.
- 1 cup (245g) pumpkin puree — Not pumpkin pie filling! Make sure you grab 100% pure pumpkin. Libby’s is my go-to.
- 1 teaspoon vanilla extract — Pure vanilla adds warmth. Imitation works fine too.
- 2 tablespoons (16g) all-purpose flour — Helps stabilize the filling and prevents cracking.
- 1½ teaspoons ground cinnamon — The backbone of the spice blend.
- 1 teaspoon ground ginger — Reinforces the crust’s flavor and adds warmth.
- ½ teaspoon ground nutmeg — Freshly grated if you have it, but pre-ground is totally fine.
- ¼ teaspoon ground cloves — Just a pinch. Cloves are potent, so don’t go overboard.
- ¼ teaspoon salt — Brings all the flavors into focus.
For the Optional Topping
- ½ cup (120ml) heavy cream — For whipping into a soft, pillowy topping.
- 1 tablespoon powdered sugar — Sweetens the cream without making it grainy.
- ½ teaspoon vanilla extract — Because everything is better with vanilla.
- Caramel sauce for drizzling — Store-bought or homemade, either works beautifully.
When you’re shopping for ingredients, look for cream cheese that’s pliable when you press it—if it’s cold and stiff, it needs more time on the counter. For the pumpkin puree, I’ve tested this with both canned and fresh roasted pumpkin, and honestly, canned is more consistent and saves you a step. If you want to use fresh, roast a sugar pumpkin, puree it, and drain off any excess liquid through a cheesecloth before measuring.
Equipment Needed
You don’t need a professional bakery setup for these bars, but having the right tools makes the process smoother. Here’s what I use every time.
- 9×9-inch baking pan — Glass, ceramic, or metal all work. If using metal, line it with parchment for easy removal. Glass takes a few minutes longer to bake.
- Parchment paper — Cut two strips that overlap in the pan for a sling that lets you lift the bars out cleanly.
- Food processor or rolling pin — For crushing the gingersnaps. A food processor gives you fine, even crumbs in seconds. A rolling pin and a zip-top bag work if you want to release some frustration.
- Electric hand mixer or stand mixer — Cream cheese needs to be beaten until smooth, and doing that by hand is a workout. A hand mixer is totally sufficient here.
- Large mixing bowls — One for the crust ingredients, one for the filling.
- Rubber spatula — For scraping down the bowl and spreading the filling evenly.
- Measuring cups and spoons — Precise measurements matter in baking, so use proper measuring tools rather than eyeballing it.
- Sharp knife — For clean slices. Run it under hot water and wipe it clean between cuts for the best results.
I’ve made these bars in a friend’s kitchen with nothing but a fork, a bowl, and a 9-inch pie plate. They turned out fine—a little thicker, a little rustic, but still delicious. So don’t stress if you’re missing something. The only non-negotiable is a pan that holds the batter without leaking.
Preparation Method
Let’s walk through this step by step. Trust me, if I can nail this after twelve attempts, you’ll get it right on your first try.
- Preheat and prep the pan. Preheat your oven to 350°F (175°C). Line your 9×9-inch baking pan with parchment paper, leaving enough overhang on two opposite sides to use as handles later. Lightly grease the parchment with butter or non-stick spray.
- Make the crust. In a food processor, pulse the gingersnap cookies until they become fine crumbs. You should have about 2 cups. Transfer the crumbs to a medium bowl. Add the melted butter, sugar, and pinch of salt. Stir with a fork until every crumb is moistened and the mixture looks like wet sand. If it doesn’t clump when you press it in your fist, add another tablespoon of melted butter.
- Press and bake the crust. Dump the crumb mixture into your prepared pan. Use the bottom of a measuring cup or a flat glass to press it down firmly and evenly. Don’t skimp on this step—a tightly packed crust holds together better. Bake for 10 minutes at 350°F (175°C). It should smell toasty and look slightly darker around the edges. Set it on a wire rack to cool while you make the filling. Leave the oven on.
- Beat the cream cheese. In a large mixing bowl, beat the softened cream cheese with an electric mixer on medium speed until it’s completely smooth, about 2 minutes. Scrape down the sides and bottom of the bowl with a rubber spatula. There should be no lumps at all—this is crucial for a silky filling.
- Add the sugars. Add the granulated sugar and brown sugar to the cream cheese. Beat on medium speed for another 2 minutes until the mixture is light and fluffy. Scrape the bowl again.
- Add the eggs one at a time. Crack one egg into the bowl and beat on low speed just until incorporated. Repeat with the second and third eggs. Overmixing at this stage can incorporate too much air, which leads to cracks during baking. Keep it gentle.
- Mix in the pumpkin and vanilla. Add the pumpkin puree and vanilla extract. Beat on low speed until just combined. The mixture will look a little looser now, which is exactly right.
- Add the dry ingredients. In a small bowl, whisk together the flour, cinnamon, ginger, nutmeg, cloves, and salt. Add this to the wet mixture in two additions, mixing on low speed after each until just combined. Stop and scrape the bowl one last time, folding any streaks of flour in by hand with your spatula.
- Pour and spread the filling. Pour the filling over the pre-baked crust. Use your spatula to spread it evenly into the corners. Tap the pan gently on the counter a few times to release any air bubbles trapped in the filling.
- Bake the bars. Place the pan in the center of the oven and bake at 350°F (175°C) for 35 to 40 minutes. The edges should look set and slightly puffed, but the center should still jiggle just a little when you gently shake the pan. That slight jiggle is your cue—it will firm up as it cools.
- Cool completely. Transfer the pan to a wire rack and let it cool to room temperature, about 1 hour. Don’t rush this. If you put warm bars in the fridge, condensation will form and make the top soggy.
- Chill for at least 4 hours. Once the pan is cool to the touch, cover it with plastic wrap and refrigerate for at least 4 hours, but overnight is better. This step is non-negotiable. The bars need time to set completely so you can slice them cleanly.
- Slice and serve. Use the parchment sling to lift the entire block out of the pan. Place it on a cutting board. Use a sharp knife to trim the edges if you want picture-perfect squares, then cut into 16 bars. Wipe the knife clean between cuts for the neatest slices.
One thing I learned the hard way: if you try to cut these bars when they’re still even slightly warm, you’ll end up with a messy, delicious disaster. Patience is the secret ingredient here.
Cooking Tips & Techniques
After more than a dozen batches, I’ve collected some hard-won wisdom that will save you from repeating my mistakes.
Room temperature ingredients matter. I know, I know, everyone says this. But here’s why: cold cream cheese creates lumps that no amount of mixing can fully smooth out. Cold eggs can cause the batter to curdle. Set everything out on the counter at least 30 minutes before you start. Your future self will thank you.
Don’t overmix the filling. The first time I made these, I got so excited that I beat the batter like it owed me money. The bars puffed up beautifully in the oven, then collapsed and cracked into a canyon landscape. Mix on low speed once the eggs are in, and stop as soon as each addition is incorporated.
That jiggle test is your friend. Every oven runs a little differently. My old apartment oven would bake these in 33 minutes. My current one takes 38. Trust the jiggle, not the timer. When the edges are set but the center wobbles like Jell-O when you shake the pan, they’re done.
Use a hot knife for clean cuts. Run your knife under hot water, dry it off, and slice. Wipe the blade clean and repeat between each cut. It takes an extra 30 seconds and makes the difference between ragged edges and bakery-worthy squares.
Let your guests do the drizzling. If you’re serving these at a party, set out a small pitcher of caramel sauce and let people add their own. That way the bars stay picture-perfect on the platter, and everyone gets exactly as much gooey caramel as they want.
Variations & Adaptations
One of the best things about this recipe is how flexible it is. Here are some ways I’ve adapted it for different occasions and dietary needs.
Gluten-Free Version: Use gluten-free gingersnap cookies for the crust. I’ve tested this with a few brands, and they all work well. Just make sure your gingersnaps are certified gluten-free if that’s important to you. The filling is naturally gluten-free, so you’re already halfway there.
Dairy-Free Adaptation: Substitute the cream cheese with a high-quality dairy-free version. Miyoko’s and Kite Hill both work beautifully, though the texture will be slightly less firm. Use a vegan butter alternative in the crust. The bars will still taste amazing, just a touch softer.
Pecan Praline Topping: For a Southern-inspired twist, top the baked and cooled bars with a layer of pecan praline. Toast 1 cup of pecans, then drizzle with a quick caramel made from ½ cup brown sugar, ¼ cup heavy cream, and 2 tablespoons butter. Let it set before slicing. I made this for a Thanksgiving potluck and it was gone in ten minutes.
Chocolate Drizzle: Melt ½ cup of dark chocolate chips with 1 teaspoon of coconut oil and drizzle it over the chilled bars. The chocolate and ginger combination is unexpectedly perfect—it’s like a grown-up version of a chocolate-covered ginger snap.
Mini Bar Version: Use a muffin tin lined with paper liners for individual servings. Press about 1½ tablespoons of crust into each liner, add the filling, and bake for 18 to 20 minutes. These are perfect for parties where people want to grab and go without committing to a full square.
Serving & Storage Suggestions
These bars are incredibly versatile when it comes to serving. Here’s how I handle them for gatherings and leftovers.
Serving Temperature: I prefer these bars straight from the fridge—cold and firm, with that creamy texture that melts as it hits your tongue. But some people love them at room temperature, where the filling softens and the spices open up more. Try both and see which camp you fall into.
Presentation Ideas: Arrange the bars on a white platter for maximum contrast. Dust them lightly with cinnamon or powdered sugar through a fine-mesh sieve. Add a dollop of whipped cream on each square and a drizzle of caramel sauce. For fall gatherings, I like to garnish with a few candied ginger pieces or a tiny rosemary sprig for color.
What to Serve Alongside: These bars pair beautifully with a hot cup of spiced chai, a bold coffee, or even a glass of cold milk. For dessert spreads, I put them next to a simple apple crisp and a pumpkin roll—they complement each other without competing.
Storage Instructions: Keep the bars in an airtight container in the refrigerator for up to 5 days. Layer them with parchment paper between each row so they don’t stick together. I’ve never had a batch last longer than 4 days in my house, but theoretically they’ll hold up fine for a full week.
Freezing Tips: These freeze like a dream. Wrap individual bars tightly in plastic wrap, then place them in a freezer-safe bag or container. They’ll keep for up to 3 months. When you’re ready to enjoy one, let it thaw in the fridge overnight. The texture stays remarkably close to fresh.
Flavor Development: Honestly, these bars taste even better on day two. The spices meld with the pumpkin and cream cheese overnight, creating a deeper, more harmonious flavor. If you’re making these for a dinner party, bake them two days ahead. Your guests will never know, and you’ll thank yourself for the head start.
Nutritional Information & Benefits
Let’s be real—these are a treat, not a health food. But that doesn’t mean they’re without redeeming qualities. Here’s what you’re looking at per bar, based on 16 servings.
| Nutrient | Amount Per Bar |
|---|---|
| Calories | 285 |
| Total Fat | 17g |
| Saturated Fat | 10g |
| Cholesterol | 85mg |
| Sodium | 210mg |
| Total Carbohydrates | 30g |
| Dietary Fiber | 1g |
| Sugars | 22g |
| Protein | 5g |
| Vitamin A | 45% DV |
| Calcium | 6% DV |
| Iron | 6% DV |
Pumpkin is packed with vitamin A, which supports eye health and immune function. The ginger in the crust and filling is known for its anti-inflammatory properties and can help with digestion. Cream cheese provides calcium and protein, though it’s also where most of the saturated fat comes from. If you’re watching your sugar intake, you can reduce the granulated sugar to ½ cup without sacrificing too much structure—the brown sugar and pumpkin add natural sweetness.
One bar is a satisfying portion, especially if you serve it with a dollop of whipped cream. I find that making them in a 9×9 pan means you get a nice thick square that feels indulgent without being over the top.
Conclusion
These pumpkin cheesecake bars with that crunchy gingersnap crust are the dessert I keep coming back to, season after season. They capture everything I love about fall baking—warm spices, creamy textures, and that cozy feeling of sharing something homemade with people you care about. Whether you’re recreating a memory like I was, or just looking for a dessert that will impress without causing you stress, this recipe delivers.
I’d love to hear how these turn out for you. Did you add the pecan praline? Drizzle them with chocolate? Serve them at a Friendsgiving that turned into a full-blown dessert competition? Drop a comment below and let me know. And if you tweak the recipe to make it your own, even better—that’s what cooking is all about.
Go ahead, make a batch this weekend. Your kitchen will smell amazing, your guests will be impressed, and you might just create a memory worth chasing later on.
Frequently Asked Questions
Can I use a different crust instead of gingersnaps?
Absolutely. Graham crackers, vanilla wafers, or even shortbread cookies all work. Just keep the butter and sugar ratios the same. The flavor will change, of course, but the texture will hold up fine.
Why did my cheesecake filling crack on top?
Cracks usually happen from overmixing or overbaking. Make sure you’re mixing on low speed once the eggs are in, and pull the bars out of the oven while the center still jiggles slightly. Cooling them slowly also helps prevent sudden temperature changes that cause cracking.
Can I make these bars in a 9×13 pan?
Yes, but the bars will be thinner and bake faster. Use a 9×13 pan and check for doneness around 25 minutes. You might want to double the crust recipe to maintain a good crust-to-filling ratio.
How far in advance can I make these for a party?
You can make them up to 3 days ahead and keep them refrigerated. They actually taste better on day two. If you’re freezing them, make them up to a month in advance and thaw overnight in the fridge before serving.
Can I use fresh pumpkin instead of canned?
Yes, but you need to roast a sugar pumpkin, puree it, and then drain the puree through a cheesecloth or fine-mesh strainer to remove excess liquid. Fresh pumpkin has more water than canned, and too much moisture will make the filling loose and difficult to slice.
Pin This Recipe!
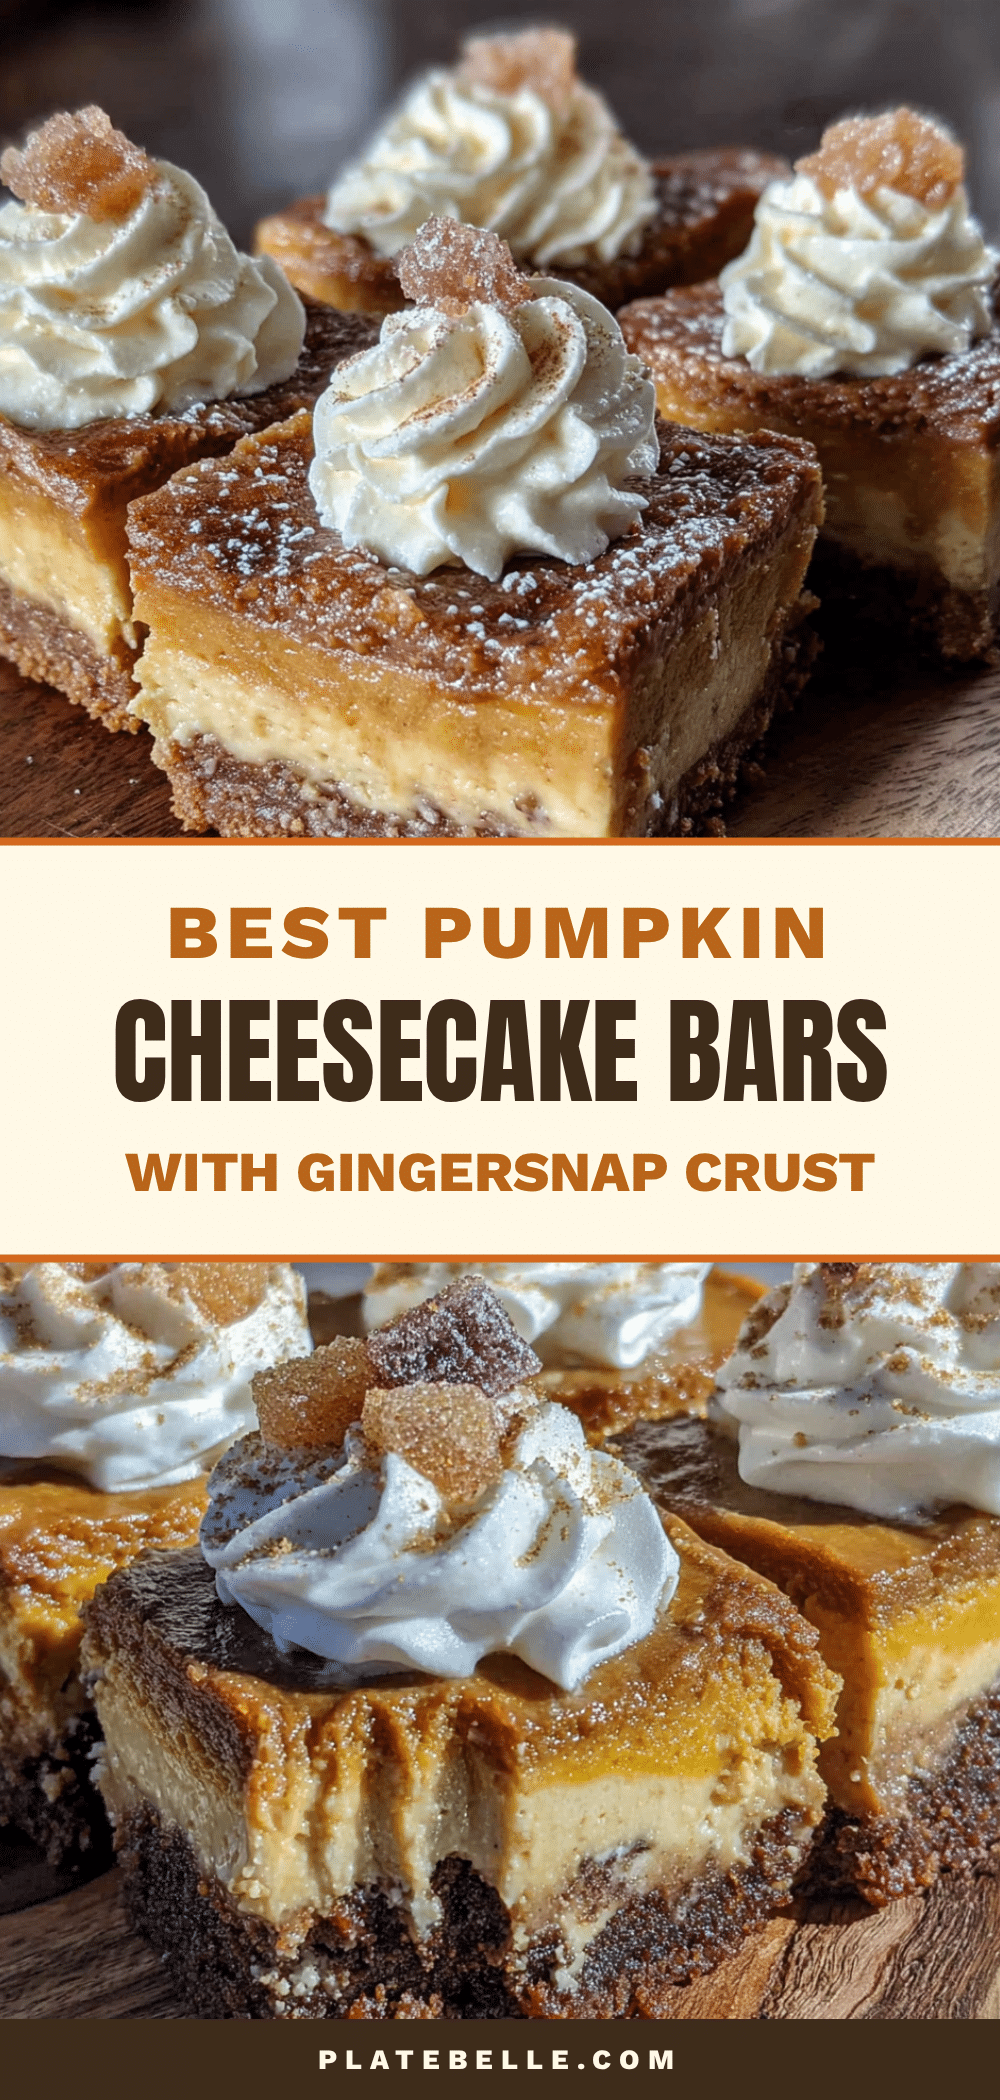
Easy Pumpkin Cheesecake Bars with Gingersnap Crust
These pumpkin cheesecake bars feature a crunchy gingersnap crust and a silky, spiced pumpkin cheesecake filling. They’re rich without being heavy, perfect for fall gatherings or a cozy treat any time.
- Prep Time: 20 minutes
- Cook Time: 40 minutes
- Total Time: 5 hours (includes chilling)
- Yield: 16 bars 1x
- Category: Dessert
- Cuisine: American
Ingredients
- 2 cups (about 200g) gingersnap cookie crumbs
- 5 tablespoons (70g) unsalted butter, melted
- 2 tablespoons (25g) granulated sugar
- Pinch of salt
- 16 ounces (450g) cream cheese, softened to room temperature
- 3/4 cup (150g) granulated sugar
- 1/4 cup (50g) packed light brown sugar
- 3 large eggs, room temperature
- 1 cup (245g) pumpkin puree (not pumpkin pie filling)
- 1 teaspoon vanilla extract
- 2 tablespoons (16g) all-purpose flour
- 1 1/2 teaspoons ground cinnamon
- 1 teaspoon ground ginger
- 1/2 teaspoon ground nutmeg
- 1/4 teaspoon ground cloves
- 1/4 teaspoon salt
- 1/2 cup (120ml) heavy cream (optional topping)
- 1 tablespoon powdered sugar (optional topping)
- 1/2 teaspoon vanilla extract (optional topping)
- Caramel sauce for drizzling (optional topping)
Instructions
- Preheat oven to 350°F (175°C). Line a 9×9-inch baking pan with parchment paper, leaving overhang on two opposite sides. Lightly grease the parchment.
- Make the crust: In a food processor, pulse gingersnap cookies into fine crumbs (about 2 cups). Transfer to a medium bowl. Add melted butter, 2 tablespoons sugar, and a pinch of salt. Stir until mixture resembles wet sand.
- Press crust mixture firmly and evenly into the prepared pan using the bottom of a measuring cup. Bake for 10 minutes at 350°F (175°C). Set on a wire rack to cool. Leave oven on.
- Beat softened cream cheese with an electric mixer on medium speed until smooth, about 2 minutes. Scrape down bowl.
- Add granulated sugar and brown sugar. Beat on medium speed for 2 minutes until light and fluffy. Scrape bowl.
- Add eggs one at a time, beating on low speed just until incorporated after each. Do not overmix.
- Add pumpkin puree and vanilla extract. Beat on low speed until just combined.
- In a small bowl, whisk together flour, cinnamon, ginger, nutmeg, cloves, and salt. Add to wet mixture in two additions, mixing on low speed after each until just combined. Fold any remaining streaks by hand.
- Pour filling over pre-baked crust. Spread evenly. Tap pan gently on counter to release air bubbles.
- Bake at 350°F (175°C) for 35 to 40 minutes, until edges are set and center jiggles slightly when shaken.
- Cool completely on a wire rack, about 1 hour.
- Cover with plastic wrap and refrigerate for at least 4 hours, preferably overnight.
- Use parchment sling to lift bars out of pan. Place on cutting board. Trim edges if desired, then cut into 16 bars. Wipe knife clean between cuts.
Notes
Room temperature ingredients are crucial for a smooth filling. Do not overmix once eggs are added. The center should jiggle slightly when done. Chill at least 4 hours before slicing. For clean cuts, use a hot knife wiped clean between slices. Bars taste even better on day two.
Nutrition
- Serving Size: 1 bar
- Calories: 285
- Sugar: 22
- Sodium: 210
- Fat: 17
- Saturated Fat: 10
- Carbohydrates: 30
- Fiber: 1
- Protein: 5
Keywords: pumpkin cheesecake bars, gingersnap crust, fall dessert, Thanksgiving dessert, easy cheesecake bars


