There used to be a tiny, family-run diner on the corner of Elm and 3rd called Mabel’s that made this incredible, gooey beef and rice casserole. When they closed suddenly about five years ago—the owner retired and moved to Florida—I actually felt a little pang of loss. It sounds dramatic, I know. But that dish was my ultimate comfort food after a long week. After about seven tries—some were too greasy, others were just sad, dry rice—I finally got it. And honestly, this version is even better than Mabel’s.
This Lightened-Up Cheesy Ground Beef and Rice Skillet is that same soul-warming meal, but it’s been reworked for how I actually want to eat on a Tuesday night. It’s got all the creamy, cheesy, savory satisfaction of the original, but we’re swapping in a few smarter ingredients to keep things feeling light and fresh. I mean, you know that feeling when you finish a heavy meal and just want to nap for three hours? This isn’t that. This is the kind of dinner that leaves you full and happy, not weighed down.
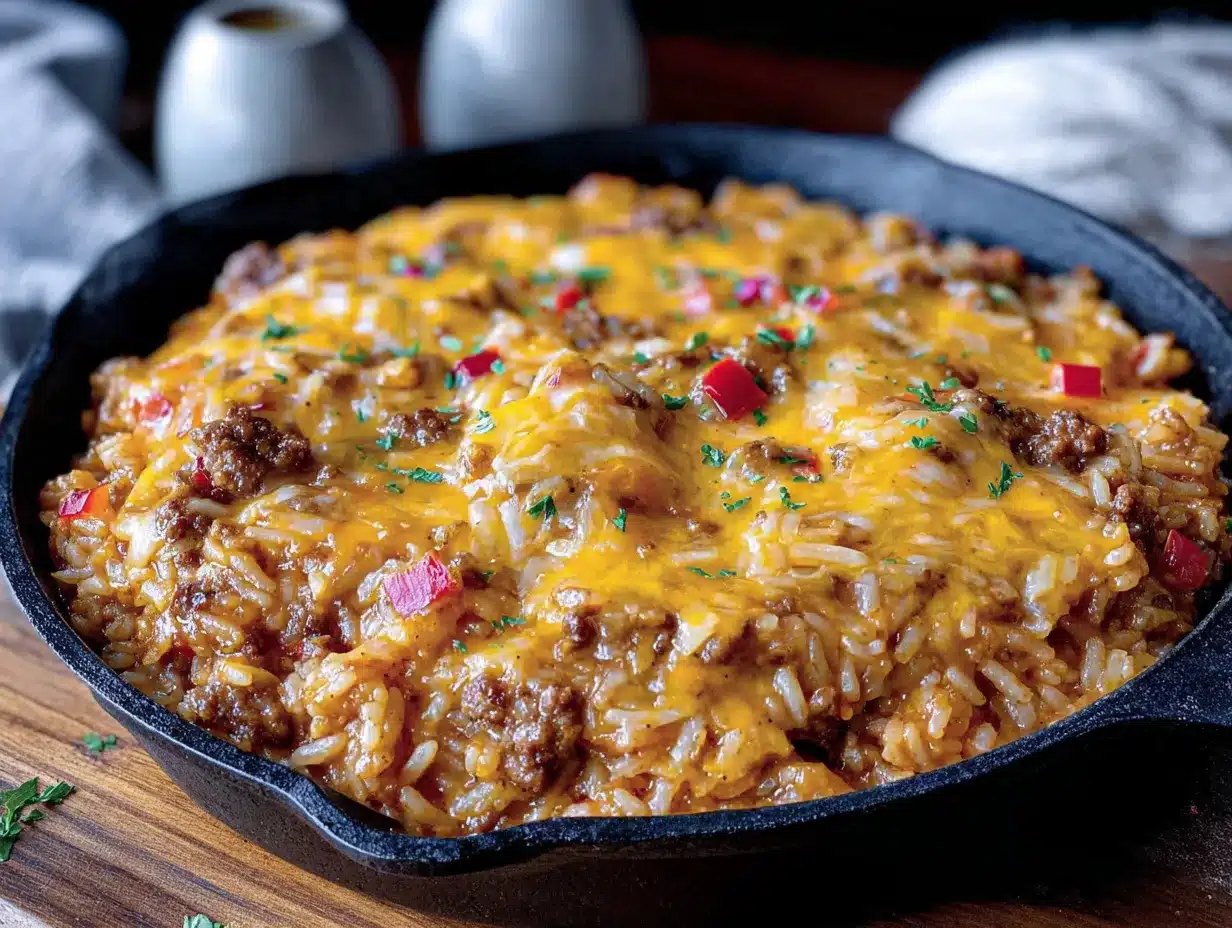
It all comes together in one skillet, which is my favorite kind of cooking. Less cleanup means more time to relax. The rice gets perfectly tender, soaking up all the beefy, tomatoey goodness, and that melty cheese on top? Let’s just say it creates a golden, bubbly crust that’s hard to resist. I keep coming back to this recipe because it’s the perfect balance of cozy and wholesome. Maybe you’ve been looking for a quick weeknight meal that actually makes you feel good? Well, this is it. Let me show you how to make it.
Why You’ll Love This Recipe
This isn’t just another ground beef recipe. It’s the one I turn to when I need a guaranteed win. As a recipe developer, I’ve tested this skillet more times than I can count, tweaking the liquid ratios and the cheese blend to get that perfect creamy-yet-light texture. Here’s why it’s become a staple in my kitchen—and I think it will be in yours, too.
- Quick & Easy: From start to finish, this meal is on the table in about 35 minutes. It’s perfect for those nights when you walk through the door hungry and need dinner now.
- Simple Ingredients: No fancy grocery trips needed. You likely already have ground beef, rice, and cheese in your kitchen. It’s the ultimate pantry-friendly meal.
- Perfect for Busy Weeknights: This is a lifesaver for hectic evenings, but it’s also great for a cozy weekend lunch. It’s versatile like that.
- Crowd-Pleaser: I’ve yet to meet a kid—or an adult—who doesn’t love a cheesy, beefy skillet. It’s pure comfort food, no arguments needed.
- Unbelievably Delicious: The texture is what gets me every time. The rice is fluffy, the beef is savory, and the cheese pull is next-level. It’s comfort food reimagined—healthier, faster, but with the same soul-soothing satisfaction.
What makes this version different from all the others? It’s the little tricks I’ve learned. We’re using lean ground beef and a smart blend of cheeses to keep things rich without being greasy. Plus, a splash of something tangy (you’ll see) cuts through the richness perfectly. This isn’t just another version—it’s my best version.
What Ingredients You Will Need
This recipe uses simple, wholesome ingredients to deliver bold flavor and satisfying texture without the fuss. Most of these are pantry staples, which makes this dish perfect for a last-minute dinner. Here’s what you’ll need:
For the Skillet Base
- 1 lb lean ground beef (93/7): Using lean beef is the key to keeping this dish light. The 93/7 blend has plenty of flavor without all the excess grease. I usually grab a pack from my local market—no specific brand preference, just make sure it’s lean.
- 1 medium yellow onion, diced: About 1 cup. Onion adds that essential savory base. I like yellow onions for their balanced flavor, but a sweet onion would work too.
- 2 cloves garlic, minced: Fresh is best here. Pre-minced from a jar works in a pinch, but fresh garlic gives a much brighter punch.
- 1 cup long-grain white rice, uncooked: I’ve tested this with jasmine and basmati, and both work beautifully. Avoid instant rice—it turns to mush. The rice absorbs the broth and becomes perfectly tender.
- 1 can (14.5 oz) diced tomatoes, undrained: This adds moisture and a little acidity. I prefer fire-roasted diced tomatoes for a deeper flavor, but plain ones are just fine. Look for no-salt-added if you’re watching your sodium.
- 2 cups low-sodium beef broth: The rice cooks in this, so flavor matters. Low-sodium gives you control over the salt level. Swanson’s or Kitchen Basics are my go-to brands for a clean taste.
- 1 teaspoon smoked paprika: This adds a subtle smokiness that makes the dish feel more complex. Regular paprika works, but smoked is worth the extra effort.
- ½ teaspoon dried oregano: A little herbaceous note that brightens everything up. Italian seasoning can be substituted in a pinch.
- ½ teaspoon salt (or to taste): I start with less and adjust at the end. The broth and tomatoes already contain some sodium.
- ¼ teaspoon black pepper: Freshly ground is always better, but pre-ground works fine.
For the Cheesy Finish
- 1 cup shredded sharp cheddar cheese: Sharp cheddar gives you the most flavor for fewer calories. I recommend shredding it yourself from a block—it melts so much smoother than pre-shredded bags, which have anti-caking agents. Cabot or Tillamook are excellent choices.
- ½ cup shredded part-skim mozzarella: This adds that gooey, stretchy texture without being too heavy. Part-skim keeps it lighter.
- 2 tablespoons grated Parmesan cheese (optional): A little sprinkle on top before the final melt adds a salty, nutty finish. It’s totally optional but highly recommended.
Optional Garnishes
- Fresh parsley or chives, chopped: A pop of green makes the dish look prettier and adds a fresh counterpoint to the richness.
- Red pepper flakes: For a tiny kick of heat. I like a pinch sprinkled over my own bowl.
Equipment Needed
One of the best things about this recipe is that it doesn’t require a ton of fancy equipment. Here’s what you’ll need:
- A large, deep skillet or Dutch oven (12-inch with a lid): This is your main tool. You need something with high sides to hold all the liquid and rice. I use my trusty 12-inch cast-iron skillet for this—it retains heat beautifully and gives a nice crust on the beef. A stainless steel or non-stick skillet works just as well. If you don’t have a lid, you can use a sheet of aluminum foil tightly crimped around the edges.
- A wooden spoon or silicone spatula: For breaking up the beef and stirring everything together. A wooden spoon is my go-to; it’s sturdy and won’t scratch your pan.
- A chef’s knife and cutting board: For dicing the onion and mincing the garlic. A sharp knife makes this step so much faster.
- Measuring cups and spoons: Accuracy matters, especially with the rice and liquid ratios. I use standard dry measuring cups for the rice and a liquid measuring cup for the broth.
- A box grater (optional): If you’re shredding your own cheese from a block, a box grater is your best friend. It takes two extra minutes but makes a world of difference in melting.
That’s it! No food processor, no stand mixer—just basic kitchen tools. If you’re looking for a budget-friendly option, a basic non-stick skillet from a store like Target or Walmart works perfectly. Just make sure it’s at least 12 inches wide and has a tight-fitting lid.
Preparation Method
Ready to cook? This comes together fast, so it’s a good idea to have all your ingredients prepped and measured before you start. Trust me, once the beef is browning, you won’t want to be scrambling for the paprika.
- Brown the Beef (about 5 minutes): Place your large skillet over medium-high heat. Add the lean ground beef and break it apart with your wooden spoon. Cook, stirring occasionally, until it’s browned and no longer pink. Since we’re using lean beef, there won’t be much fat to drain—just a tablespoon or two. If there’s more than that, carefully spoon it out, leaving about 1 tablespoon in the pan for flavor.
- Sauté the Aromatics (about 3 minutes): Reduce the heat to medium. Add the diced onion to the skillet with the beef. Cook for 2 minutes, stirring frequently, until the onion starts to soften and turn translucent. The sizzle should be gentle, not aggressive. Add the minced garlic and cook for another 30 seconds until fragrant—your kitchen will start smelling amazing at this point.
- Toast the Rice (about 2 minutes): Sprinkle the uncooked rice over the beef and onion mixture. Stir it around for about 1-2 minutes. This toasting step is a game-changer—it coats the grains in the beef fat and prevents them from getting mushy later. You’ll notice the rice turning slightly opaque at the edges.
- Add the Liquids and Seasonings: Pour in the undrained diced tomatoes and the beef broth. Add the smoked paprika, dried oregano, salt, and black pepper. Give everything a good stir, scraping up any browned bits from the bottom of the pan. That’s where so much flavor lives.
- Simmer the Rice (about 18-20 minutes): Increase the heat to high and bring the mixture to a rolling boil. Once it’s boiling, reduce the heat to low, cover the skillet with the lid, and let it simmer gently. Do not lift the lid during this time! The rice needs the steam to cook evenly. Set a timer for 18 minutes. After 18 minutes, check the rice—it should be tender and most of the liquid should be absorbed. If the rice is still a little firm, let it cook for another 2-3 minutes with the lid on.
- Add the Cheese (about 3 minutes): Once the rice is perfectly tender, remove the lid. Sprinkle the shredded cheddar and mozzarella evenly over the top of the skillet. If you’re using the Parmesan, sprinkle that on too. Cover the skillet again and let it sit off the heat for 2-3 minutes. The residual heat will melt the cheese into a glorious, gooey blanket. You’ll know it’s ready when the cheese is completely melted and starting to bubble around the edges.
- Rest and Serve: Let the skillet rest, uncovered, for 2-3 minutes. This allows the steam to escape and the dish to set up slightly, making it easier to serve. Sprinkle with fresh parsley or chives and a pinch of red pepper flakes if you like. Scoop out generous portions and enjoy!
Cooking Tips & Techniques
Over the years, I’ve made this skillet more times than I can count, and I’ve learned a few things the hard way. Here are my best tips to make sure yours turns out perfect every single time.
Don’t skip toasting the rice. I know it seems like an extra step, but it’s the secret to fluffy, separate grains. Toasting the rice in the beef fat for just a minute or two creates a barrier that prevents it from absorbing too much liquid too quickly. The result? Rice that’s tender but still has a little bite, not a sticky, gloppy mess. I learned this after my first attempt turned into what I can only describe as savory rice pudding. Not good.
Resist the urge to peek. I get it—you’re curious, you want to stir it, you want to see if it’s burning. But lifting the lid releases all that precious steam, and the rice needs that steam to cook evenly. Trust the process. Set a timer and walk away. If you’re worried about it burning, make sure your heat is on low and your skillet is heavy-bottomed. I once lifted the lid three times in one batch, and the rice was crunchy on top and mushy on the bottom. A hard lesson learned.
Shred your own cheese. This is my number one tip for any recipe involving melted cheese. Pre-shredded bags are coated with potato starch or cellulose to prevent clumping, and that coating stops the cheese from melting smoothly. You end up with a grainy, clumpy mess instead of a silky, gooey blanket. It takes two extra minutes to shred a block of cheddar, and the difference is night and day. I promise you won’t regret it.
Use low-sodium broth. This gives you control over the salt level. The cheese and the diced tomatoes already add a fair amount of sodium, so starting with low-sodium broth keeps the dish from becoming a salt bomb. You can always add more salt at the end if needed.
Variations & Adaptations
One of the reasons I love this recipe is how easy it is to adapt. Here are a few of my favorite variations to keep things interesting.
Make it a veggie-loaded skillet: After you sauté the onion, throw in a diced bell pepper, a cup of chopped zucchini, or a handful of spinach. Sauté the firmer veggies (pepper, zucchini) for a couple of minutes before adding the rice. For spinach, just stir it in at the very end, right before you add the cheese. It wilts down beautifully and adds a boost of nutrients without changing the flavor much.
Swap the protein: Ground turkey or chicken works perfectly here. Just make sure you’re using a lean blend (93/7 or 99/1) to keep it light. Ground pork or Italian sausage (casings removed) would also be delicious for a richer flavor, though it won’t be as lightened-up. I’ve made it with ground chicken before, and it was just as satisfying.
Go gluten-free: This recipe is naturally gluten-free as long as you use certified gluten-free beef broth. The rice is already gluten-free, so you’re good to go. Double-check your spice blends if you’re highly sensitive, as some brands add anti-caking agents that contain gluten.
Try a different cheese: Sharp cheddar and mozzarella are my go-to, but a Mexican blend, Monterey Jack, or even a little crumbled feta on top would work. For a smoky twist, use smoked Gouda instead of mozzarella. I tried this once on a whim, and it was incredible.
Make it spicy: Add a diced jalapeño along with the onion, or stir in a teaspoon of chili powder with the paprika. A few dashes of hot sauce on top at the end are also great. My husband loves it this way—he adds sriracha to his bowl every single time.
Serving & Storage Suggestions
This skillet is a complete meal on its own, but here are some ideas for rounding it out and storing leftovers.
How to serve: Serve this dish hot, straight from the skillet. The cheese should be perfectly melted and stretchy. I like to scoop it into bowls and top with fresh parsley or chives. A side of steamed green beans or a simple green salad with a lemon vinaigrette is a great way to add some freshness. You could also serve it with a dollop of Greek yogurt or sour cream for extra creaminess.
What to drink with it: A cold glass of milk is a classic pairing, but an iced tea or a light beer works too. For a non-alcoholic option, a sparkling water with a squeeze of lime cuts through the richness beautifully.
Storage instructions: Let the skillet cool completely, then transfer leftovers to an airtight container. Store in the refrigerator for up to 4 days. The flavors actually meld together and get even better overnight.
How to reheat: The best way to reheat is in a skillet over medium-low heat with a splash of beef broth or water to loosen it up. Cover and heat for 5-7 minutes, stirring occasionally. You can also use the microwave—just cover the bowl with a damp paper towel and heat in 1-minute intervals, stirring in between. The rice will be a little softer the next day, but it’s still delicious.
Freezer tips: This dish freezes surprisingly well. Let it cool completely, then portion it into freezer-safe containers or zip-top bags. Freeze for up to 3 months. Thaw overnight in the refrigerator and reheat as directed above. I often make a double batch and freeze half for busy weeks.
Nutritional Information & Benefits
I love that this dish feels indulgent but is actually pretty balanced. Here’s the estimated nutritional breakdown per serving (based on 6 servings):
- Calories: ~385
- Protein: 28g
- Fat: 14g
- Carbohydrates: 34g
- Fiber: 2g
- Sugar: 4g
- Sodium: 680mg
The lean ground beef provides a solid dose of protein and iron, which is great for energy and muscle health. The tomatoes are rich in lycopene, a powerful antioxidant. And the cheese adds calcium for strong bones. By using lean beef and part-skim cheeses, we’re getting all the flavor with less saturated fat. It’s a meal that feels good to eat and leaves you feeling satisfied, not sluggish.
If you’re watching your sodium, use no-salt-added tomatoes and low-sodium broth. You can also reduce the salt in the recipe to ¼ teaspoon and adjust at the table.
Frequently Asked Questions
Can I use brown rice instead of white rice?
Yes, but you’ll need to adjust the cooking time and liquid. Brown rice takes about 40-45 minutes to cook and needs about 2 ½ cups of liquid. Increase the broth to 2 ½ cups and simmer for 40-45 minutes, covered, before adding the cheese. The texture will be chewier, but it’s still delicious.
Can I make this in an Instant Pot or slow cooker?
I haven’t tested it in a slow cooker, but it works great in an Instant Pot. Use the sauté function to brown the beef and onion, then add the remaining ingredients (except the cheese). Pressure cook on high for 5 minutes with a natural release. Stir in the cheese at the end. For a slow cooker, I’d recommend cooking the rice separately and adding it at the end to avoid mushiness.
How do I prevent the rice from burning on the bottom?
Make sure your heat is on low during the simmering step, and use a heavy-bottomed skillet. If you’re using a thinner pan, you might need to stir once halfway through, but be quick about it so you don’t lose too much steam. Adding an extra ¼ cup of broth can also help.
Can I use a different type of rice?
Absolutely. Jasmine or basmati rice work beautifully. Avoid instant rice, as it will turn to mush. Arborio rice (risotto rice) would also work, but it will be much creamier and less fluffy. For a low-carb option, you can use cauliflower rice, but cook it separately and stir it in at the end.
What can I substitute for the cheese to make it dairy-free?
Use a high-quality dairy-free shredded cheese blend. I’ve had good results with brands like Violife or Miyoko’s. The melting won’t be as gooey, but the flavor will still be great. You can also skip the cheese entirely and add a tablespoon of nutritional yeast for a cheesy flavor without the dairy.
Conclusion
This Lightened-Up Cheesy Ground Beef and Rice Skillet is everything I want in a weeknight dinner—it’s quick, comforting, and made with simple ingredients that make me feel good. It’s the kind of meal that brings everyone to the table without any fuss, and the leftovers are just as wonderful the next day. I love how customizable it is, too. Whether you load it up with veggies, swap in a different protein, or spice it up, it always turns out delicious.
I really hope you give this recipe a try. It’s become a staple in my home, and I think it will in yours too. If you make it, I’d love to hear how it turned out! Drop a comment below and let me know if you added any fun twists. And hey, if you loved it, share it with a friend who needs a new easy dinner idea. Happy cooking, friends!
Pin This Recipe!

Lightened-Up Cheesy Ground Beef and Rice Skillet

A quick and easy one-pan dinner featuring lean ground beef, fluffy rice, and a gooey cheese topping. This lightened-up version of a classic comfort food is ready in about 35 minutes and uses simple, wholesome ingredients.
- Prep Time: 10 minutes
- Cook Time: 25 minutes
- Total Time: 35 minutes
- Yield: 6 servings 1x
- Category: Main Course
- Cuisine: American
Ingredients
- 1 lb lean ground beef (93/7)
- 1 medium yellow onion, diced (about 1 cup)
- 2 cloves garlic, minced
- 1 cup long-grain white rice, uncooked
- 1 can (14.5 oz) diced tomatoes, undrained
- 2 cups low-sodium beef broth
- 1 teaspoon smoked paprika
- ½ teaspoon dried oregano
- ½ teaspoon salt (or to taste)
- ¼ teaspoon black pepper
- 1 cup shredded sharp cheddar cheese
- ½ cup shredded part-skim mozzarella
- 2 tablespoons grated Parmesan cheese (optional)
- Fresh parsley or chives, chopped (optional garnish)
- Red pepper flakes (optional garnish)
Instructions
- Brown the Beef: Place a large skillet over medium-high heat. Add the lean ground beef and break it apart with a wooden spoon. Cook, stirring occasionally, until browned and no longer pink (about 5 minutes). Drain excess fat, leaving about 1 tablespoon in the pan.
- Sauté the Aromatics: Reduce heat to medium. Add the diced onion to the skillet and cook for 2 minutes, stirring frequently, until softened. Add the minced garlic and cook for another 30 seconds until fragrant.
- Toast the Rice: Sprinkle the uncooked rice over the beef and onion mixture. Stir for 1-2 minutes until the rice is slightly opaque at the edges.
- Add Liquids and Seasonings: Pour in the undrained diced tomatoes and beef broth. Add smoked paprika, dried oregano, salt, and black pepper. Stir well, scraping up any browned bits from the bottom of the pan.
- Simmer the Rice: Increase heat to high and bring to a rolling boil. Reduce heat to low, cover the skillet, and let simmer for 18-20 minutes. Do not lift the lid during this time. Check rice for tenderness; if still firm, cook for another 2-3 minutes covered.
- Add the Cheese: Once rice is tender, remove the lid. Sprinkle shredded cheddar, mozzarella, and optional Parmesan evenly over the top. Cover the skillet and let sit off the heat for 2-3 minutes until cheese is melted and bubbly.
- Rest and Serve: Let the skillet rest uncovered for 2-3 minutes. Garnish with fresh parsley or chives and red pepper flakes if desired. Serve hot.
Notes
Don’t skip toasting the rice—it prevents mushiness. Resist lifting the lid while rice simmers. Shred your own cheese for best melting. Use low-sodium broth to control salt. For brown rice, increase broth to 2.5 cups and simmer 40-45 minutes. For Instant Pot, sauté beef and onion, then pressure cook on high for 5 minutes with natural release.
Nutrition
- Serving Size: 1 serving (about 1.5
- Calories: 385
- Sugar: 4
- Sodium: 680
- Fat: 14
- Saturated Fat: 6
- Carbohydrates: 34
- Fiber: 2
- Protein: 28
Keywords: cheesy ground beef and rice skillet, one-pan dinner, easy weeknight meal, lightened-up comfort food, ground beef recipe


