This was supposed to be a batch of brown butter shortbread. I had the fancy European butter out, the flaky sea salt ready, and a very specific vision of delicate, crumbly cookies that would impress my book club. But I was already running late from a work call, the butter was starting to brown a little too fast, and honestly, I just grabbed the wrong bag of flour off the shelf. It was self-rising, not all-purpose. I realized my mistake about five seconds after the dough came together in a sticky, almost batter-like mess. I stood there, spatula in hand, staring at a bowl of something that was definitely not shortbread. I almost scraped the whole thing into the trash. But I had people coming over in an hour, and I didn’t have time to start over. So I just threw in some chocolate chips, scooped out little mounds onto a baking sheet, and hoped for the best. What came out of the oven was nothing like the plan—and so much better. They were chewy in the center, crispy at the edges, and had this almost caramelized flavor from the slightly over-browned butter. My book club devoured them in about ten minutes, and someone asked for the recipe before I even admitted it was a total accident. Maybe you’ve been there—staring at a kitchen fail that turned into a win. These cookies are that happy little surprise, and I keep making them on purpose now.
Why You’ll Love This Recipe
I have tested this small batch recipe at least a dozen times since that accidental night. It is now my go-to for any gathering where I want to look like I planned something spectacular, even when I didn’t. These cookies have a few things going for them that make them stand out from every other chocolate chip cookie recipe you have seen.
- Perfect for Parties: This recipe makes exactly 12 cookies. No more, no less. You don’t end up with dozens of extras that go stale, and you don’t have to double a recipe and risk messing up the ratios. It is built for a crowd of 6 to 8 people, which is ideal for a dinner party or a casual get-together.
- Simple Ingredients: You likely have everything in your pantry right now. No need to hunt down specialty flours or unusual extracts. This is about making something incredible with what you already own.
- Quick and Easy: From start to finish, these cookies take about 20 minutes of active prep and 12 minutes of baking. You can have them ready before your guests finish their first drink.
- Crowd-Pleaser: I have served these at brunches, potlucks, and even a formal dinner party. They get the same reaction every time: a moment of silence after the first bite, followed by a chorus of compliments. They are universally loved.
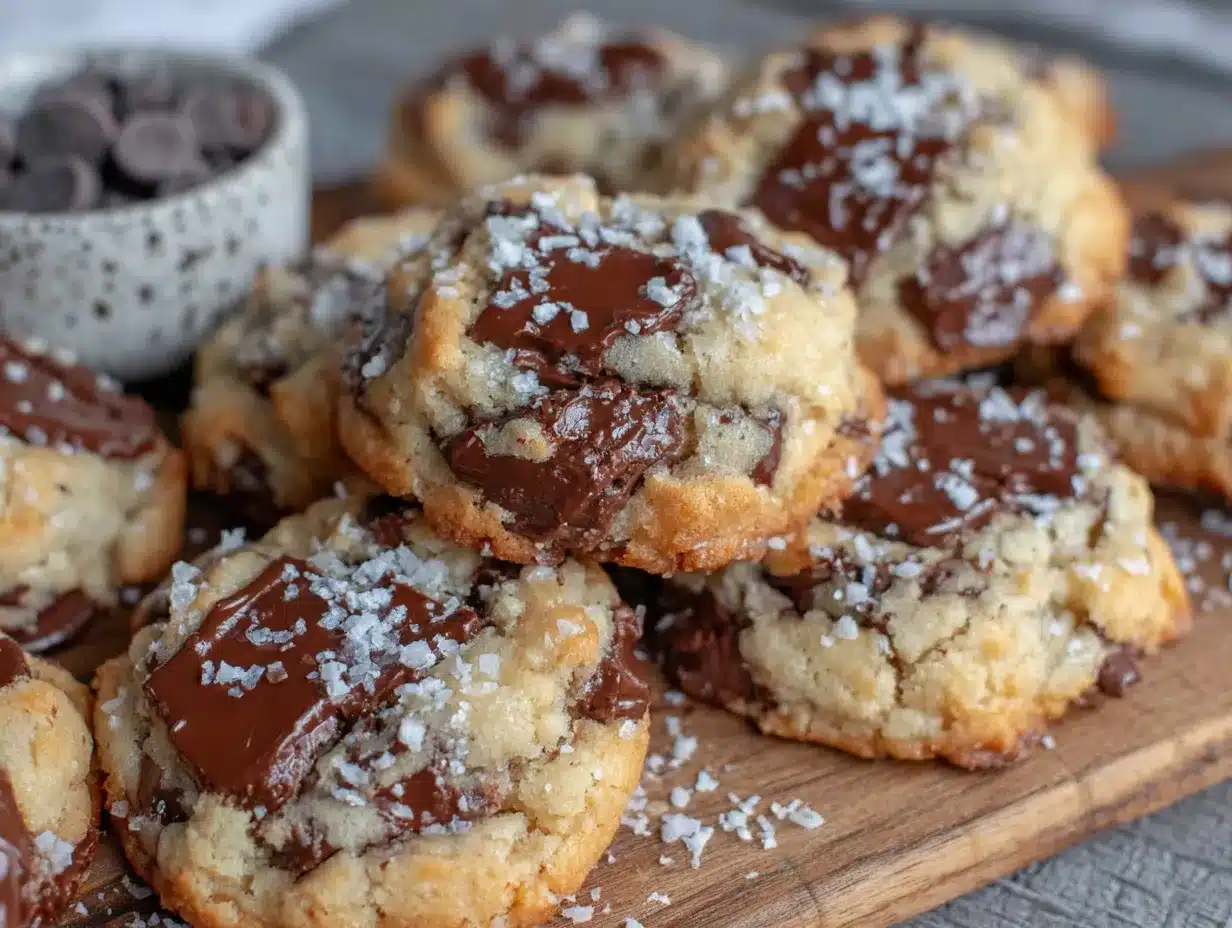
- Unbelievably Delicious: The texture is the star here. The edges are perfectly crisp and golden, while the centers stay soft, chewy, and almost gooey. The chocolate chips melt into pools of richness, and the touch of flaky salt on top balances everything beautifully.
This recipe isn’t just good—it is the kind that makes you close your eyes after the first bite. It is comfort food reimagined for the host who wants to impress without spending hours in the kitchen. Perfect for making your guests feel special without the stress.
What Ingredients You Will Need
This recipe uses simple, wholesome ingredients to deliver bold flavor and satisfying texture without the fuss. Most of these are pantry staples, which makes this the perfect last-minute dessert for any party.
- Unsalted butter, 6 tablespoons (85 grams), softened to room temperature — I prefer using unsalted so I can control the salt level. Let it sit out for about 30 minutes before starting. (Softened butter creams better with sugar, creating a lighter texture.)
- Granulated sugar, 1/4 cup (50 grams) — This adds sweetness and helps create those crispy edges. Regular white sugar works best here.
- Light brown sugar, 1/4 cup (50 grams), packed — The molasses in brown sugar gives the cookies chewiness and a deeper, almost caramel-like flavor. Make sure you pack it firmly into the measuring cup.
- Large egg yolk, 1 — Using just the yolk instead of a whole egg reduces moisture, which prevents the cookies from spreading too much. Save the egg white for an omelet or scrambled eggs the next morning.
- Vanilla extract, 1 teaspoon — Pure vanilla extract makes a noticeable difference. I have used imitation in a pinch, but pure vanilla gives a richer, more aromatic flavor.
- All-purpose flour, 3/4 cup (95 grams) — Spoon and level the flour into your measuring cup. Scooping directly from the bag can pack it down and add too much flour, making the cookies dry.
- Baking soda, 1/2 teaspoon — This helps the cookies spread and become golden. Make sure it is fresh—test it by dropping a little into vinegar; it should fizz immediately.
- Salt, 1/4 teaspoon — Salt enhances all the flavors and balances the sweetness. I use fine sea salt for the dough and flaky salt for finishing.
- Semi-sweet chocolate chips, 1/2 cup (90 grams) — I recommend Ghirardelli or Guittard for the best melt and flavor. You can also chop up a good quality chocolate bar for more varied chocolate pools.
- Flaky sea salt, for finishing — This is optional but highly recommended. A tiny sprinkle on top right after baking adds a wonderful salty crunch that contrasts with the sweet cookie.
If you are out of brown sugar, you can make a quick substitute by mixing 1/4 cup of granulated sugar with 1 tablespoon of molasses. It works in a pinch, though the flavor won’t be quite as rich.
Equipment Needed
You do not need any fancy gadgets for this recipe. I have made these cookies in a tiny apartment kitchen with minimal tools, and they came out perfect every time.
- Mixing bowls — One medium bowl for the dry ingredients and one large bowl for the wet ingredients. Glass or stainless steel works well.
- Electric hand mixer or stand mixer — A hand mixer is perfectly fine for this small batch. If you are feeling strong, you can cream the butter and sugar by hand with a wooden spoon, but it will take a few extra minutes of elbow grease.
- Rubber spatula — For scraping down the sides of the bowl and folding in the chocolate chips. I like a sturdy one that won’t bend.
- Baking sheet — A standard half-sheet pan works great. Line it with parchment paper for easy cleanup and even browning. Silicone baking mats also work well.
- Cookie scoop or tablespoon — A 1.5-tablespoon cookie scoop ensures uniform cookies that bake evenly. If you don’t have one, use a regular tablespoon and level it off.
- Cooling rack — Letting the cookies cool on a rack prevents the bottoms from getting soggy. If you don’t have one, carefully transfer the cookies to a plate after a few minutes.
- Parchment paper — This is non-negotiable for me. It prevents sticking and makes cleanup a breeze. Plus, it helps the cookies brown evenly.
Preparation Method
Follow these steps carefully, and you will have perfect cookies every time. I have included time estimates and sensory cues so you know exactly what to look for at each stage.
- Preheat your oven to 375°F (190°C). Line a baking sheet with parchment paper. Preheating is important—if the oven is too cool, the cookies will spread too much before they set. Give it a full 15 minutes to reach temperature.
- In a medium bowl, whisk together the flour, baking soda, and salt. Set this aside. Whisking aerates the flour and ensures the leavening agents are evenly distributed. You should not see any streaks of baking soda.
- In a large bowl, beat the softened butter, granulated sugar, and brown sugar together until light and fluffy. This should take about 2 to 3 minutes with an electric mixer on medium speed. The mixture should look pale in color and have a slightly grainy texture. Scrape down the sides of the bowl with a spatula halfway through.
- Add the egg yolk and vanilla extract to the butter mixture. Beat on low speed until just combined, about 30 seconds. Do not overmix here, or the cookies can become tough. The mixture might look a little curdled at this point—that is normal.
- Gradually add the dry ingredients to the wet ingredients. Mix on low speed until just a few streaks of flour remain. This should take about 20 seconds. Overmixing develops gluten, which makes cookies dense and cakey instead of chewy.
- Fold in the chocolate chips using a rubber spatula. Gently stir until they are evenly distributed throughout the dough. The dough will be thick and slightly sticky. If it feels too soft to scoop, pop it in the fridge for 10 minutes.
- Scoop the dough into 12 equal portions. Using a 1.5-tablespoon cookie scoop, place the dough balls about 2 inches apart on the prepared baking sheet. They will spread, so give them room. I usually fit 6 cookies per sheet and bake in two batches.
- Bake for 10 to 12 minutes, or until the edges are golden brown and the centers are still slightly soft. The centers will look puffy and a little underdone—that is exactly what you want. They will continue to set on the hot baking sheet after you take them out. For a gooier cookie, bake for 10 minutes. For a crisper cookie, go for 12 minutes.
- Remove the baking sheet from the oven and immediately sprinkle the cookies with flaky sea salt. Let them cool on the baking sheet for 5 minutes. This allows them to firm up without becoming hard.
- Transfer the cookies to a cooling rack to cool completely. If you can resist eating them warm, that is. Warm cookies are amazing, but they are even better after they have cooled for about 15 minutes—the flavors meld together beautifully.
Cooking Tips & Techniques
I have made plenty of mistakes with small batch cookies so you don’t have to. Here are the lessons I learned the hard way.
Room temperature butter matters. I once tried to speed things up by microwaving cold butter. It partially melted, and the cookies spread into flat, greasy discs. Softened butter should yield slightly when you press it with your finger, but it should still hold its shape. If it is too soft, the cookies will spread too much. If it is too cold, they won’t spread enough.
Chill the dough if you have time. This is not strictly necessary for this recipe, but if you can chill the scooped dough balls for 30 minutes before baking, the cookies will be thicker and chewier. The cold butter takes longer to melt in the oven, which means less spreading. I do this when I am making them ahead for a party.
Do not overbake. This is the most common mistake I see. Cookies continue to bake on the hot sheet after you pull them out of the oven. If they look perfectly done in the oven, they will be overdone by the time they cool. Take them out when the edges are set and golden, but the centers still look soft and slightly underdone. Trust me on this.
Use a cookie scoop for uniform sizes. When I first started making cookies, I used two spoons to drop the dough, and every cookie was a different size. Some burned, some were underdone. A cookie scoop ensures even baking and a professional look. It is worth the five-dollar investment.
Bake one sheet at a time. If you try to bake both batches at once, the heat distribution in your oven will be uneven, and the cookies on the lower rack might burn on the bottom. It takes a little longer, but the results are worth it.
Variations & Adaptations
One of the best things about this small batch recipe is how easily it adapts to different tastes and dietary needs. I have tried several variations myself, and they all turned out great.
Gluten-Free Version: Substitute the all-purpose flour with a 1:1 gluten-free baking flour blend that contains xanthan gum. I have used Bob’s Red Mill 1-to-1 Baking Flour with excellent results. The texture will be slightly more delicate, but the flavor is still amazing. Do not use almond flour or coconut flour alone—they change the structure too much.
Double Chocolate Chip: Replace 2 tablespoons of the all-purpose flour with 2 tablespoons of unsweetened cocoa powder. Add an extra tablespoon of butter to compensate for the dryness. The result is a rich, fudgy chocolate cookie that pairs beautifully with the chocolate chips. My neighbor Sarah requests these for every potluck.
Nutty Crunch: Fold in 1/4 cup of toasted chopped walnuts or pecans along with the chocolate chips. Toast the nuts in a dry skillet over medium heat for about 3 minutes, stirring constantly, until they smell fragrant. This adds a wonderful crunch and a warm, toasty flavor that complements the sweet dough.
Dietary Adaptation for Dairy-Free: Use a high-quality vegan butter stick, such as Miyoko’s or Earth Balance. Make sure it is softened to room temperature. The cookies will spread a little more, but they will still be delicious. Use dairy-free chocolate chips as well.
Flavor Twist with Espresso: Add 1/2 teaspoon of instant espresso powder to the dry ingredients. It does not make the cookies taste like coffee—it simply enhances the chocolate flavor and adds a subtle depth. I tried this on a whim one afternoon, and it has become my secret weapon for impressing guests.
Serving & Storage Suggestions
These cookies are incredibly versatile when it comes to serving. Here is how I present them for parties and store any leftovers.
Serving Temperature: These cookies are fantastic at room temperature, but they are absolutely divine warm. If you are serving them at a party, bake them just before guests arrive so they are still slightly warm. Arrange them on a wooden board or a pretty cake stand for a rustic, inviting look. A small bowl of flaky sea salt on the side lets guests add a little extra if they want.
What to Serve Alongside: A cold glass of milk is the classic pairing, but these cookies also go beautifully with a scoop of vanilla bean ice cream or a dollop of lightly sweetened whipped cream. For a more grown-up pairing, try them with a cup of strong black coffee or a glass of bourbon. The salty-sweet combination is incredible with a smoky cocktail.
Storage Instructions: Store any leftover cookies in an airtight container at room temperature for up to 5 days. Place a slice of bread in the container with the cookies—the bread absorbs excess moisture and keeps the cookies soft. Replace the bread slice every other day. Do not store them in the refrigerator, as the cold air dries them out.
Freezing Instructions: You can freeze the baked cookies for up to 3 months. Let them cool completely, then place them in a single layer in a freezer-safe bag or container. Thaw at room temperature for about 30 minutes before serving. You can also freeze the unbaked dough balls. Scoop them onto a parchment-lined baking sheet, freeze until solid, then transfer to a freezer bag. Bake directly from frozen, adding 2 to 3 minutes to the baking time.
How Flavors Develop: These cookies actually taste better the day after baking. The flavors meld together, and the texture becomes perfectly balanced. If you can resist eating them all right away, save a few for the next day. You will be pleasantly surprised.
Nutritional Information & Benefits
While I do not consider these cookies a health food, knowing what is in them helps with mindful indulgence. Here is the estimated nutritional breakdown per cookie (based on 12 cookies).
| Nutrient | Amount Per Cookie |
|---|---|
| Calories | 185 |
| Total Fat | 11g |
| Saturated Fat | 7g |
| Cholesterol | 35mg |
| Sodium | 125mg |
| Total Carbohydrates | 22g |
| Dietary Fiber | 1g |
| Sugars | 14g |
| Protein | 2g |
The butter provides a small amount of vitamin A, and the chocolate chips contain antioxidants from cocoa. If you use dark chocolate chips with at least 70% cocoa content, you get a little more fiber and less sugar. The flaky sea salt adds trace minerals like magnesium and potassium. This recipe is not suitable for vegans or those with dairy or egg allergies, but the gluten-free and dairy-free variations above work well.
I believe in balance—enjoying treats like these cookies as part of a varied diet. They are made for celebrations and gatherings, not everyday consumption. A little indulgence now and then is good for the soul.
Conclusion
These perfect small batch chocolate chip cookies have become my signature party dessert, and they started as a complete accident. That is the funny thing about cooking—sometimes the best recipes come from the biggest mistakes. I love that this recipe proves you do not need a complicated technique or a long list of ingredients to create something truly memorable. It is simple, reliable, and always gets the reaction I am hoping for.
I encourage you to make this recipe your own. Try the espresso twist for a deeper flavor, or add toasted nuts for crunch. Serve them warm with ice cream, or pack them up as a hostess gift. However you choose to enjoy them, I hope they bring a little sweetness to your table and maybe even a story of your own kitchen accident that turned into a win.
If you make these cookies, I would love to hear about it. Drop a comment below and let me know how they turned out, or share your own variation. Do not forget to pin this recipe for later and share it with a friend who loves to host. Happy baking, and remember—sometimes the best things in life come from happy accidents.
Frequently Asked Questions
Can I make this recipe with whole wheat flour?
Yes, you can substitute up to half of the all-purpose flour with whole wheat flour. The cookies will be slightly denser and have a nuttier flavor. Using 100% whole wheat flour will make them too dry, so stick to a 50/50 blend for the best texture.
Why did my cookies spread too much?
This usually happens for one of three reasons: the butter was too soft or melted, the dough was not chilled before baking, or the baking sheet was too warm. Make sure your butter is softened but not greasy, and let your baking sheet cool completely between batches. Chilling the dough for 20 to 30 minutes helps, too.
Can I use margarine instead of butter?
I do not recommend it. Margarine has a higher water content than butter, which causes cookies to spread more and become greasy. Stick with unsalted butter for the best flavor and texture. If you need a dairy-free option, use a high-quality vegan butter stick instead.
How do I make the cookies extra chewy?
For extra chewy cookies, use an extra egg yolk instead of just one. The extra fat and lecithin from the yolk add moisture and chewiness. You can also substitute 1 tablespoon of the granulated sugar with 1 tablespoon of light corn syrup, which helps retain moisture during baking.
Can I double this recipe?
Absolutely. Double all the ingredients and follow the same instructions. If you are baking for a larger party, just make sure you do not overcrowd the baking sheet. Bake in batches if needed, and store any extras in an airtight container. The doubled recipe makes about 24 cookies.
Pin This Recipe!

Perfect Small Batch Chocolate Chip Cookies – Easy Party Favorite

These chewy, crispy chocolate chip cookies are a happy accident turned signature party dessert. Made with simple ingredients and ready in under 30 minutes, they’re perfect for any gathering.
- Prep Time: 20 minutes
- Cook Time: 12 minutes
- Total Time: 32 minutes
- Yield: 12 cookies 1x
- Category: Dessert
- Cuisine: American
Ingredients
- 6 tablespoons (85 grams) unsalted butter, softened to room temperature
- 1/4 cup (50 grams) granulated sugar
- 1/4 cup (50 grams) light brown sugar, packed
- 1 large egg yolk
- 1 teaspoon vanilla extract
- 3/4 cup (95 grams) all-purpose flour
- 1/2 teaspoon baking soda
- 1/4 teaspoon salt
- 1/2 cup (90 grams) semi-sweet chocolate chips
- Flaky sea salt, for finishing
Instructions
- Preheat your oven to 375°F (190°C). Line a baking sheet with parchment paper.
- In a medium bowl, whisk together the flour, baking soda, and salt. Set aside.
- In a large bowl, beat the softened butter, granulated sugar, and brown sugar together until light and fluffy, about 2 to 3 minutes with an electric mixer on medium speed.
- Add the egg yolk and vanilla extract to the butter mixture. Beat on low speed until just combined, about 30 seconds.
- Gradually add the dry ingredients to the wet ingredients. Mix on low speed until just a few streaks of flour remain, about 20 seconds.
- Fold in the chocolate chips using a rubber spatula until evenly distributed.
- Scoop the dough into 12 equal portions using a 1.5-tablespoon cookie scoop. Place dough balls about 2 inches apart on the prepared baking sheet.
- Bake for 10 to 12 minutes, or until the edges are golden brown and the centers are still slightly soft.
- Remove the baking sheet from the oven and immediately sprinkle the cookies with flaky sea salt. Let them cool on the baking sheet for 5 minutes.
- Transfer the cookies to a cooling rack to cool completely.
Notes
For thicker, chewier cookies, chill the scooped dough balls for 30 minutes before baking. Do not overbake; cookies continue to set on the hot baking sheet. Use a cookie scoop for uniform sizes. Bake one sheet at a time for even heat distribution.
Nutrition
- Serving Size: 1 cookie
- Calories: 185
- Sugar: 14
- Sodium: 125
- Fat: 11
- Saturated Fat: 7
- Carbohydrates: 22
- Fiber: 1
- Protein: 2
Keywords: small batch chocolate chip cookies, easy party cookies, chewy chocolate chip cookies, crispy edge cookies, homemade cookies


